13The Video Adjust menu
Setting the picture quality for disc playback
This setting determines how the picture will look when playing discs.
1Follow Choosing a preset above and select one of the user presets (Memory 1,
2or 3).
2Move the cursor down and select ‘Detailed Settings’.
Choosing a preset
HOME MENU
1![]() With a disc playing (or paused), press to display the Home Menu.
With a disc playing (or paused), press to display the Home Menu.
Memory1
Detailed Settings
3Select the picture quality setting you want to adjust.
| ENTER |
2 | Select ‘Video Adjust’. |
| ENTER |
3 | Select a setting. |
TV
Detailed Settings
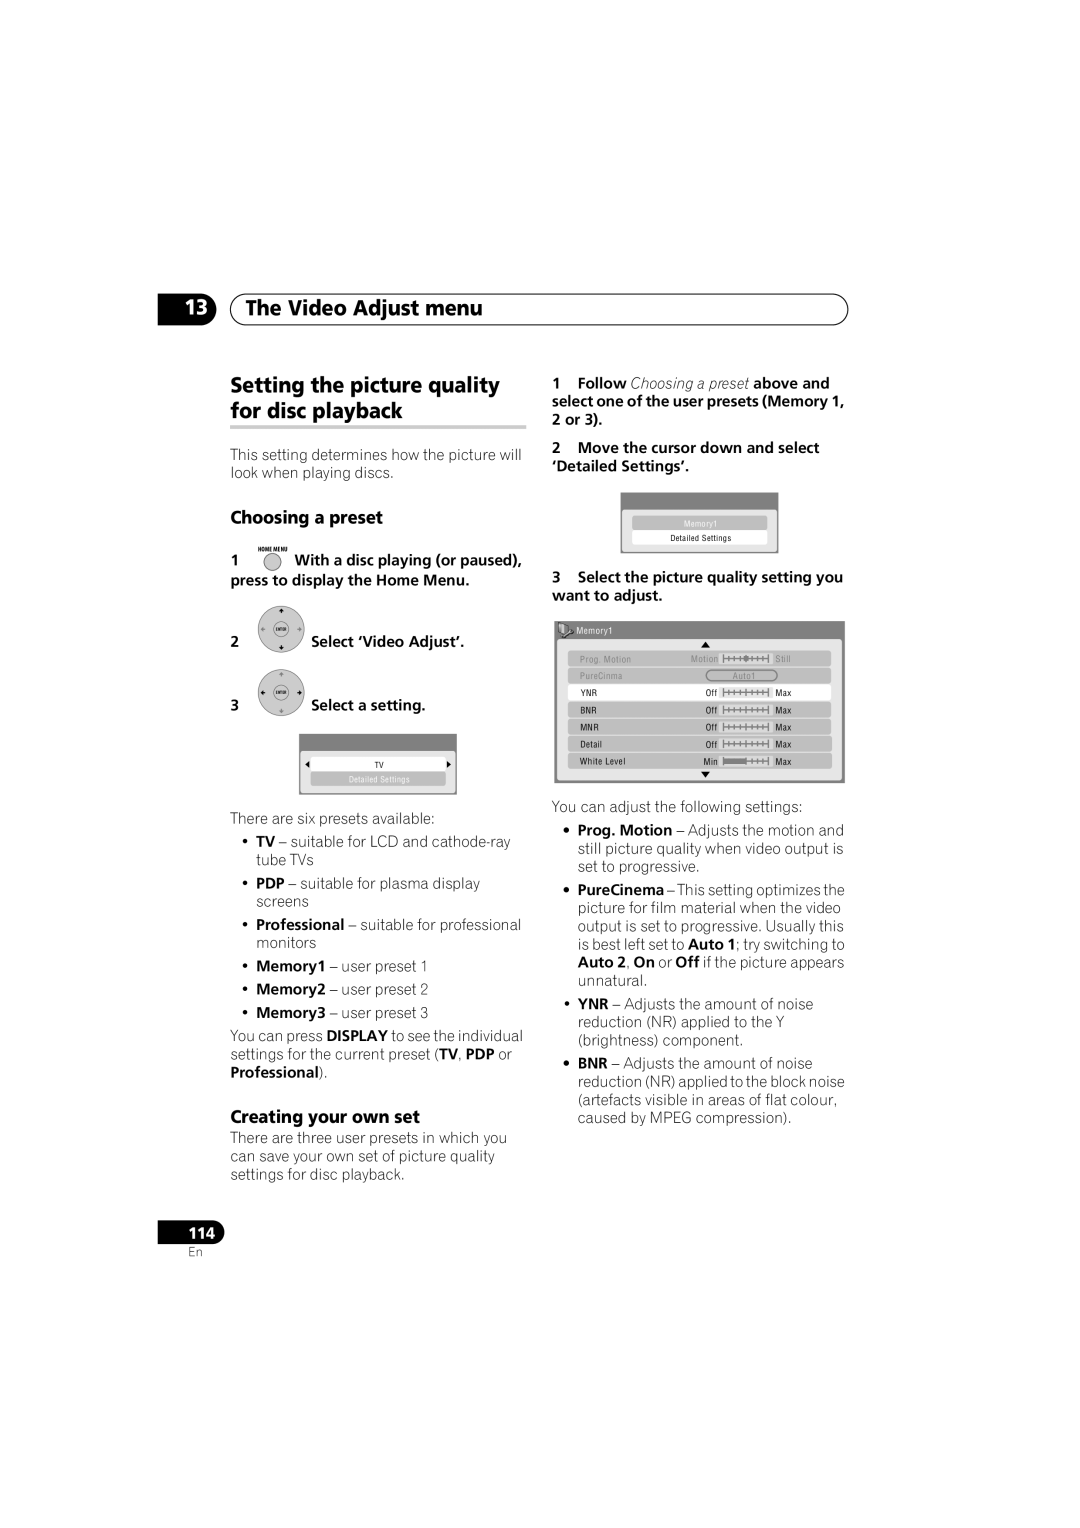
Memory1 |
|
Prog. Motion | Motion |
PureCinma |
|
YNR | Off |
BNR | Off |
MNR | Off |
Detail | Off |
White Level | Min |
Still
Auto1
Max
Max
Max
Max
Max
There are six presets available:
•TV – suitable for LCD and
•PDP – suitable for plasma display screens
•Professional – suitable for professional monitors
•Memory1 – user preset 1
•Memory2 – user preset 2
•Memory3 – user preset 3
You can press DISPLAY to see the individual settings for the current preset (TV, PDP or
Professional).
Creating your own set
There are three user presets in which you can save your own set of picture quality settings for disc playback.
114
You can adjust the following settings:
•Prog. Motion – Adjusts the motion and still picture quality when video output is set to progressive.
•PureCinema – This setting optimizes the picture for film material when the video output is set to progressive. Usually this is best left set to Auto 1; try switching to Auto 2, On or Off if the picture appears unnatural.
•YNR – Adjusts the amount of noise reduction (NR) applied to the Y (brightness) component.
•BNR – Adjusts the amount of noise reduction (NR) applied to the block noise (artefacts visible in areas of flat colour, caused by MPEG compression).
En