Getting started | 04 |
Checking the downloaded data the following day
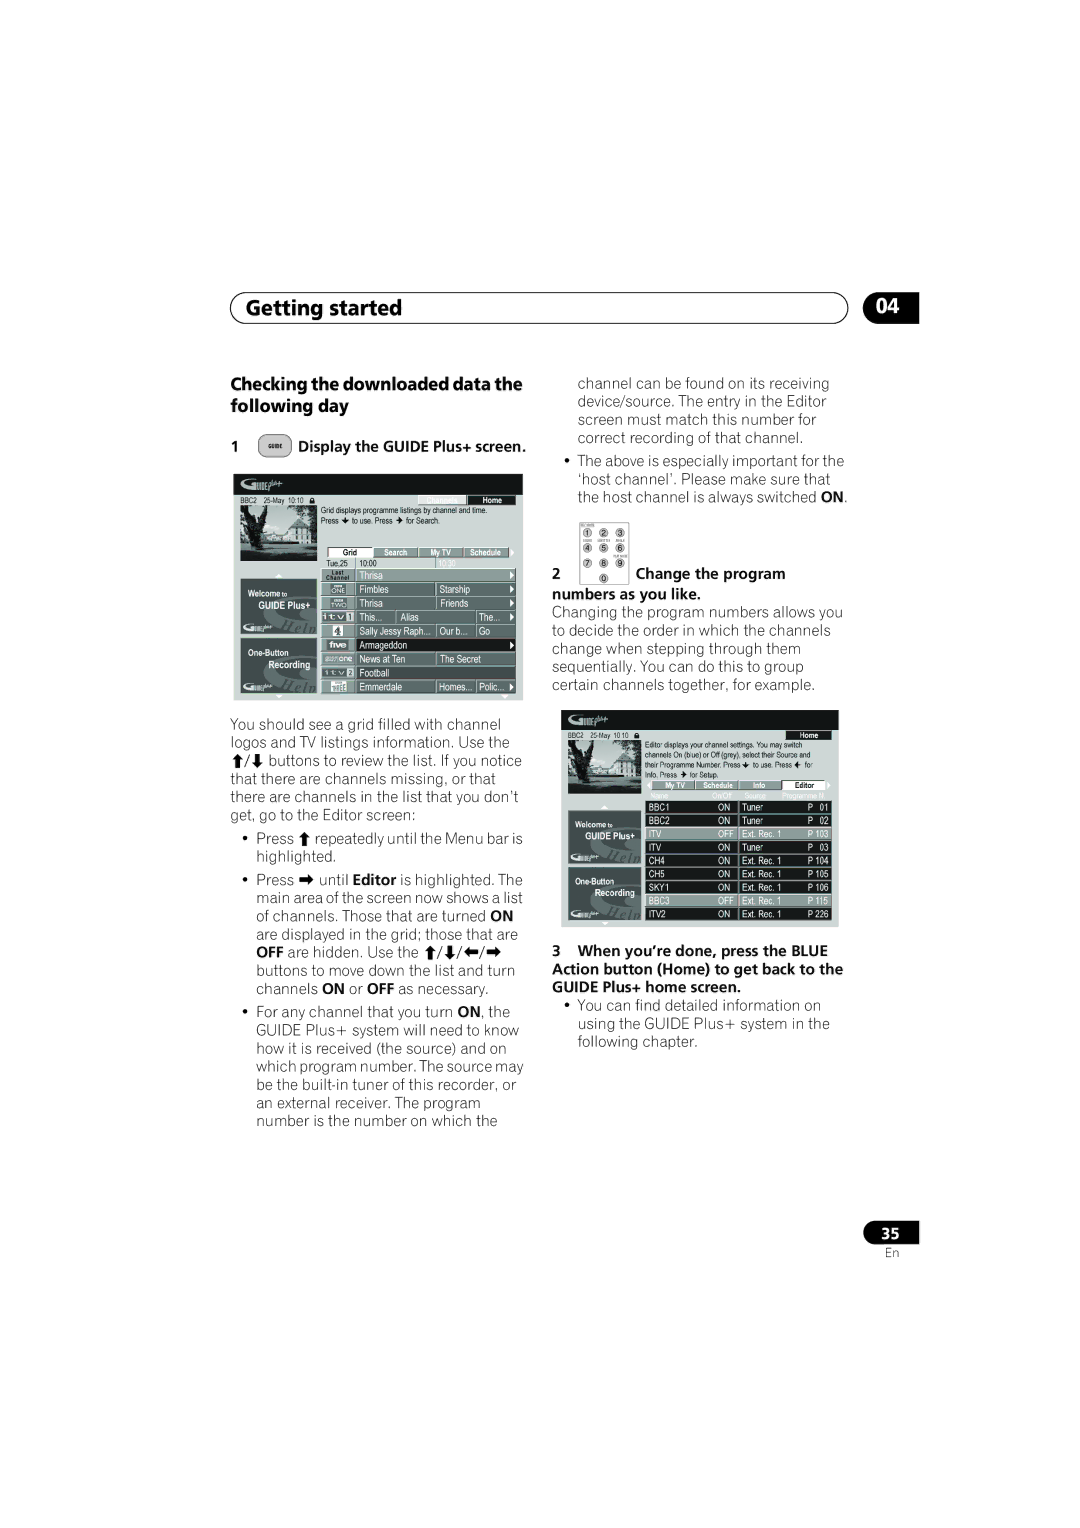
1 | GUIDE | Display the GUIDE Plus+ screen. |
You should see a grid filled with channel logos and TV listings information. Use the
buttons to review the list. If you notice that there are channels missing, or that there are channels in the list that you don’t get, go to the Editor screen:
• Press | repeatedly until the Menu bar is |
highlighted. | |
• Press | until Editor is highlighted. The |
main area of the screen now shows a list of channels. Those that are turned ON are displayed in the grid; those that are OFF are hidden. Use the
buttons to move down the list and turn channels ON or OFF as necessary.
•For any channel that you turn ON, the GUIDE Plus+ system will need to know how it is received (the source) and on which program number. The source may be the
channel can be found on its receiving device/source. The entry in the Editor screen must match this number for correct recording of that channel.
•The above is especially important for the ‘host channel’. Please make sure that the host channel is always switched ON.
REC MODE |
|
AUDIO | SUBTITLE ANGLE |
| PLAY MODE |
2 | Change the program |
numbers as you like.
Changing the program numbers allows you to decide the order in which the channels change when stepping through them sequentially. You can do this to group certain channels together, for example.
3When you’re done, press the BLUE Action button (Home) to get back to the GUIDE Plus+ home screen.
•You can find detailed information on using the GUIDE Plus+ system in the following chapter.
35
En