Easy start
How to prepare the wrist receiver |
|
|
| |
1. Since the display is blank when the receiver leaves the |
|
|
| |
factory, you have to activate the wrist receiver by pressing |
|
|
| |
the OK button twice, after which the Time of day display |
|
|
| |
appears. This is a |
|
|
| |
on your receiver you can not turn it off anymore. |
|
|
| |
2. You may start measuring your heart rate right away |
|
|
| |
using the default settings. However, the following | 1 | max 50 cm / | ||
settings are ones that it would be useful to change as | ||||
| ||||
soon as possible: Time of day (see section Setting the |
| 1´8´´ |
| |
|
|
| ||
watch) and personal user settings (see section User |
|
|
| |
information settings). |
|
|
| |
3. Your heart rate monitor has various functions that you can |
|
|
| |
use according to your personal training needs. For more |
|
|
| |
information, see section Modes and their functions. You |
|
| 60° | |
can either manually enter the settings by pressing the |
|
| ||
|
|
| ||
receiver buttons or you can define your settings Polar |
|
|
| |
Precision Performance software, after which the data |
|
| 2 | |
should be transferred from your computer to the wrist |
|
| ||
|
|
| ||
receiver. |
|
| direction | |
4. Wear the wrist receiver as you would wear an ordinary |
|
| ||
|
|
| ||
watch. If you go biking, we recommend attaching the |
|
|
| |
wrist receiver to a Polar Bike Mount™. |
|
| Riding | |
A 8 |
| A 9 | ||
|
| |||
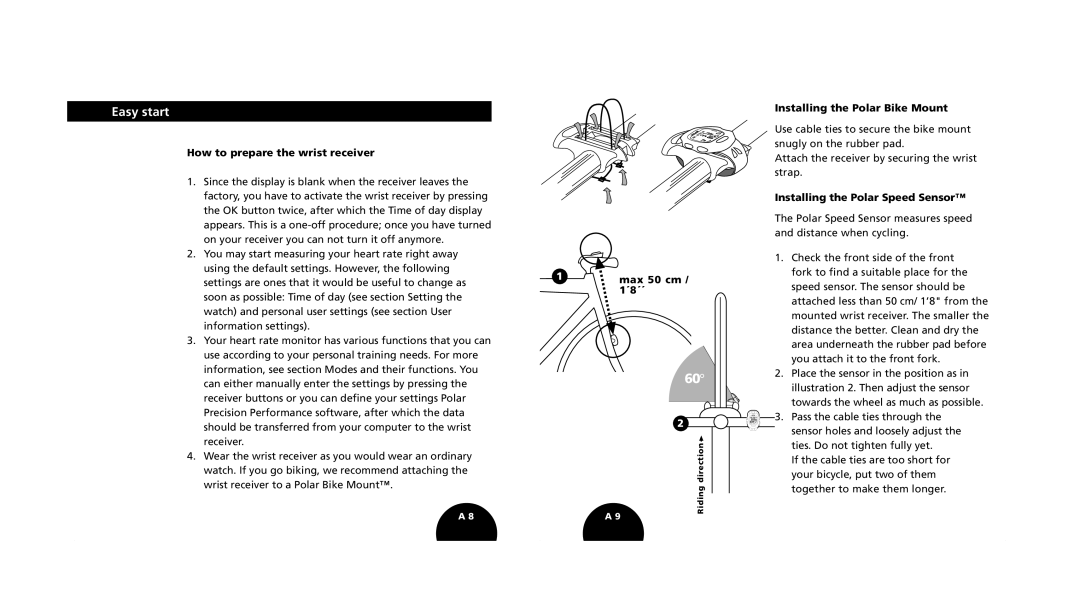
Installing the Polar Bike Mount
Use cable ties to secure the bike mount snugly on the rubber pad.
Attach the receiver by securing the wrist strap.
Installing the Polar Speed Sensor™
The Polar Speed Sensor measures speed and distance when cycling.
1.Check the front side of the front fork to find a suitable place for the speed sensor. The sensor should be attached less than 50 cm/ 1’8" from the mounted wrist receiver. The smaller the distance the better. Clean and dry the area underneath the rubber pad before you attach it to the front fork.
2.Place the sensor in the position as in illustration 2. Then adjust the sensor towards the wheel as much as possible.
3.Pass the cable ties through the sensor holes and loosely adjust the ties. Do not tighten fully yet.
If the cable ties are too short for your bicycle, put two of them together to make them longer.