basic setup
After installation is complete, you may want to set the machine’s default settings. Refer to the next section if you would like to set or change values. This chapter gives you
This chapter includes:
•Altitude adjustment
•Setting the date and time
•Changing the clock mode
•Changing the display language
Altitude adjustment
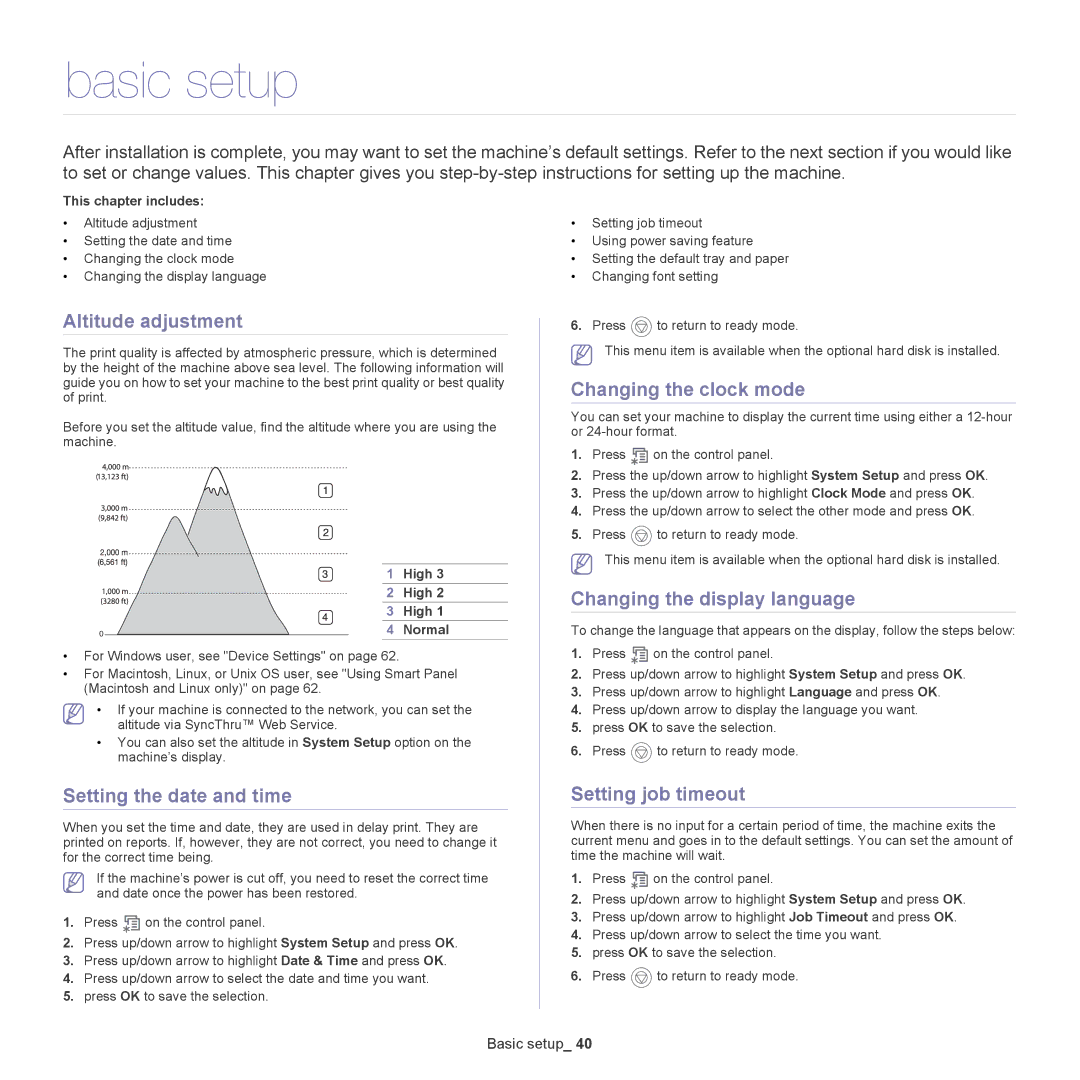
The print quality is affected by atmospheric pressure, which is determined by the height of the machine above sea level. The following information will guide you on how to set your machine to the best print quality or best quality of print.
Before you set the altitude value, find the altitude where you are using the machine.
| 1 | High 3 |
| 2 | High 2 |
| 3 | High 1 |
0 | 4 | Normal |
•For Windows user, see "Device Settings" on page 62.
•For Macintosh, Linux, or Unix OS user, see "Using Smart Panel (Macintosh and Linux only)" on page 62.
•If your machine is connected to the network, you can set the altitude via SyncThru™ Web Service.
•You can also set the altitude in System Setup option on the machine’s display.
Setting the date and time
When you set the time and date, they are used in delay print. They are printed on reports. If, however, they are not correct, you need to change it for the correct time being.
If the machine’s power is cut off, you need to reset the correct time and date once the power has been restored.
1.Press ![]() on the control panel.
on the control panel.
2.Press up/down arrow to highlight System Setup and press OK.
3.Press up/down arrow to highlight Date & Time and press OK.
4.Press up/down arrow to select the date and time you want.
5.press OK to save the selection.
•Setting job timeout
•Using power saving feature
•Setting the default tray and paper
•Changing font setting
6.Press ![]() to return to ready mode.
to return to ready mode.
This menu item is available when the optional hard disk is installed.
Changing the clock mode
You can set your machine to display the current time using either a
1.Press ![]() on the control panel.
on the control panel.
2.Press the up/down arrow to highlight System Setup and press OK.
3.Press the up/down arrow to highlight Clock Mode and press OK.
4.Press the up/down arrow to select the other mode and press OK.
5.Press ![]() to return to ready mode.
to return to ready mode.
This menu item is available when the optional hard disk is installed.
Changing the display language
To change the language that appears on the display, follow the steps below:
1.Press ![]() on the control panel.
on the control panel.
2.Press up/down arrow to highlight System Setup and press OK.
3.Press up/down arrow to highlight Language and press OK.
4.Press up/down arrow to display the language you want.
5.press OK to save the selection.
6.Press ![]() to return to ready mode.
to return to ready mode.
Setting job timeout
When there is no input for a certain period of time, the machine exits the current menu and goes in to the default settings. You can set the amount of time the machine will wait.
1.Press ![]() on the control panel.
on the control panel.
2.Press up/down arrow to highlight System Setup and press OK.
3.Press up/down arrow to highlight Job Timeout and press OK.
4.Press up/down arrow to select the time you want.
5.press OK to save the selection.
6.Press ![]() to return to ready mode.
to return to ready mode.
Basic setup_ 40