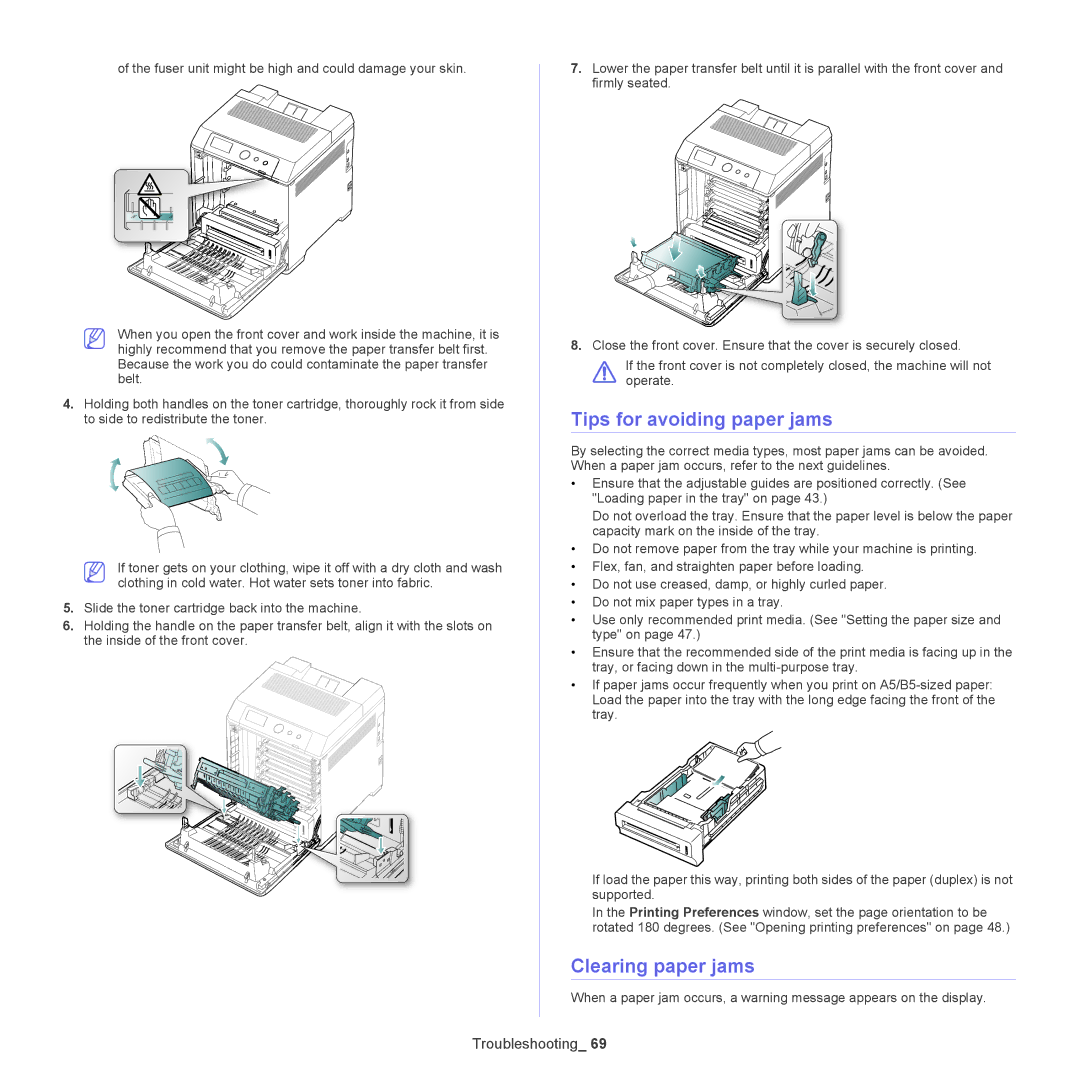
of the fuser unit might be high and could damage your skin.
When you open the front cover and work inside the machine, it is highly recommend that you remove the paper transfer belt first. Because the work you do could contaminate the paper transfer belt.
4.Holding both handles on the toner cartridge, thoroughly rock it from side to side to redistribute the toner.
If toner gets on your clothing, wipe it off with a dry cloth and wash clothing in cold water. Hot water sets toner into fabric.
5.Slide the toner cartridge back into the machine.
6.Holding the handle on the paper transfer belt, align it with the slots on the inside of the front cover.
7.Lower the paper transfer belt until it is parallel with the front cover and firmly seated.
8.Close the front cover. Ensure that the cover is securely closed.
If the front cover is not completely closed, the machine will not operate.
Tips for avoiding paper jams
By selecting the correct media types, most paper jams can be avoided. When a paper jam occurs, refer to the next guidelines.
•Ensure that the adjustable guides are positioned correctly. (See "Loading paper in the tray" on page 43.)
Do not overload the tray. Ensure that the paper level is below the paper capacity mark on the inside of the tray.
•Do not remove paper from the tray while your machine is printing.
•Flex, fan, and straighten paper before loading.
•Do not use creased, damp, or highly curled paper.
•Do not mix paper types in a tray.
•Use only recommended print media. (See "Setting the paper size and type" on page 47.)
•Ensure that the recommended side of the print media is facing up in the tray, or facing down in the
•If paper jams occur frequently when you print on
If load the paper this way, printing both sides of the paper (duplex) is not supported.
In the Printing Preferences window, set the page orientation to be rotated 180 degrees. (See "Opening printing preferences" on page 48.)
Clearing paper jams
When a paper jam occurs, a warning message appears on the display.
