Printing Using PictBridge
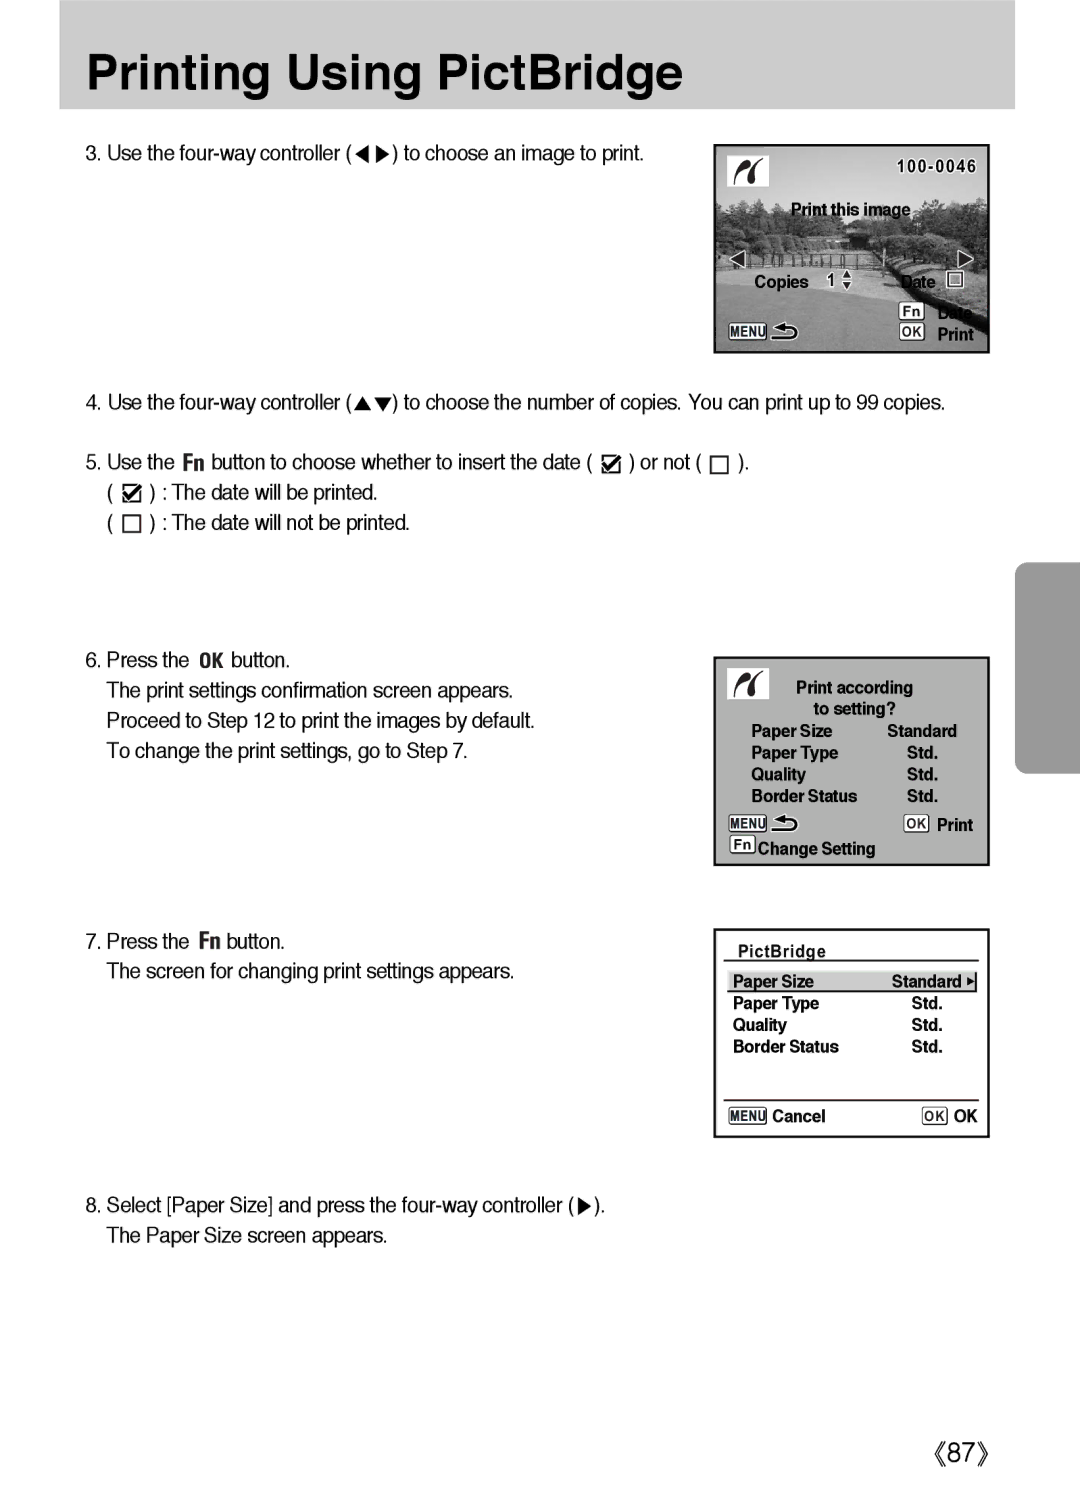
3. Use the | ) to choose an image to print. |
| ||
|
|
| ||
|
| Print this image |
| |
|
| Copies 1 | Date |
|
|
|
| Fn | Date |
|
|
| OK | |
|
|
| ||
4. Use the | ) to choose the number of copies. You can print up to 99 copies. | |||
5.Use the ![]()
![]() button to choose whether to insert the date (
button to choose whether to insert the date ( ![]() (
( ![]() ) : The date will be printed.
) : The date will be printed.
( ![]() ) : The date will not be printed.
) : The date will not be printed.
6.Press the 
 button.
The print settings confirmation screen appears. Proceed to Step 12 to print the images by default. To change the print settings, go to Step 7.
) or not (  ).
).
Print according
to setting?
Paper Size | Standard |
Paper Type | Std. |
Quality | Std. |
Border Status | Std. |
| OK Print |
Fn Change Setting |
|
7.Press the ![]()
![]() button.
button.
The screen for changing print settings appears.
8. Select [Paper Size] and press the
PictBridge
| Paper Size | Standard |
|
| Paper Type | Std. |
|
| Quality | Std. | |
| Border Status | Std. | |
|
|
|
|
| Cancel | OK OK | |
87