USER'S MANUAL
Chapter 5:
DVR Setup Menu
This monitor was set to password lock when you purchase a new set. Therefore, you must first enter 4digit password to activate the OSD. The default password for a new set is “4321”.
Pressing the FRONT PANEL MENU button allows users to enter the SETUP MENU and see the following OSD menu box. Setting method of each SETUP MENU function and operation is as follows.
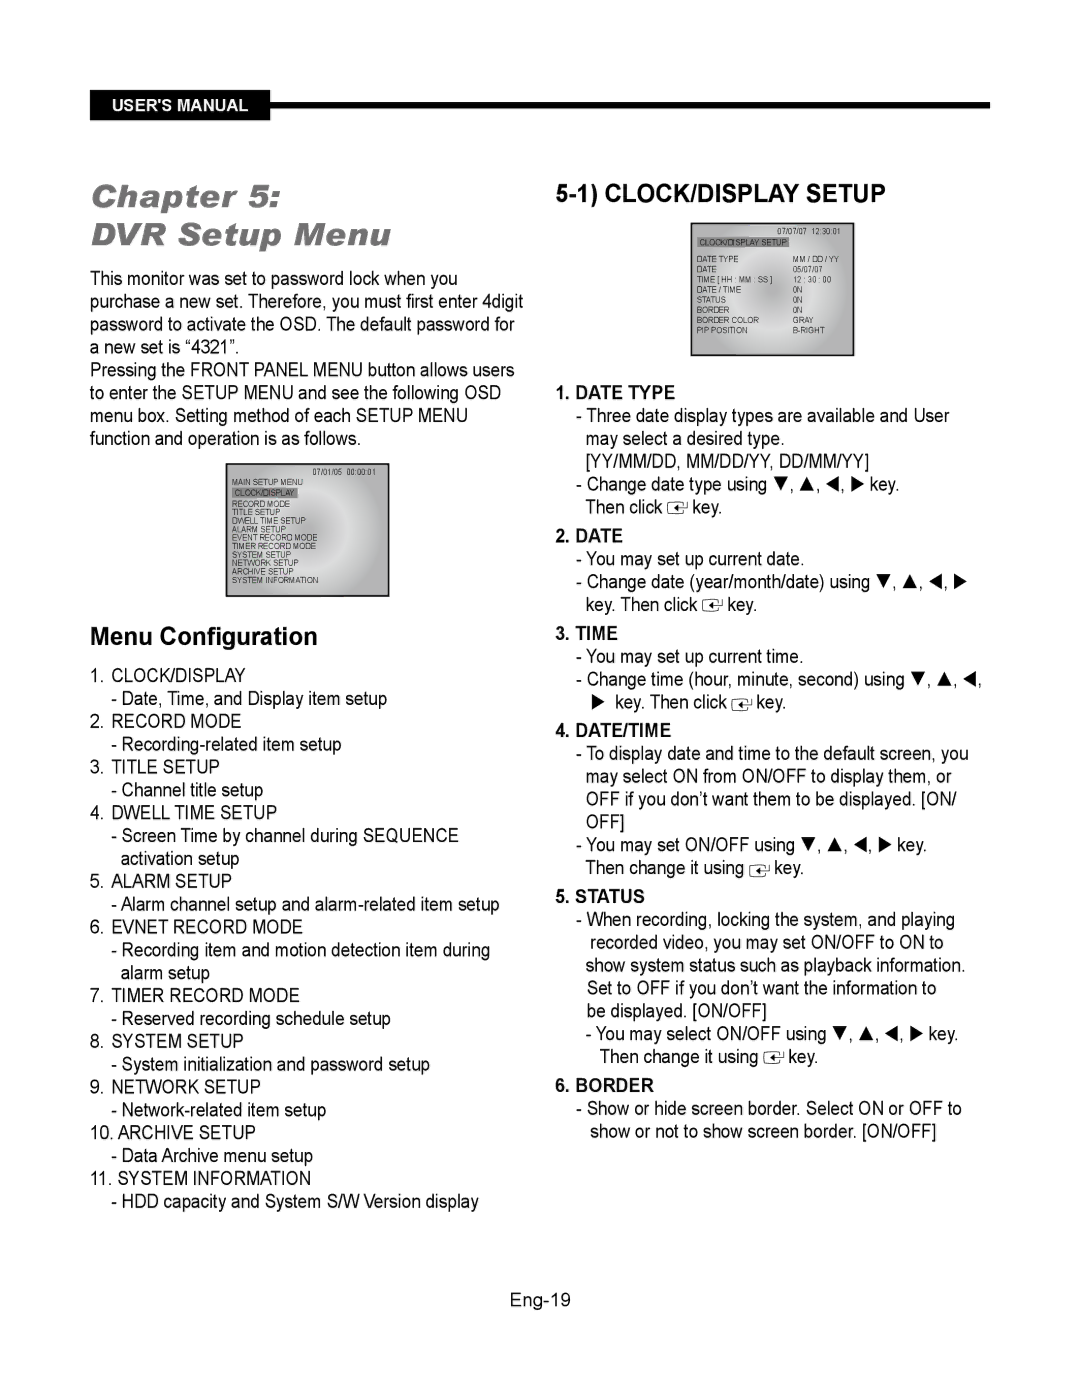
07/01/05 00:00:01
MAIN SETUP MENU
CLOCK/DISPLAY
RECORD MODE
TITLE SETUP
DWELL TIME SETUP
ALARM SETUP
EVENT RECORD MODE
TIMER RECORD MODE
SYSTEM SETUP
NETWORK SETUP
ARCHIVE SETUP
SYSTEM INFORMATION
Menu Configuration
1.CLOCK/DISPLAY
-Date, Time, and Display item setup
2.RECORD MODE
-
3.TITLE SETUP
-Channel title setup
4.DWELL TIME SETUP
-Screen Time by channel during SEQUENCE activation setup
5.ALARM SETUP
-Alarm channel setup and
6.EVNET RECORD MODE
-Recording item and motion detection item during alarm setup
7.TIMER RECORD MODE
-Reserved recording schedule setup
8.SYSTEM SETUP
-System initialization and password setup
9.NETWORK SETUP
-
10.ARCHIVE SETUP
-Data Archive menu setup
11.SYSTEM INFORMATION
-HDD capacity and System S/W Version display
5-1) CLOCK/DISPLAY SETUP
| 07/07/07 | 12:30:01 | |
CLOCK/DISPLAY SETUP |
|
| |
DATE TYPE |
| MM / DD / YY | |
DATE | 05/07/07 | ||
TIME [ HH : MM : SS ] | 12 : 30 : 00 | ||
DATE / TIME |
| 0N |
|
STATUS |
| 0N |
|
BORDER |
| 0N |
|
BORDER COLOR |
| GRAY | |
PIP POSITION |
| ||
|
|
|
|
1.DATE TYPE
-Three date display types are available and User may select a desired type.
[YY/MM/DD, MM/DD/YY, DD/MM/YY]
-Change date type using , , , key. Then click ![]()
![]() key.
key.
2.DATE
-You may set up current date.
-Change date (year/month/date) using , , , key. Then click ![]()
![]() key.
key.
3.TIME
-You may set up current time.
-Change time (hour, minute, second) using , , , key. Then click ![]()
![]() key.
key.
4.DATE/TIME
-To display date and time to the default screen, you may select ON from ON/OFF to display them, or OFF if you don’t want them to be displayed. [ON/ OFF]
-You may set ON/OFF using , , , key. Then change it using ![]()
![]() key.
key.
5.STATUS
-When recording, locking the system, and playing recorded video, you may set ON/OFF to ON to show system status such as playback information. Set to OFF if you don’t want the information to be displayed. [ON/OFF]
-You may select ON/OFF using , , , key. Then change it using ![]()
![]() key.
key.
6.BORDER
-Show or hide screen border. Select ON or OFF to show or not to show screen border. [ON/OFF]