LCD Built in 8CH DVR SMT-190Dx
Cleaning
Accessories
Read Instructions
Retain Instructions
Installation
Power Sources
Power
Damage Requiring Service
Contents
Monitor Setup Menu
Product specification
Search Menu
Remote Viewer Connection
Features
Modes of recorded image quality adjustment
Overview
Product Introduction
For proper operation of the system
System Components Installation
Requirements for installation and safety
System Components
System consists of the following
Camera Mount BracketSBR-110S & Standard CameraSOC-C120
Installing Standard CameraSOC-C120
Standard Camera composition SOC-C120
Before Installation
Night Vision Camera
Mode
Connect the camera cable to the camera
Standard Composition
Temperature -10˚C ~ 50˚C14˚F ~ 122˚F Humidity Below 90%
SOC-N120 Pin Configuration
External terminal connecting Method for Camera and Monitor
Alarm terminal connecting method
Camera
Eng-12
Eng-13
Eng-14
Identifying the parts and their features
Monitor Front
Eng-15
Rear
Eng-16
Remote Controller
Eng-17
Power On
Recognition of Input video signal
Basic Use
Basic screen
CLOCK/DISPLAY Setup
Chapter DVR Setup Menu
Menu Configuration
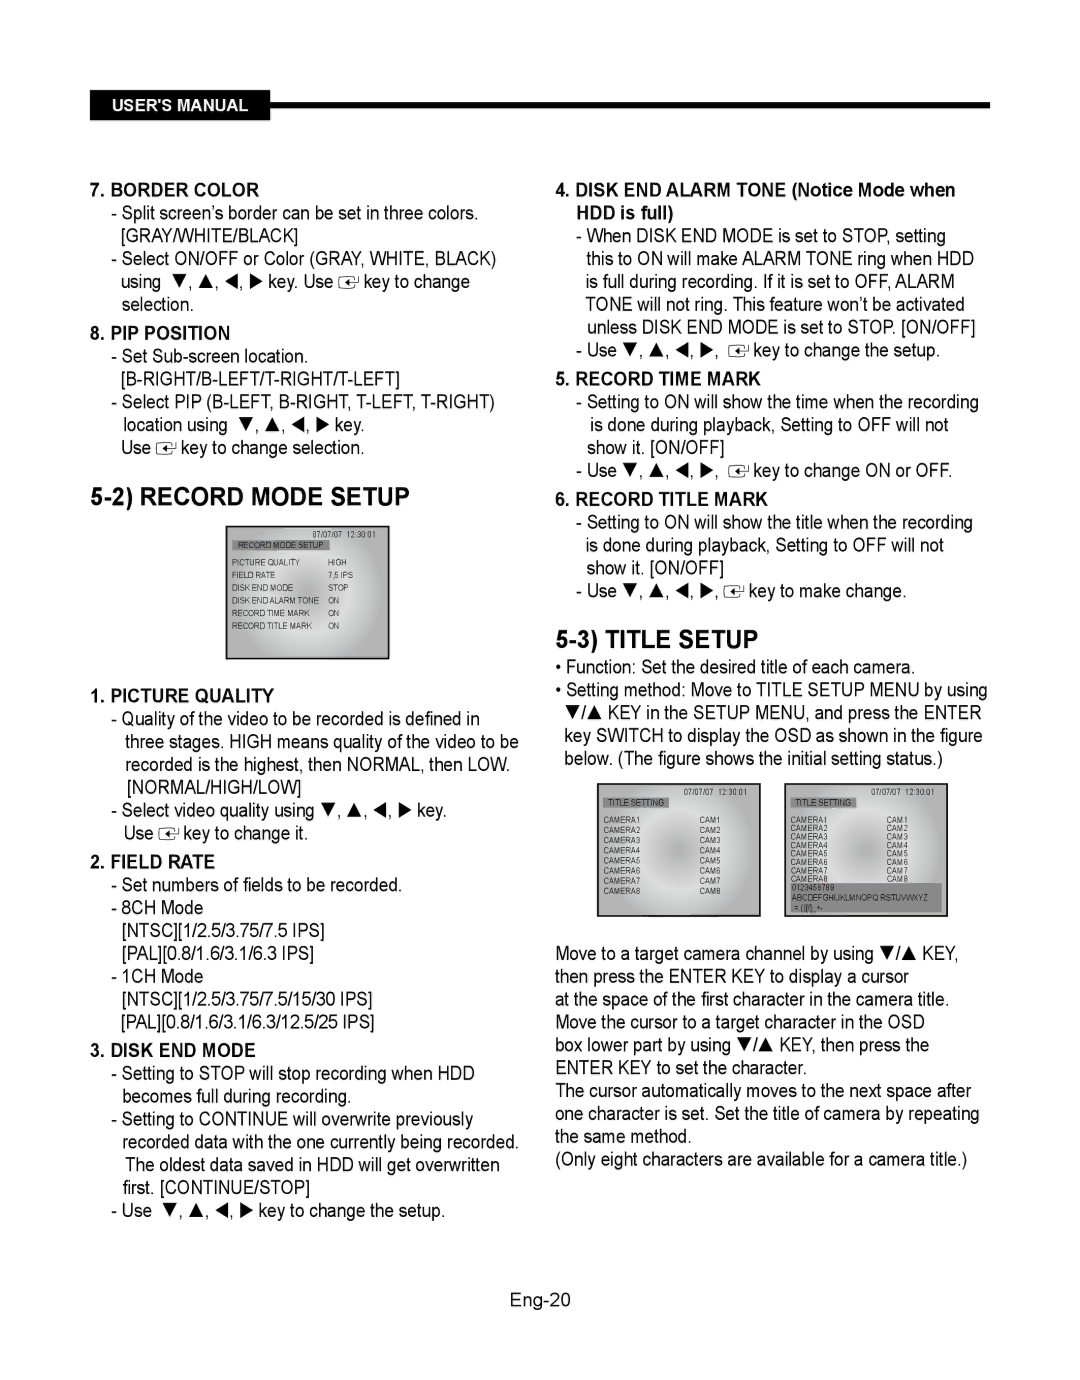
Record Mode Setup
Title Setup
Dwell Time Setup
Alarm Setup
Event Record Mode
Dwell Time Setup
Timer Record Mode
System Setup
Dhcp
Network Setup
Language
Http//192.168.1.200
Http//192.168.1.20080
At this time, you should add w in front of mac address
Eng-25
ID and Password
DSL User PPPoE Constituted by IP on PPPoE DSL
Http//wff0000.websamsung.net
Eng-26
Archive Setup
System Information
Recording
Search Menu
Search Menu
Date Time Search
Alarm Event Search
Power Event List
Record Event Search
Loss Event List
SMT-190DN basic settings
Remote Viewer Connection
Quad Mode Display
Live Menu
Camera Select
Single Screen Display
Single Mode Sequence Display
Quad Mode Sequence Display
Save Mode
Capture Mode
Program screen configuration
How to play 1. Playback
Snap shot
Print
Admin Menu
To start Admin. Menu
Admin Menu Structure
System Configuration Menu System Information
Menu Configuration
Admin. Password
Date & Time
User Registration
Alarm Notification
Network Configuration Menu
Network Configuration Static IP
Image transfer in your e-mail account
Network Configuration Dhcp Client
DNS is a default value, so it does not need to be changed
EX http//wff0000.websamsung.net
Eng-38
Network Ports Configuration
Ddns Configuration Menu Configuration
Http Port
View Network Status
System Update
Save Configuration
Reboot
Click Reboot in the utilities group
Click Previous button to go back to the previous stage
Normal System and Web Update
Choose web-dvr.tar.gz in the browse Eng-41
Page
Freeze KEY Remote Controller
PIP Mode Display Remote Controller
Zoom Mode Display Remote Controller
Functions
Single Screen Display
Quad Mode Display
Sequence Mode
Auto Sequential Display Mode Front Panel KEY
LIVE/PB/TRIPLEX KEY Remote Controller
Single Mode Sequence Display
Quad Mode Sequence Display
Monitor Setup Menu
No Signal Display
PIP on VGA mode only
OSD Menu Selection
PIP Size select VGA mode only
PIP Position select VGA mode only
PIP OFF VGA mode only
Edit Name
DVR Mode Mode Dynamic, Standard, Movie, Custom
Picture Menu
Press the / and Enter button to select the Name you want
Press the Menu and / button to select the Picture menu
Color Tone DVR mode Cool2, Cool1, Normal, Warm1, Warm2
Video mode
Under Scan Over, Under
NRNoise Reduction On, Off
VGA Mode Color Control Red, Green, Blue
Position Image Lock
Auto Adjustment
Mode Standard, Music, Movie, Speech, Custom
Sound Menu
PIP Picture Contrast, Brightness Sharpness, Color
Transparency High, Medium, Low, Opaque
Setup Menu
Language
Reset Image, Color VGA mode only
System ID 0 ~9
Product specification
SMT-190DN,SMT-190DN/XAC
Monitor
Eng-54
Power Code
System Components
Camera Cable Ethernet Cable
60ft4ea
SMT-190DP, SMT-190DP/GBR
Eng-56
SOC-C120P
Eng-57
SOC-N120P Camera
SMT-190DKP
Eng-58
Eng-59
Remote & Batteries Installation manual Ethernet Cable
AAA
SMT-190DN/JPN
Eng-60
Eng-61
SMT-190DK/JPN
Eng-62
Eng-63
SMT-190DK
Eng-64
Eng-65
IP Router Setup Guide
Step-by-Step Setup Example of IP Router
Appendix
Eng-66
Eng-67
Link model DI-624+
AB68-00679C-00
Page
Accessoires
Lisez les consignes
Conservez les consignes
Tenez compte des avertissements
10.l’installation
Sources dalimentation
Prise de terre ou polarisation
Alimentation
Consignes DE Securite Imptantes
Chapitre 7 Menu de Recherche
Chapitre 8 Connexion de la Visionneuse Distante
Chapitre 9 Fonction
Chapitre10 Menu de paramètrage du moniteur
Ntsc 1 IPS ~ MAX 30 IPS PAL 1 IPS ~ MAX 25 IPS
Chapitre Eléments et installation du système
Fonctions
Conditions requises pour linstallation et la sécurité
SOC-C120P 2 chacune
Eléments du système
Le système comprend les éléments suivants
Composants de la camera et Procédure dinstallation
Installation DE LA Camera Standard SOC-C120
Composants de la camera standard SOC-C120
Console DE Camera SBR-110 ET Camera Standard SOC-C120
Avant Linstallation
Camera Vision de nuit
Branchez le câble de la camera sur cette dernière
Vis à ailettes
DVR
Configuration des broches de la SOC-N120
Título de cada component
Configuration du système local
Fiche dentrée alarme De la camera
Procédure de raccordement de la Camera et du Moniteur
Procédure de raccordement de la Camera
Connectez le câble vidéo de la camera au Monit
EUR
Allumez le Moniteur
Français-13
Français-14
Chapitre Noms des éléments du moniteur et leur fonction
Monitor En façade
Français-15
Face arrière
Français-16
Français-17
Reconnaissance du signal vidéo entrant
Chapitre Utilisation de base
Allumage
Ecran de base
REG.HEURE/AFFICHAGE
Configuration du menu
Chapitre 5 Menu de paramètrage du DVR
REG Mode ENR
REG Titre
Mode ENR Alarme
REG Temps Cyclique
REG Alalrme
REG Temps Cyclique
Mode ENR PAR Prog
LIM. Temps Prealarme
Sensibilite
REG Canal Detect Mouv
REG Systeme
REG Reseau
Support Enreg Canal
POLSKI/ČESKY/ /TÜRKÇE/DUTCH/DANSK Hrvatski
Fixe Dhcp
Au lieu de ff0000
Cela donne http//192.168.1.20080
Pour votre SMT-190DN. Si ladresse MAC de
ID de M.DE Passe
Français-26
REG Archive
Chapitre Enregistrement
Info Systeme
REC Normale
Stop d’enregistrement
Recherche Alarme
Chapitre Menu de Recherche
Menu DE Recherche
Recherche PAR D&H
Liste Alarme Alimentation
Liste DES Pertes
Lecture Simple
En pause
Chapitre 8 Connexion de la Visionneuse Distante
Réglages de base du SMT-190DN
Selection Dune Camera
Français-31
Affichage EN Mode Single Screen
Affichage EN Mode Quad
Affichage EN Mode AUTO-SEQUENCE
Affichage EN Sequence EN Mode Single
Installation/utilisation/suppression du lecteur
Sur le périphérique de stockage amovible
Apparaissent
Français-33
Lecture, le
Français-34
Affiche la vitesse de
Menu Admin
Admin Menu Entering
Capture dimage
Imprimer
Menu System Configuration System Information
Configuration du menu
Permet de définir le format de date et heure actuelles
Français-36
Tous les serveurs Smtp ne gèrent pas le Transfert dimages
Français-37
Saisissez les adresses DNS 1 et DNS
Français-38
PPPoE DSL for Eth0
Ladresse MAC
Français-39
Permet de vérifier le statut de ladresse
Ddns Configuration Configuration du menu
Utilities Save Configuration
Met à jour uniquement le système et
Cliquez sur Cancel Annuler pour interrompre la mise
Update Le web
Sélectionnez « web-ve.tar.gz » dans le navigateur
Affichage EN Mode Zoom Telecommande
Affichage en mode Single De CH2 La zone du zoom est Activée
Chapitre 9 Fonction
Français-43
Affichage EN Mode PIP Telecommande
Affichage EN Mode Quad
Setup
Si vous appuyez sur la touche
Touche LIVE/PB/TRIPLEX Telecommande
Affichage EN Sequence EN Mode Quad
Affichage EN Sequence EN Mode Single
Français-45
PAS D’AFFICHAGE DU Signal
PIP activé seulement en mode VGA
Chapitre10 Menu de paramètrage du moniteur
Sélection du Menu d’affichage des Options à l’écran
Modif. Nom
PIP Size select seulement en mode VGA
Sélection de la Position PIP seulement en mode VGA
Mode DVR Mode Dynamique, Standard, Cinéma, Personnalisé
Mode VGA
Menu Image
Appuyez sur le bouton Entrer ou
Mode Vidéo
Pour sortir
Sous Balaya. Sur, Sous
RédNoise Reduction Arrêt, Marche
Mode VGA Contrôle Couleur Rouge, Vert, Bleu
Appuyez sur le bouton / and the Enter button to Adjust
Setting value
Verrouillage Image
Mode Standard, Musique, Cinéma, Parole, Personnalisé
Menu SON
Réglage Automatique
Image PIP Contraste, Luminosité, Netteté Couleur
Transparence Elevé, Moyen, Bas, Opaque
Menu D’INSTALLATION
Langue
Réinitialiser Image, Couleur seulement en mode VGA
ID Du Systeme 0~9
Chapitre11 Spécification du produit
SMT-190DN, SMT-190DN/XAC
Moniteur
Français-54
Français-55
Camera
Eléments du système
Français-56
SMT-190DP, SMT-190DP/GBR
Français-57
Nom du Modèle SOC-C120P
Français-58
SMT-190DKP
Télécommande et piles Installation manual
Français-59
2X AAA
Incorporés dans le DVR
Français-60
SMT-190DN/JPN
Français-61
Français-62
SMT-190DK/JPN
Français-63
Français-64
SMT-190DK
Français-65
Canaux Guide de démarrage ’instruction Rapide
Guide d’installation du routeurIP
Exemple d’installation étape parétape d’un routeurIP
Chapitre12 Annexe
Cliquez sur Router Status
Enabled Laissez sur checked Nom Réglez-le sur Http
Serveur virtuel Port Forwarding pour le Http
AB68-00679C-00
SMT-190Dx Benutzerhandbuch
DEU-�
Befolgen Sie die Bediener- und Verwendungshinweise
Installation
Inhalt
Wikanal Tige Ikanal Erheitshinweise
Kapitel 10 Setup-Menü für den Monitor
Kapitel Suchmenü
Kapitel Remoteanz-eigeverbindung
Kapitel Funktionen
Kapitel 1 Übersicht
Erste Schritte mit dem Gerät
Funktionen
Hokanal , NORMAL, Niedrig
Eingangsspannung 100 240 V Wechselspannung
Kapitel 2 Systemkomponenten und Installation
Stromverbrauch Weniger als 85 W Frequenz 60 Hz/50 Hz
Kamera Kabel Verwendet mit
Systemkomponenten
Das System umfasst die folgenden Bestandteile
Montagehalterung SBR-110S und Standardkamera SOC-C120
Standardausstattung der Kamera und Installation
Standardausstattung der Kamera SOC-C120
Vorsichtsmaßnahmen bei Installation und Betrieb
Nachtsichtkamera
Anschlussbelegung des SOC-N120
Standardausstattung
Verfahren zum Verbinden mit dem Alarmanschluss
Verfahren für den Externanschluss für Kamera und Monitor
Konfiguration des lokalen Systems
DEU-12
DEU-13
DEU-14
Kapitel 3 Bauteile und deren Funktionen
Monitor Vorderseite
DEU-15
Rückseite
DEU-16
Fernbedienung
DEU-17
Kapitel Grundlegende Funktionen
Basisfenster
Einschalten
Vollbild
Kapitel DVR-Setup-Menü
Einstellung UHR/ANZEIGE
Einstellung
Aufnahmemodus
Alarmeinstellung
Titel Einstellung
Einstellung Sequenz Dauer
Einstellung Sequenz Dauer
Ereignis Aufnahmemodus
Aufnahmemodus Zeitplan
Systemeinstellung
Netzwerk Einrichten
Fabrikeinstellung
Sprache
STATISCH…
Wechseln Sie mit der Taste / zu IP Adresse
Gateway / Subnetzmaske
DEU-25
DEU-26
Hinweis Mac-Adresse
Anmeldename und Kennwort
Großbuchstaben werden nicht unterstützt
Jetzt müssen Sie ein „w vor die „Mac-Adresse schreiben
DEU-27
Speich Ereinstellung
Kapitel 6 Aufnahme
Systeminformation
Aufnahme Normal
Aufnahme beenden
Alarm Ereignissuche
Kapitel 7 Suchmenü
Such Menü
Datum Zeit Suche
Power Ereignis Liste
Ereignisliste Loeschen EN
Einfache Wiedergabe
DEU-31
Kapitel 8 Remoteanz- eigeverbindung
Grundeinstellungen für das SMT-190DN
Live Menü
Kamera Select
Einzelbildschirmanzeige
DEU-34
Wiedergabe
Wiedergabe einer Archivdatei *.fmp4
DEU-35
Vergrößern
Admin-Menü
Öffnen des Administratormenüs
Schnappschuss
Drucken
Struktur des Administratormenüs
Konfigurationsmenü System System Information
Konfigurationsmenü
DEU-37
Rechte des Benutzers im System bestimmen
Geben Sie die Kennung des Benutzers in die
Spalte „User ID ein
Und Zahlen und Buchstaben enthalten
Netzwerkkonfiguration Network Configuration
Bildübertragung zu Ihrem E-Mail-Konto
Netzwerkkonfiguration Statische IP
Netzwerkkonfiguration DHCP-Client
Menü Menü Einstellungen Netzwerk Einrikanal TEN
Der aktuelle SMT-190DN-Server verwendet HTTP-Port
Service kontrollieren
Wenn der PPPoE-Service nicht
Service Wählen Sie „Enable oder „Disable
Klicken Sie auf „Apply um die Einstellungen zu übernehmen
Normal System and Web Aktualisieren von System und Update
Programms durchzuführen und zur nächsten Stufe zu wechseln
Kapitel 9 Funktionen
Standbildtaste Fernsteuerung
ZOOM-MODUSANZEIGE Fernsteuerung
DEU-44
DEU-45
Einzelbildschirmanzeige
PIP-MODUSANZEIGE Fernsteuerung
QUAD-MODUSANZEIGE
Automatisch sequenzielle Anzeige
Taste AUF Vorderseite
Sequenzanzeige im QUAD-Modus
DEU-47
LIVE/PB/TRIPLEX-Taste
Fernsteuerung
Kapitel 10 Setup-Menü für den Monitor
Keine Signalanzeige
OSD-Menüauswahl
Menü Eingang
PIP-Größe auswählen nur im VGA-Modus
PIP-Position auswählen nur im VGA-Modus
PIP AUS nur VGA-Modus
Name bearb
Menü „Bild
DVR-Modus Modus Dynamisch, Standard, Film, Benutzerdef
Farbtemp DVR-Modus Kalt 2, Kalt 1, Normal, Warm1, Warm2
UnderScan Over, Under
Farbtemp
DEU-51
VGA-Modus Farbanpassung Rot, Grün, Blau
Bildjustierung
Position Bildjustierung
Autom. Einstellung
Das Bild unten wird auf dem Bildschirm angezeigt
PIP-Bild Kontrast, Helligkeit, Schärfe, Farbe
Menü „Ton
Benutzerdef. Tiefen, Höhen, Balance
Menü „Einstellungen
Sprache
Transparenz Hoch, Mittel, Gering, Deckend
System-ID 0 ~9
Kapitel 11 Technische Daten des Produkts
DEU-56
DEU-57
Kamera
Systemkomponenten
DEU-58
Netzcode
DEU-59
Gebiet Vereinigtes Königreich Großbritannien und Nordirland
40 C 32F -104F
DEU-60
Ein/Aus 230 V, 50 Hz Wechselspannung Stromverbrauch 90 W
DEU-61
SOC-C120P
DEU-62
Europa
Netto 95 kg, 17,5 Lbs Karton 10,75 kg, 23,7 Lbs
DEU-63
Netzstrom 230 V, 50 Hz Wechselspannung Stromverbrauch 90 W
Fernbedienung und Installationshandbuch Ethernet-Kabel
DEU-64
Batterien 2 x AAA
Handbuhc auf CD Kurzhandbuch Reinigungstuch
DEU-65
Gebiet Japan
DEU-66
DEU-67
DEU-68
SMT-190DK/JPN
DEU-69
DEU-70
DEU-71
Gebiet Korea Typnr
DEU-72
Netzstrom 220 V, 60 Hz Wechselspannung Stromverbrauch 90 W
DEU-73
Kapitel 12 Anhang
IP-Router-Konfigurationshandbuch
Detailliertes Beispiel für das Einrichten eines IP- Routers
Sie benötigen sie später beim Einrichten des SMT- 190DN
Link-Modell DI-624+
AB68-00679C-00
Manuale dell’utente
Accessori
Rispettare le avvertenze
Seguire le istruzioni
Pulizia
Installazione
Tipo di alimentazione
Messa a terra o polarizzazione
Alimentazione
Sommario
Istruzioni Importanti PER LA Sicurezza
Capitolo Menu di ricerca
Capitolo Connessione Viewer remoto
Capitolo Funzioni
Capitolo 10 Menu di impostazione del monitor
Capitolo 1 Panoramica
Introduzione al prodotto
Caratteristiche
ALTA, NORMALE, Bassa
Temperatura di esercizio 0C ~ 40C 32F ~ 104F
Capitolo 2 Componenti del sistema e installazione
Requisiti per l’installazione e la sicurezza
Componenti del sistema
Il sistema è composto dalle seguenti parti
Telecamera Cavo
Uso comune
Composizione telecamera standard e metodo di installazione
Installazione telecamera standard SOC-C120
Composizione telecamera standard SOC-C120
Obiettivo
Precauzioni per l’installazione e il funzionamento
Telecamera per visione notturna
SOC-N120 Configurazione dei pin
Temperatura -10˚C 50˚C14˚F ~ 122˚F Umidità Meno di 90%
Composizione standard
Microfono
Metodo di collegamento
Del terminale esterno per la
Telecamera o il monitor
Allarme
Ita-13
Monitor
Accendere il Monitor
Monitor Davanti
Ita-14
Ita-15
Lato posteriore
Ita-16
Ita-17
Capitolo 4 Utilizzo di base
Accensione
Riconoscimento del segnale video di ingresso
Schermata di base
OROLOGIO/SETUP Display
Menu di configurazione
Capitolo 5 Menu di
Impostazione DVR
Setup Modalità REG
Setup Titolo
Setup Tempo Attesa
Setup Allarme
Setup Tempo Attesa
Modalità REG Evento
Modalità Timer REG
Setup Movimento CH
Limite ORA PRE Allarme
Limite ORA Post Allarme
Setup Sistema
Setup Rete
Statico
Supporto REG 1CH
Lingua
Indirizzo IP / Gateway / Subnetmask
Utente Dhcp
Formato da un IP dinamico su una una rete via
Cavo/modem xDSL
Http// .websamsung.net
Nota Indirizzo MAC
Setup Archivio
Capitolo Registrazione
Informazioni Sistema
Interruzione della registrazione
Capacità
Capitolo Menu di ricerca
Menu Ricerca
Ricerca Evento REG
Ricerca Data ORA Ricerca Evento Allarme
Elenco Evento on
Ita-30
Capitolo 8 Connessione Viewer remoto
Impostazioni di base SMT-190DN
Menu Live
Selsect
Visualizza Videata Singola
Visualizzazione Della Sequenza in MODALITA’ Singola
Visualizzazione Della Sequenza in MODALITA’ Quad
MODALITA’ DI Salvataggio
Riprod
Come eseguirlo 1. Riproduzione
Manuale’utente
Per avviare Admin. Menu
Istantanea
Stampa
Ita-35
Configurazione delle schermate
Struttura del menu Admin
Configurazione del menu
Categoria Main Menu
Ita-37
Configurazione della rete Static IP
Menu Network Configuration
Fare clic su Back per annullare le impostazioni eseguite
Ita-38
Menu Setup Menu Setup Rete
DNS Domain Name Service Servizio per convertire
’attuale server SMT-190DN utilizza la porta Http
Porta Http
Ddns Configuration Configurazione del menu
Service Selezionare Enable o Disable
Fare clic su Reboot nel gruppo utilities Ita-40
Status Statico La maschera di rete e l’indirizzo MAC PPPoE
Fare clic su Next per passare alla fase successiva
NormalSystem and Web Update
Normal System and Web Aggiorna il sistema e il Web Update
Manuale’utente
Capitolo 9 Funzioni
Tasto Freezetelecomando
Zoomtelecomando
Visualizzazione Della MODALITA’ Piptelecomando
Visualizza Videata Singola
Visualizzazione in MODALITA’ Quad
Pieno schermo l’immagine proveniente da un’altra
Visualizzazione Quad Bquad a da Quad Aquad B
Visualizzazione Single Mode Sequence
Anteriore
Tasto LIVE/PB Triplextelecomando
Auto Sequential Display Modetasto Pannello
Capitolo 10 Menu di impostazione del monitor
Nessun segnale visualizzato
Selezione del menu OSD
Menu Inserisci
Selezione Sorgente PIP solo modalità VGA
Modifica Nome
Ita-47
Premere / e Enter per selezionare l’impostazione
Menu Immagine
Ita-48
NR On, Off
Premere / per selezionare la modalità desiderata
Modalità VGA Controllo Colore Rosso, Verde, Blu
Premere / e Enter per regolare il valore e salvare
Blocco immagine
Posizione Blocco immagine
Menu Suono
Regolazione auto
Modalità Standard, Musica, Film, Dialoghi, Personaliz
Personaliz. Bassi, Alti, Bilanc
Menu Impostazione
Lingua
Trasparenza Alta, Media, Bassa, Opaco
Premere Menu o ripetutamente per uscire Ita-52
Reset Immagine, Colore solo modalità VGA
ID Sistema 0 ~9
Capitolo 11 Specifiche del prodotto
Ita-54
Ita-55
PIP
Telecamera
Componenti di sistema
Cavo Ethernet
Guida rapida
Ita-57
Ita-58
Ita-59
SOC-N120P Intemperie
Ita-60
MODALITA’ DI Visualizzazione
Ita-61
Manuale su CD Guida rapida
Ita-62
DVR 8 CH con LCD Telecomando e Manuale di
Cavo alimentazione
Ita-63
Ita-64
Ita-65
Ita-66
Ita-67
Ita-68
Ita-69
Ita-70
Ita-71
Esempio di impostazione Step-by-Step del router
Capitolo 12 Appendice
Guida all’impostazione del router
Link modello DI-624+
Schedule Selezionare Always Fare clic su Apply
AB68-00679C-00
Manual DE Usuario
Lea las instrucciones
Guarde las instrucciones
Preste atención a las advertencias
Siga las instrucciones
Instalación
Fuentes de alimentación
Puesta a tierra o polarización
Alimentación
Composición y método de instalación de la Cámara Estandár
Español
Menú Admin
Configuración básica del SMT-190DN
Freeze
Capítulo 1 Información general
ALTA, NORMAL, Baja
Capítulo 2 Componentes del sistema e instalación
Requisitos para instalación y seguridad
Uso común
El sistema se compone de lo siguiente
Cámara Cable
Composición y método de instalación de la Cámara Estandár
Cámara DE Visión Nocturna
Introducción SOC-N120
Configuración de patillas de la SOC-N120
Instalación
Configuración del sistema local
La señal del disparador del sensor es no Normal abierto
Español-12
No se suministra el sensor. Se vende por separado
Aviso
Encienda el monitor
Español-13
Capítulo Nombres de componentes y características
Español-14
Español-15
Grabación
Español-16
Precaución
Español-17
Capítulo 4 Uso básico
Arranca mostrando la pantalla
Siguiente
Aparece el mensaje Pausa DEL Sistema
Capítulo 5 Menú de configuración de DVR
RELOJ/CONFIG. DE Display
CONFIG. DEL Modo DE Grabación
Configuración DE Título
CONFIG. Tiempo DE Permanencia
Configuración DE Alarma
Alarma
Modo DE Grabación DE Eventos
Modo GRAB. CON Temporizador
Configuración DEL Sistema
Configuración DE RED
Idioma
Estático Dhcp
TCP/IP
Español-25
Http Port
Dirección MAC
DSLUserPPPoE
Permitir Archivo
Fecha MM/DD/AA
Hora Hhmmss
Archivo CA
Capítulo 6 Grabación
Capítulo 7 Menú Búsqueda
Búsqueda Alarma DE Eventos
Búsqueda Fecha Hora
Búsqueda Grabación DE Eventos
Lista DE Eventos Perdidos
Español-30
Capítulo Conexión del visor remoto
Si no hay datos grabados, se visualiza el mensaje SIN Datos
Selección de Cámara
Pantalla Sencilla
Pantalla EN Modo Quad
EN Modo Quad
Modo DE Pantalla Auto Secuencia
Pantalla DE Secuencia DE Modo Sencillo
Pantalla DE Secuencia DE Modo Quad
Modo Guardar Ruta
Manual DE Usuario
En la barra
Imprime la imagen actual. Seleccione
Seleccione Imprimir y haga clic en OK aceptar Español-34
3Menú Admin
Categoría Menú principal
Registro de Usuario
Contraseña Admin
Fecha/Hora
Configuración de Red IP Estática
Notificación de Alarma
Configuración de Red
Configuración de Red Cliente Dhcp
Menú Menú Setup Configuración DE RED
Configuración Puertos de Red
DNS es un valor prefijado, así que no debe cambiar se
Configuración Ddns
Utilitidades Guardar Configuración
Puerto Http
Ver Estado de Red
Reiniciar
Actualización del Sistema
Haga clic en botón Next para ir al paso siguiente
Actualización Normal Sistema y Web
Manual DE Usuario
Español-42
Capítulo 9 Funciones
Modo DE Visualización Zoom Mando a Distancia
Modo DE Visualización PIP Mando a Distancia
Visualización DE Pantalla Única
Modo DE Visualización Cuadrangular
Modo PIP
Visualización DE Secuencia EN Modo Single
En visualización de Quad Bquad a desde Quad Aquad B
Botón LIVE/PB/TRIPLEX Mando a Distancia
Español-45
Capítulo10 Configuraciones del menú
OSD
Selección del tamaño de PIP sólo modo
Español-47
Menú DE Imagen
Imagen Márg. Completa, Márgenes
/ y Enter para
Seleccionar el menú Bloqueo de imagen
Pulse los botones / para seleccionar el
Submenú que desea. Grueso, Fino o Nitidez
Ajuste automático
Menú DE Configuración Idioma
ID Sistema 0 ~9
Capítulo 11 Especificaciones de Producto
Español-54
Cámara
Componentes del sistema
Manual de
Español-55
Español-56
Cable
Guía rápida
Ethernet
Español-57
Español-58
CD de instrucciones Guía rápida
Español-59
Manual de instalación
LCD Monitor de Mando a distancia y
Español-60
Español-61
Español-62
Español-63
Español-64
Español-65
Guía de configuración del Enrutador IP
Ejemplo de configuración paso a paso del enrutadorIP
Capítulo 12 Apéndice
Ejemplo de instalación paso a paso
Español-67
Ejemplo de configuración paso a paso del enrutador IP
IP Address Setup Menu
AB68-00679C-00