Recording Live Video
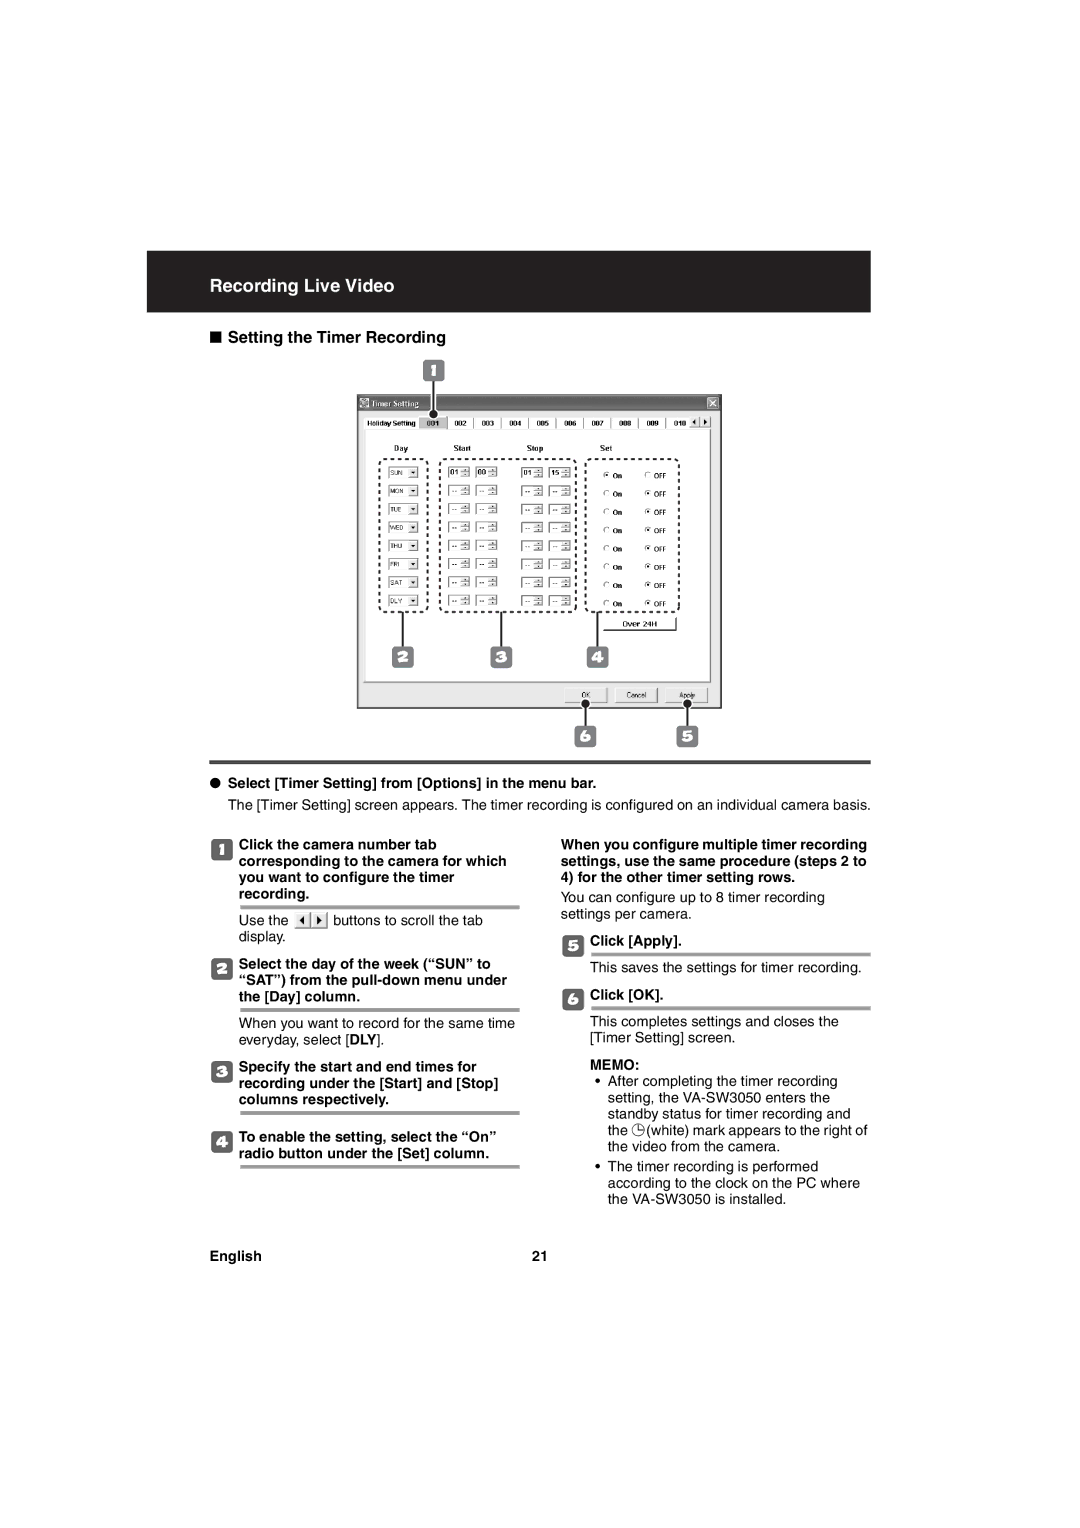
■Setting the Timer Recording
1
2 3 4
6 5
●Select [Timer Setting] from [Options] in the menu bar.
The [Timer Setting] screen appears. The timer recording is configured on an individual camera basis.
1Click the camera number tab corresponding to the camera for which you want to configure the timer recording.
Use the ![]() buttons to scroll the tab display.
buttons to scroll the tab display.
2Select the day of the week (“SUN” to “SAT”) from the
When you want to record for the same time everyday, select [DLY].
3Specify the start and end times for recording under the [Start] and [Stop] columns respectively.
4To enable the setting, select the “On” radio button under the [Set] column.
When you configure multiple timer recording settings, use the same procedure (steps 2 to 4) for the other timer setting rows.
You can configure up to 8 timer recording settings per camera.
5Click [Apply].
This saves the settings for timer recording.
6Click [OK].
This completes settings and closes the [Timer Setting] screen.
MEMO:
•After completing the timer recording setting, the
•The timer recording is performed according to the clock on the PC where the
English | 21 |