Registering the Camera with the Software
Registering the cameras with the
Set the IP address of registered cameras using “FIX” (manual) mode (see “NETWORK SETTINGS” on page 12 in the option board instruction manual).
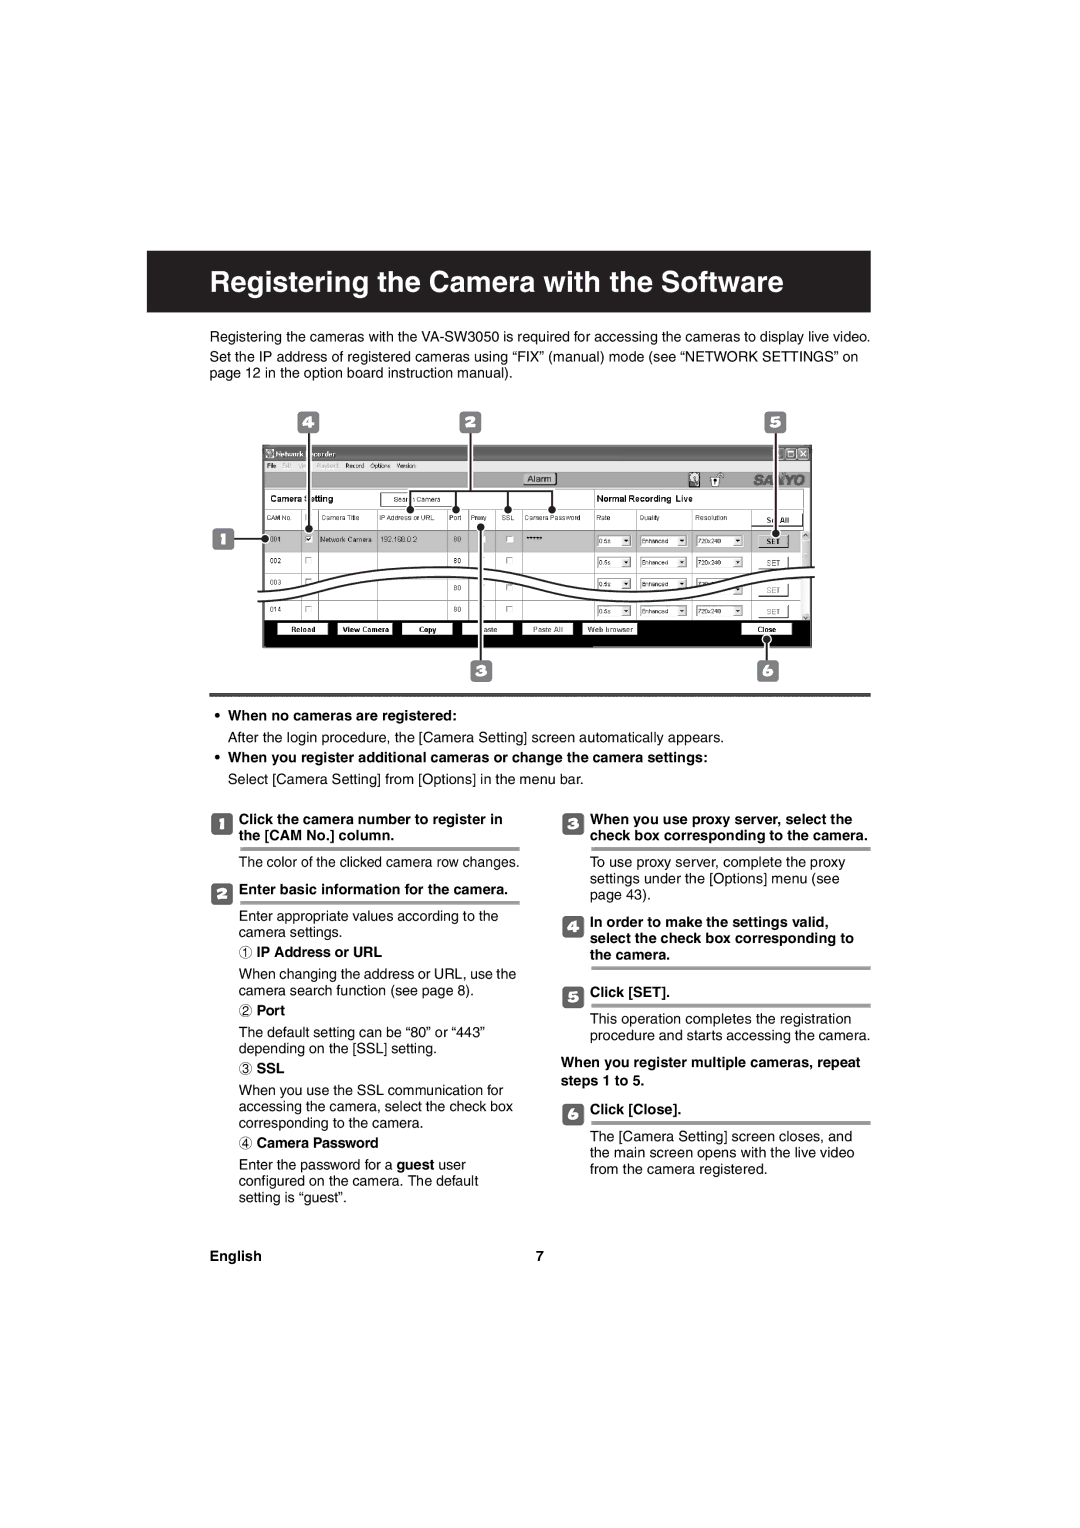
4 | 2 | 5 |
1![]()
36
•When no cameras are registered:
After the login procedure, the [Camera Setting] screen automatically appears.
•When you register additional cameras or change the camera settings: Select [Camera Setting] from [Options] in the menu bar.
1Click the camera number to register in the [CAM No.] column.
The color of the clicked camera row changes.
2Enter basic information for the camera.
Enter appropriate values according to the camera settings.
1 IP Address or URL
When changing the address or URL, use the camera search function (see page 8).
2 Port
The default setting can be “80” or “443” depending on the [SSL] setting.
3 SSL
When you use the SSL communication for accessing the camera, select the check box corresponding to the camera.
4 Camera Password
Enter the password for a guest user configured on the camera. The default setting is “guest”.
3When you use proxy server, select the check box corresponding to the camera.
To use proxy server, complete the proxy settings under the [Options] menu (see page 43).
4In order to make the settings valid, select the check box corresponding to the camera.
5Click [SET].
This operation completes the registration procedure and starts accessing the camera.
When you register multiple cameras, repeat steps 1 to 5.
6Click [Close].
The [Camera Setting] screen closes, and the main screen opens with the live video from the camera registered.
English | 7 |