USING THE MENU SCREEN
CAMERA ID
 CAMERA ID setting
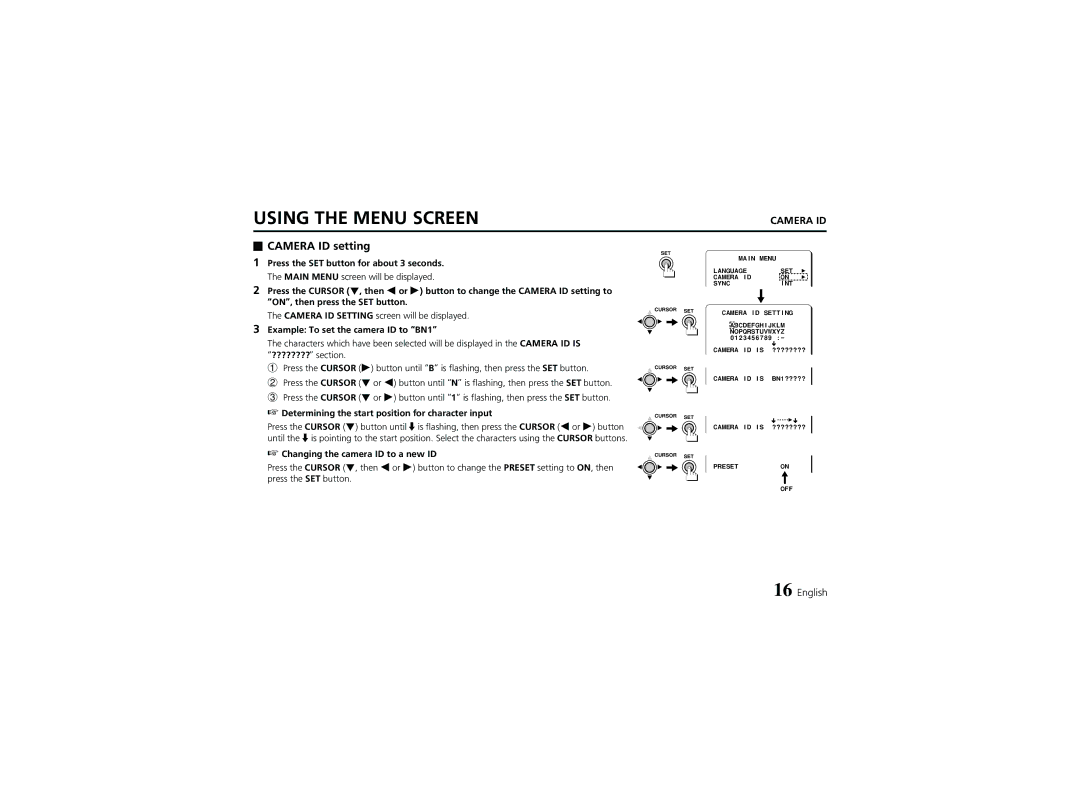
1Press the SET button for about 3 seconds. The MAIN MENU screen will be displayed.
2Press the CURSOR (l, then d or c) button to change the CAMERA ID setting to “ON”, then press the SET button.
The CAMERA ID SETTING screen will be displayed.
3Example: To set the camera ID to “BN1”
The characters which have been selected will be displayed in the CAMERA ID IS “????????” section.
1 Press the CURSOR (c) button until “B” is flashing, then press the SET button.
2 Press the CURSOR (l or d) button until “N” is flashing, then press the SET button.
3 Press the CURSOR (l or c) button until “1” is flashing, then press the SET button.
☞Determining the start position for character input
Press the CURSOR (l) button until 2 is flashing, then press the CURSOR (d or c) button until the 2 is pointing to the start position. Select the characters using the CURSOR buttons.
☞Changing the camera ID to a new ID
Press the CURSOR (l, then d or c) button to change the PRESET setting to ON, then press the SET button.
SET
![]() CURSOR SET
CURSOR SET
![]() CURSOR SET
CURSOR SET
CURSOR SET
![]() CURSOR SET
CURSOR SET
MAIN MENU |
|
|
LANGUAGE | SET | p |
CAMERA ID | ON | p |
SYNC | INT |
|
CAMERA ID SETTING
![]() ABCDEFGHIJKLM NOPQRSTUVWXYZ 0123456789 :-
ABCDEFGHIJKLM NOPQRSTUVWXYZ 0123456789 :-
CAMERA ID IS ????????
CAMERA ID IS BN1?????
CAMERA ID IS ????????
PRESET ON
OFF
16 English
