USING THE MENU SCREEN | MOTION/MASKING |
CMASKING setting
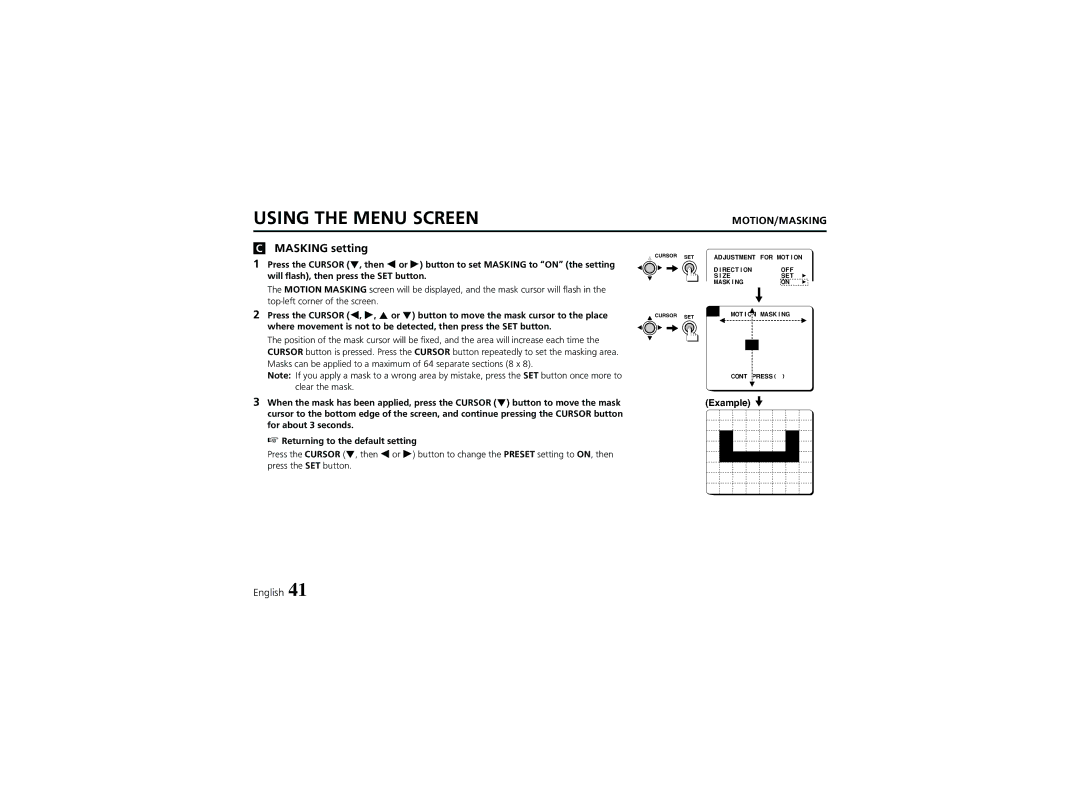
1 Press the CURSOR (l, then d or c) button to set MASKING to “ON” (the setting will flash), then press the SET button.
The MOTION MASKING screen will be displayed, and the mask cursor will flash in the
2Press the CURSOR (d, c, j or l) button to move the mask cursor to the place where movement is not to be detected, then press the SET button.
The position of the mask cursor will be fixed, and the area will increase each time the CURSOR button is pressed. Press the CURSOR button repeatedly to set the masking area. Masks can be applied to a maximum of 64 separate sections (8 x 8).
Note: If you apply a mask to a wrong area by mistake, press the SET button once more to clear the mask.
3When the mask has been applied, press the CURSOR (l) button to move the mask cursor to the bottom edge of the screen, and continue pressing the CURSOR button for about 3 seconds.
☞Returning to the default setting
Press the CURSOR (l, then d or c) button to change the PRESET setting to ON, then press the SET button.
![]() CURSOR SET ADJUSTMENT FOR MOTION
CURSOR SET ADJUSTMENT FOR MOTION
|
| DIRECTION | OFF |
|
|
| SIZE | SET | p |
|
| MASKING | ON | p |
CURSOR | SET | MOTION MASKING |
| |
|
|
|
| |
CONT PRESS(ñ)
(Example)
English 41
