USING THE MENU SCREEN
WHITE BALANCE/AWC
BPush-lock white balance adjustment (AWC)
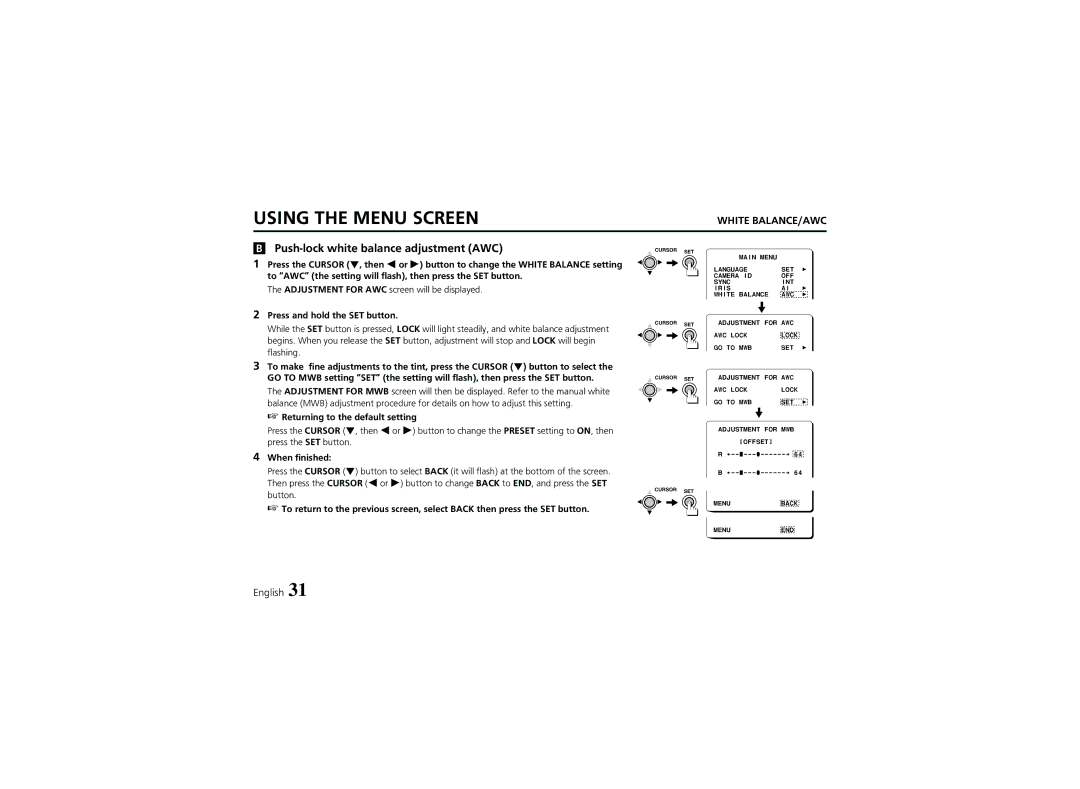
1 Press the CURSOR (l, then d or c) button to change the WHITE BALANCE setting to “AWC” (the setting will flash), then press the SET button.
The ADJUSTMENT FOR AWC screen will be displayed.
2Press and hold the SET button.
While the SET button is pressed, LOCK will light steadily, and white balance adjustment begins. When you release the SET button, adjustment will stop and LOCK will begin flashing.
3To make fine adjustments to the tint, press the CURSOR (l) button to select the
GO TO MWB setting “SET” (the setting will flash), then press the SET button. The ADJUSTMENT FOR MWB screen will then be displayed. Refer to the manual white balance (MWB) adjustment procedure for details on how to adjust this setting.
☞Returning to the default setting
Press the CURSOR (l, then d or c) button to change the PRESET setting to ON, then press the SET button.
4When finished:
Press the CURSOR (l) button to select BACK (it will flash) at the bottom of the screen. Then press the CURSOR (d or c) button to change BACK to END, and press the SET button.
☞ To return to the previous screen, select BACK then press the SET button.
![]() CURSOR SET
CURSOR SET
![]() CURSOR SET
CURSOR SET
CURSOR SET
CURSOR SET
MAIN MENU |
|
| |
LANGUAGE | SET | p | |
CAMERA ID | OFF |
| |
SYNC | INT |
| |
IRIS | AI | p | |
WHITE BALANCE | AWC | p | |
|
| ||
|
|
| |
ADJUSTMENT FOR AWC |
| ||
AWC LOCK | LOCK |
| |
GO TO MWB | SET | p | |
ADJUSTMENT FOR AWC |
| ||
AWC LOCK | LOCK |
| |
GO TO MWB | SET | p | |
ADJUSTMENT FOR MWB
[OFFSET]
R | 64 | |
B | 64 |
MENU | BACK |
MENU | END |
English 31
