Delete Protection
Available mode:
You can prevent your important images recorded on the card from accidental erasure.
1In
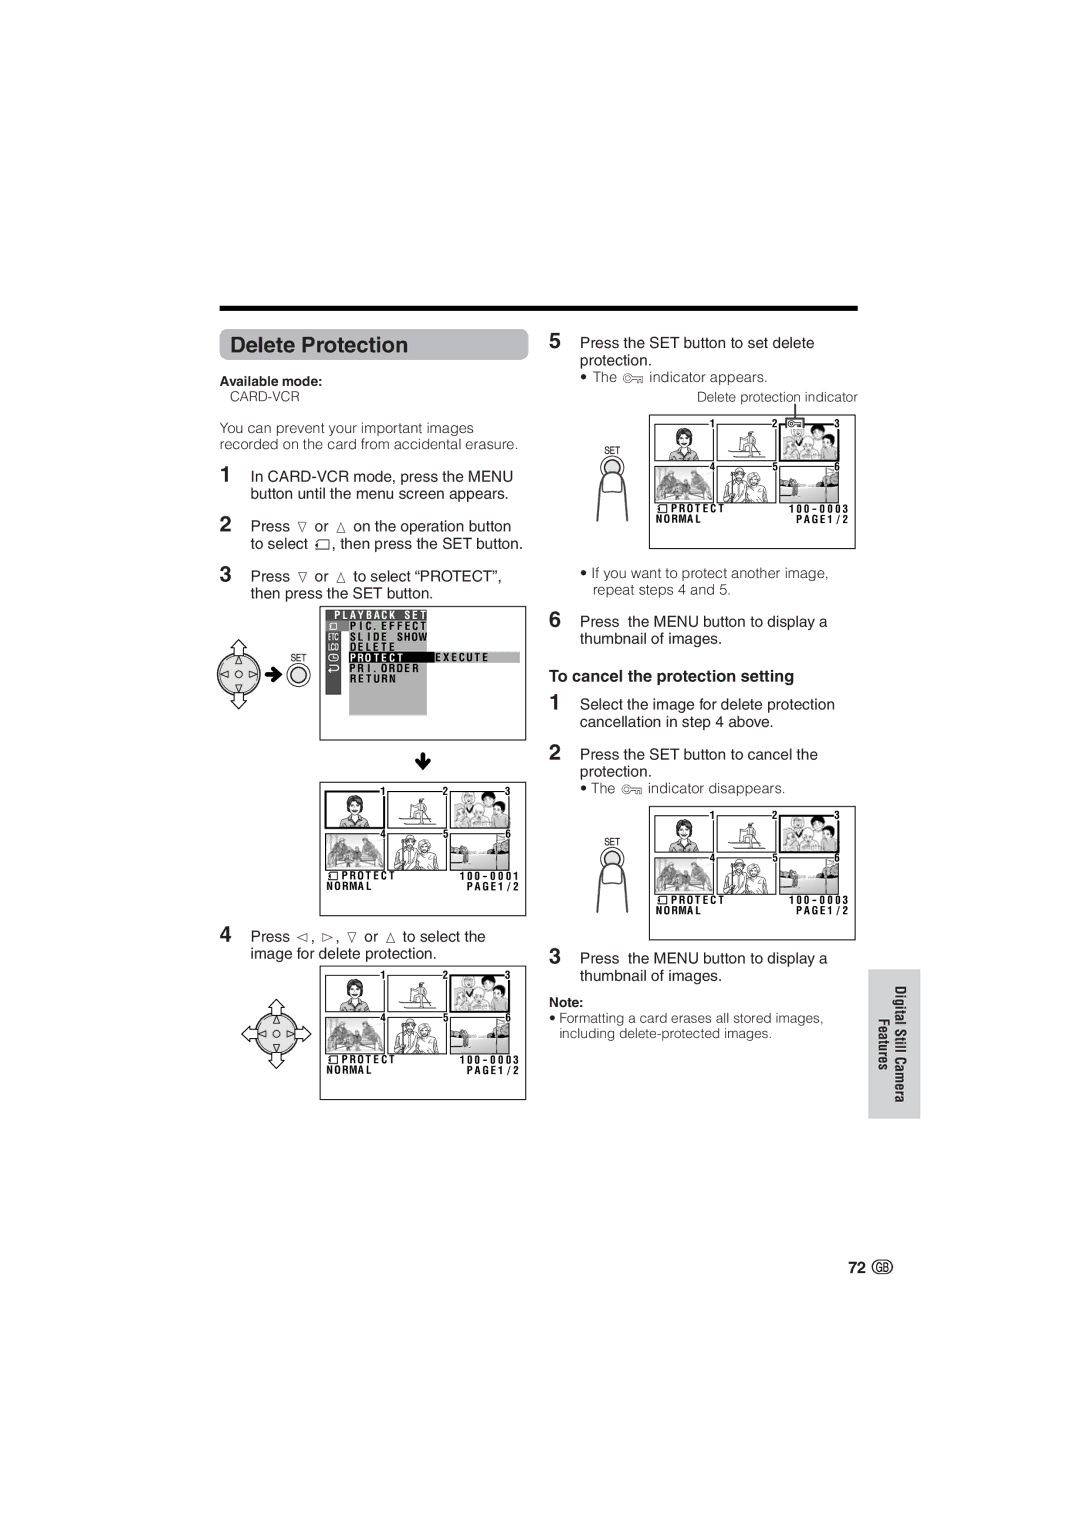
2Press l or m on the operation button to select S, then press the SET button.
3Press l or m to select “PROTECT”, then press the SET button.
|
|
|
|
|
|
|
| P L A Y B A C K S E T |
|
|
| ||
|
|
| P I C . E F F E C T |
|
|
|
|
|
| S L I D E S HOW |
|
|
|
|
|
| D E L E T E |
|
|
|
|
|
| P R O T E C T |
| E X E C U T E |
|
|
|
| P R I . O R D E R |
|
|
|
|
|
| R E T U R N |
|
|
|
|
|
|
|
|
|
|
|
|
|
|
|
|
|
|
|
|
|
|
|
|
1 | 2 | 3 |
4 | 5 | 6 |
P R O T E C T |
| 1 0 0 - 0 0 0 1 |
N O RMA L |
| P A G E 1 / 2 |
4Press j, k, l or m to select the image for delete protection.
1 | 2 | 3 |
4 | 5 | 6 |
P R O T E C T |
| 1 0 0 - 0 0 0 3 |
N O RMA L |
| P A G E 1 / 2 |
5Press the SET button to set delete protection.
• The R indicator appears.
Delete protection indicator
1 | 2 | 3 |
4 | 5 | 6 |
P R O T E C T |
| 1 0 0 - 0 0 0 3 |
N O RMA L |
| P A G E 1 / 2 |
•If you want to protect another image, repeat steps 4 and 5.
6Press the MENU button to display a thumbnail of images.
To cancel the protection setting
1Select the image for delete protection cancellation in step 4 above.
2Press the SET button to cancel the protection.
• The R indicator disappears.
1 | 2 | 3 |
4 | 5 | 6 |
P R O T E C T |
| 1 0 0 - 0 0 0 3 |
N O RMA L |
| P A G E 1 / 2 |
3Press the MENU button to display a thumbnail of images.
Note:
•Formatting a card erases all stored images, including
FeaturesDigital Still Camera
72 ![]()
