Useful Features
Usefulseful eaturesFeatures Cameraamera RecordingRecording
Displaying the Recording Guide
Available modes:
This function helps you decide on the size of the subject occupying the screen. Select one of five recording guides.
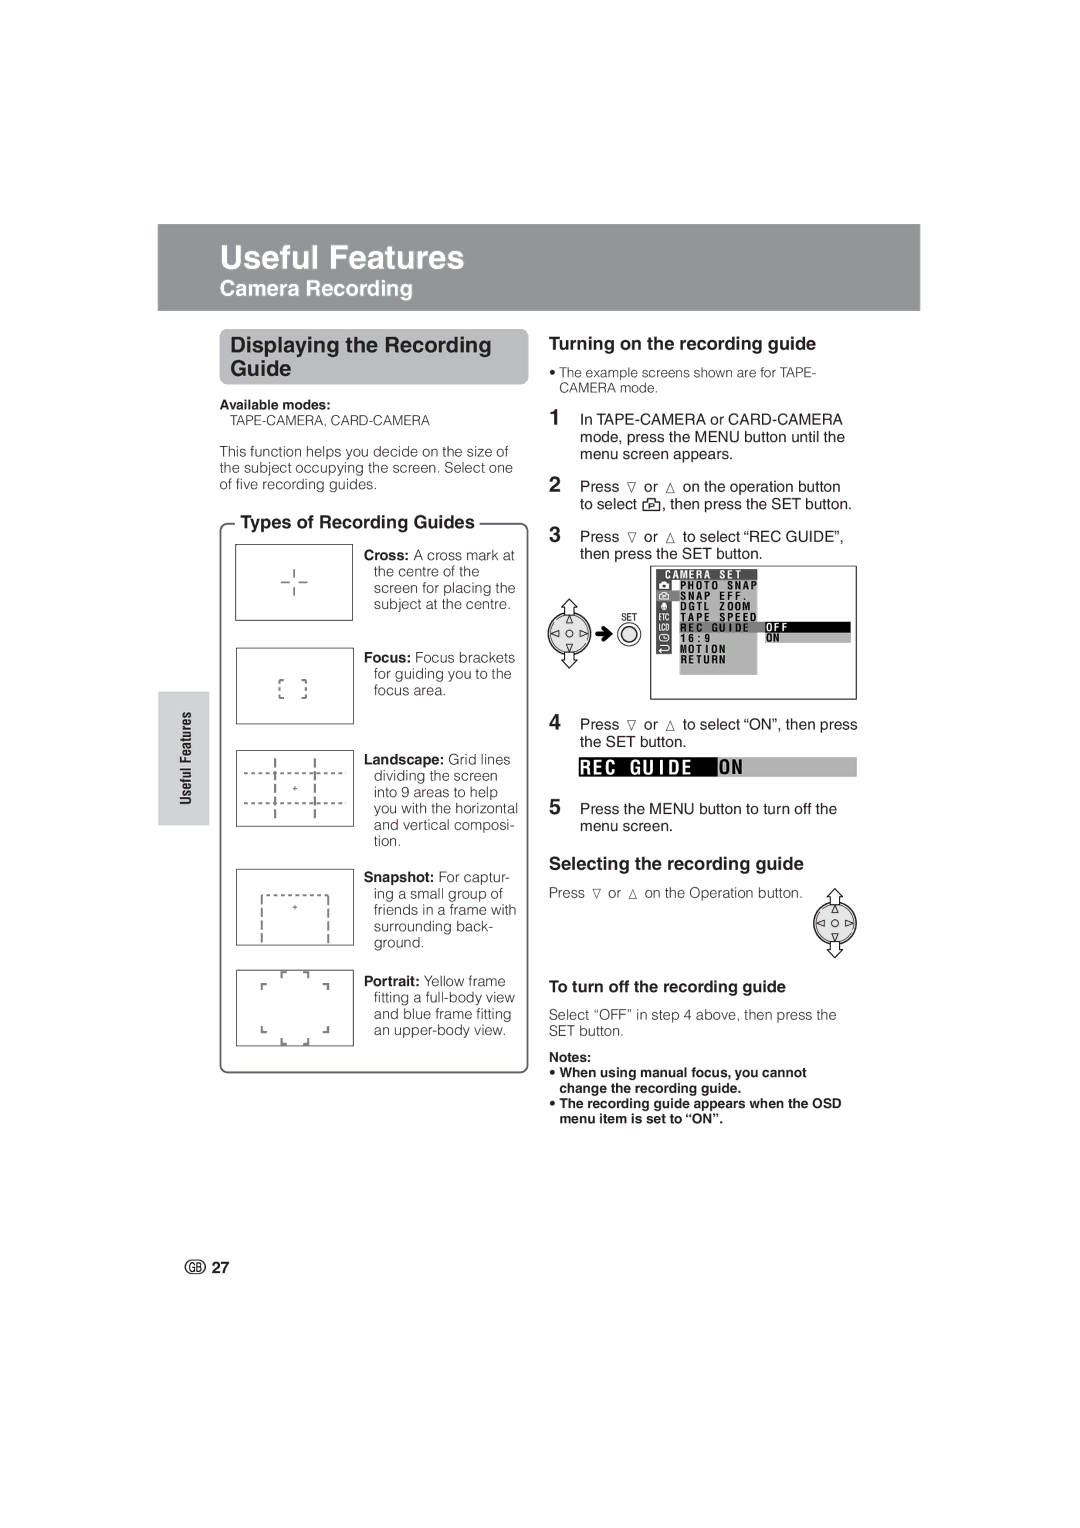
Types of Recording Guides
Cross: A cross mark at the centre of the screen for placing the subject at the centre.
Focus: Focus brackets for guiding you to the focus area.
Landscape: Grid lines dividing the screen into 9 areas to help you with the horizontal and vertical composi- tion.
Snapshot: For captur- ing a small group of friends in a frame with surrounding back- ground.
Portrait: Yellow frame fitting a
Turning on the recording guide
•The example screens shown are for TAPE- CAMERA mode.
1In
2Press l or m on the operation button to select Y, then press the SET button.
3Press l or m to select “REC GUIDE”, then press the SET button.
C A M E R A | S E T | |
| P H O T O | S N A P |
| S N A P | E F F . |
| D G T L | Z O OM |
| T A P E | S P E E D |
R E C G U I D E O F F
1 6 : 9 | ON |
M O T I O N |
|
R E T U R N |
|
4Press l or m to select “ON”, then press the SET button.
RE C GU I D E ON
5Press the MENU button to turn off the menu screen.
Selecting the recording guide
Press l or m on the Operation button.
To turn off the recording guide
Select “OFF” in step 4 above, then press the SET button.
Notes:
•When using manual focus, you cannot change the recording guide.
•The recording guide appears when the OSD menu item is set to “ON”.
![]() 27
27