SIEMENS ADSL
5. Commit your changes.
Select Admin > Commit & Reboot and click [Save] to save your changes to permanent storage.
Part 2: Check your connection status.
Select Home. On the System View page, the WAN Interfaces item should display the interface you created to communicate with your ISP. A green ball in the Status field indicates a successful connection.
Part 3: Configuring the PC.
Option 1: Your PC use the IP given by your ISP.
If this is the case, configure your PC to use the static IP given by your ISP, for example: IP address: 10.100.16.2
Subnet mask: 255.255.255.0
Default gateway: 10.100.16.254
Note: With the configuration above, your PC should be able to access the Internet now but will lose the local connection to the device’s LAN port. If you want to configure the ADSL Router via the Web browser again, you should
Option 2: Your client use PPPoE software to connect to your ISP.
Just keep your PC’s setting as a DHCP client and execute the PPPoE software to make the connection.
PPP Connection Mode
In this deployment environment, the PPPoE/PPPoA session is between the ADSL WAN interface and BRAS. The ADSL Router gets a public IP address from BRAS when connecting to DSLAM. The multiple client PCs will get private IP address from the DHCP server enabled on private LAN. The enabled NAT mechanism will translate the IP information for clients to access the Internet.
Part 1: Configuring the ADSL Router
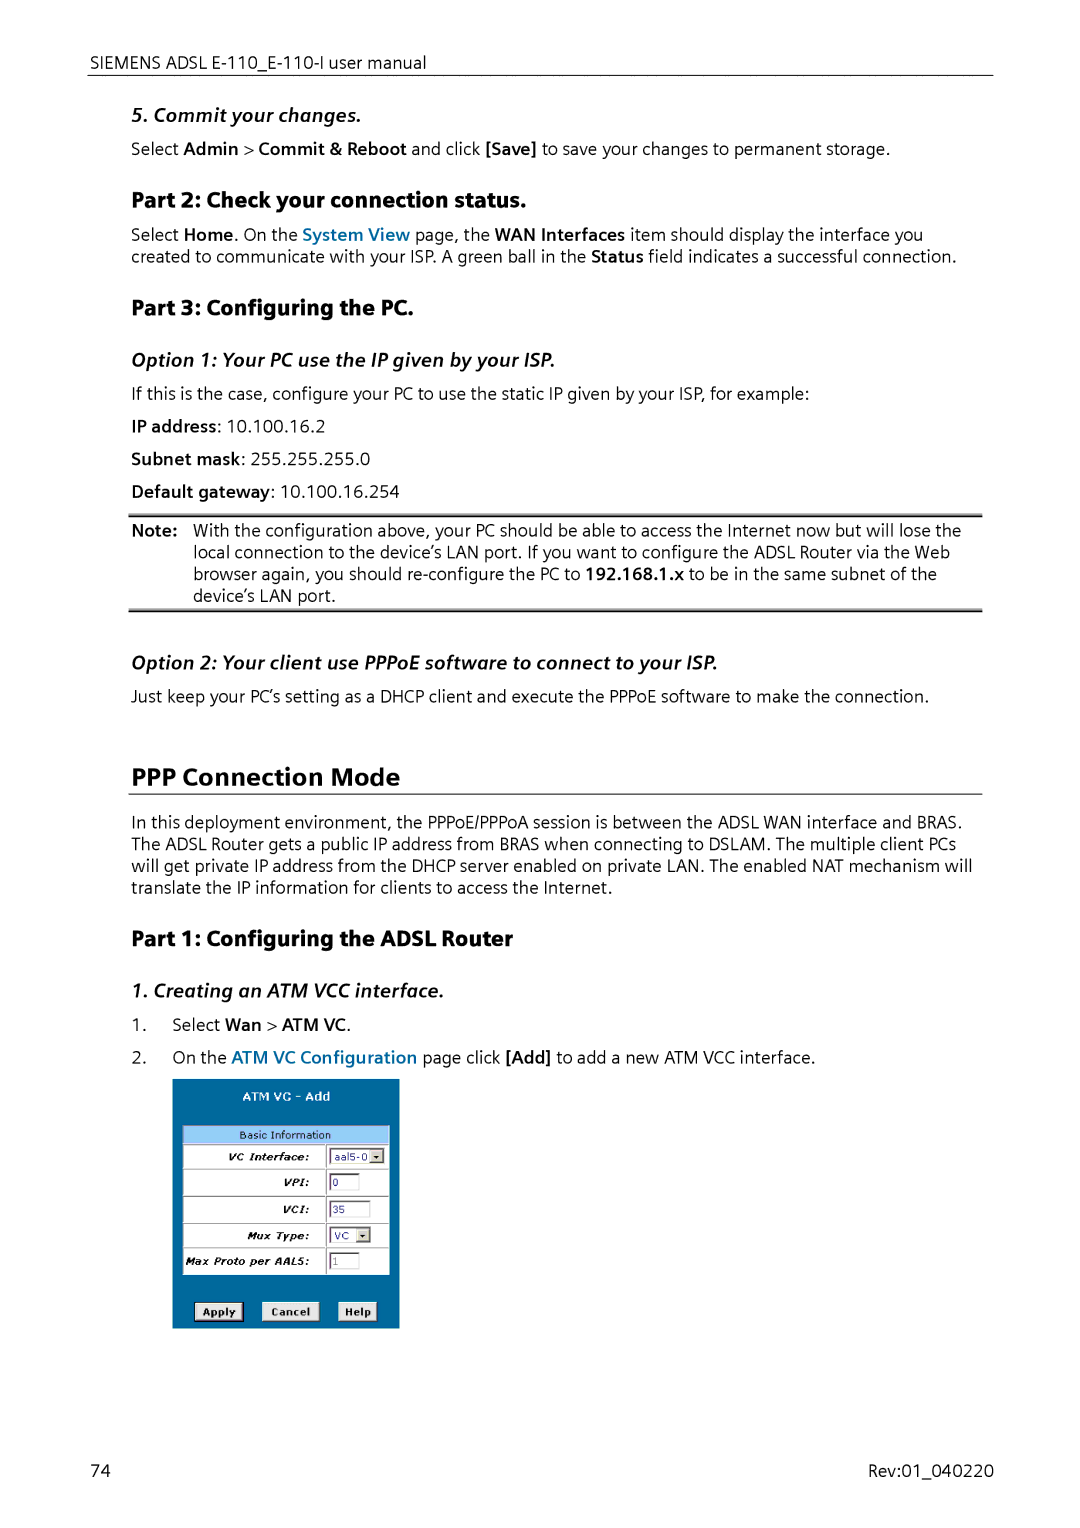
1. Creating an ATM VCC interface.
1.Select Wan > ATM VC.
2.On the ATM VC Configuration page click [Add] to add a new ATM VCC interface.
74 | Rev:01_040220 |