D9 Viewer Software
Viewing Remotely
Now that you have configured the DVR and your PC you can view your DVR over the internet. The DVR can be viewed remotely over the internet using the DVR software on the CD included with the DVR or using a web browser (preferably Internet Explorer). You’ll need to know the PUBLIC IP ADDRESS of your network.
Using Internet Explorer
http://210.9.10.115:85
1.Open up Internet Explorer. (If you do not have Internet Explorer you can download it from the Microsoft website www.microsoft.com.)
2.In the address bar type “HTTP://” followed by your PUBLIC IP ADDRESS, a colon then your WEB PORT. eg “HTTP://210.9.10.115:85” and push ENTER.
See below to for more information regarding your IP address and WEB PORT.
Host Info
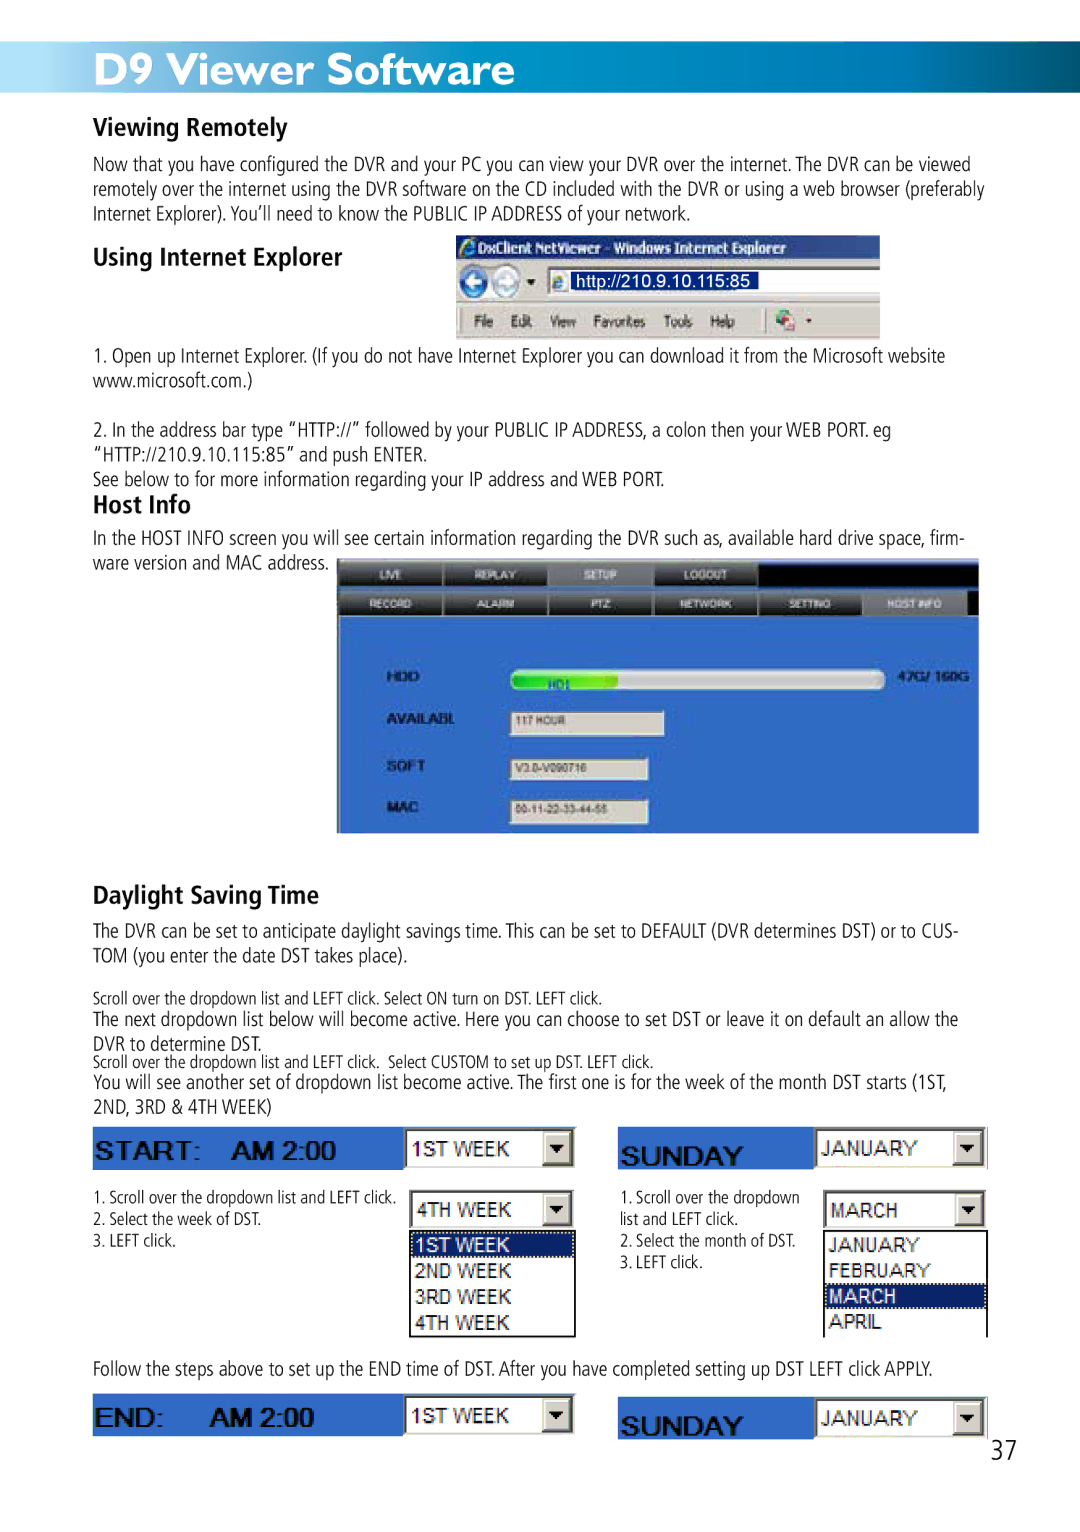
In the HOST INFO screen you will see certain information regarding the DVR such as, available hard drive space, firm- ware version and MAC address.
Daylight Saving Time
The DVR can be set to anticipate daylight savings time. This can be set to DEFAULT (DVR determines DST) or to CUS- TOM (you enter the date DST takes place).
Scroll over the dropdown list and LEFT click. Select ON turn on DST. LEFT click.
The next dropdown list below will become active. Here you can choose to set DST or leave it on default an allow the DVR to determine DST.
Scroll over the dropdown list and LEFT click. Select CUSTOM to set up DST. LEFT click.
You will see another set of dropdown list become active. The first one is for the week of the month DST starts (1ST, 2ND, 3RD & 4TH WEEK)
1.Scroll over the dropdown list and LEFT click.
2.Select the week of DST.
3.LEFT click.
1.Scroll over the dropdown list and LEFT click.
2.Select the month of DST.
3.LEFT click.
Follow the steps above to set up the END time of DST. After you have completed setting up DST LEFT click APPLY.
37