Navigating the Menus
This DVR comes with a USB mouse and also a remote control, and also has a full compliment of control buttons on the front panel. So, basically, you have options!
Note: The USB mouse must be attached to the upper USB port!
The mouse functions just like any PC mouse for easy navigation of the menus. In a nutshell, the left mouse button selects and confirms choices, the right mouse button will take you back towards the main menu. Most users find that attaching a USB mouse to their DVR is the most convenient way to operate it.
If you prefer to use the remote please read the REMOTE LAYOUT page for instructions on using the remote before you attempt to set up your DVR. Most buttons on the remote operate in a similar manner to those on a VCR or DVD player, but due to the specific functionality of the DVR, the function of some buttons may be obvious. These buttons are also located on the front panel of the DVR.
The Main Menu
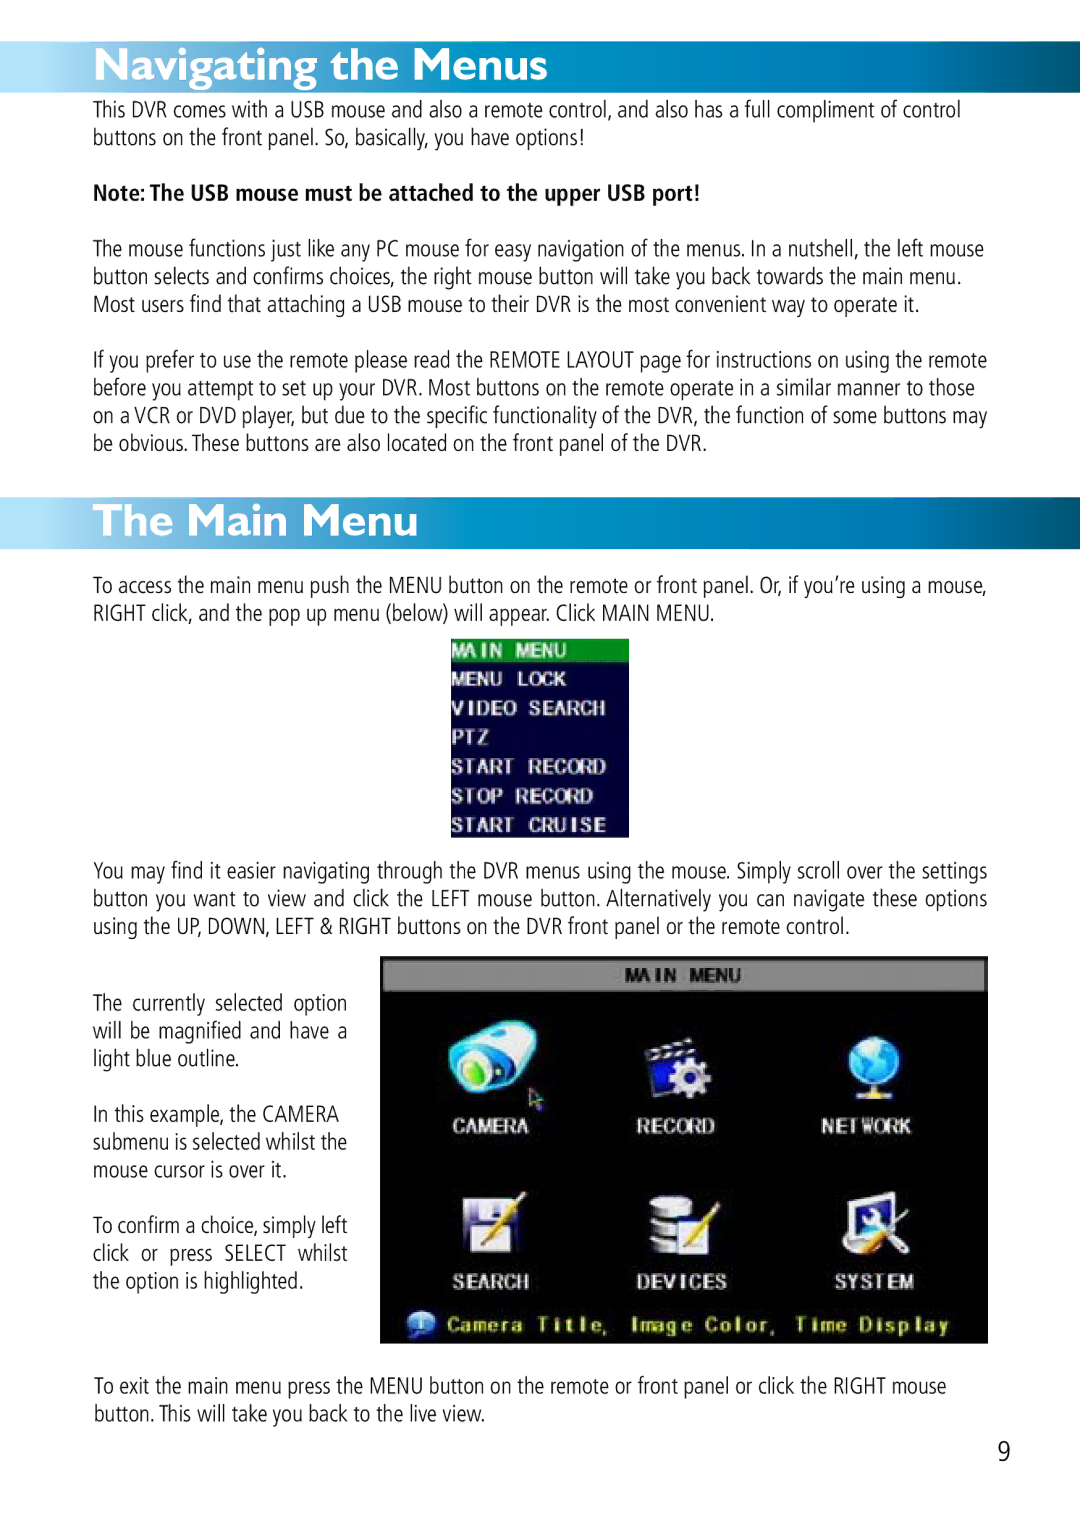
To access the main menu push the MENU button on the remote or front panel. Or, if you’re using a mouse, RIGHT click, and the pop up menu (below) will appear. Click MAIN MENU.
You may find it easier navigating through the DVR menus using the mouse. Simply scroll over the settings button you want to view and click the LEFT mouse button. Alternatively you can navigate these options using the UP, DOWN, LEFT & RIGHT buttons on the DVR front panel or the remote control.
The currently selected option will be magnified and have a light blue outline.
In this example, the CAMERA submenu is selected whilst the mouse cursor is over it.
To confirm a choice, simply left click or press SELECT whilst the option is highlighted.
To exit the main menu press the MENU button on the remote or front panel or click the RIGHT mouse button. This will take you back to the live view.
9
