Installing/Changing the HDD
Note: the following instructions are for installing or changing the hard drive. If your DVR already has a hard drive
1. Ensure the DVR is unplugged and removed from mains power.
2.Locate and remove the 3 screws on the rear of the DVR.
3. Pull up the top case of the DVR.
Remove
Back of DVR
4.Locate the 4 screws holding down the hard drive stand.
Remove
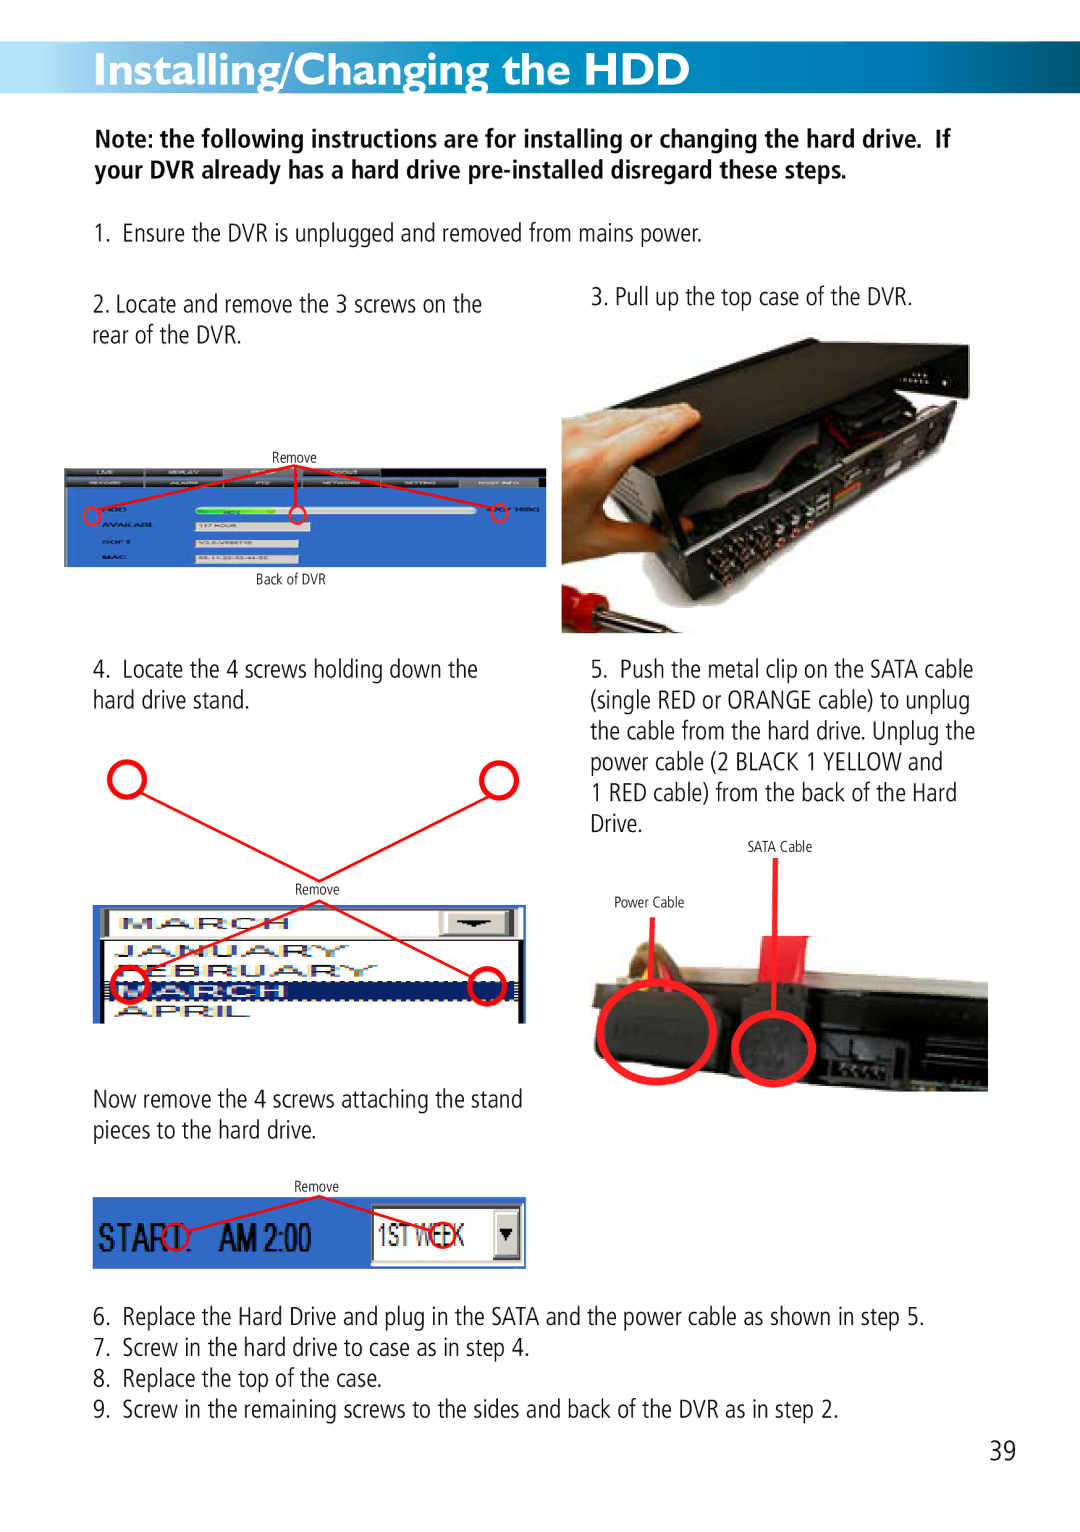
5.Push the metal clip on the SATA cable (single RED or ORANGE cable) to unplug the cable from the hard drive. Unplug the power cable (2 BLACK 1 YELLOW and
1RED cable) from the back of the Hard Drive.
SATA Cable
Power Cable
Now remove the 4 screws attaching the stand pieces to the hard drive.
Remove
6.Replace the Hard Drive and plug in the SATA and the power cable as shown in step 5.
7.Screw in the hard drive to case as in step 4.
8.Replace the top of the case.
9.Screw in the remaining screws to the sides and back of the DVR as in step 2.
39