7 − Copy function
•After you press the F4 key to display the file selection screen, you can select a file to be copied using the function keys. When the file selection screen is first displayed, all files are selected. (That is, all files are marked with a check mark to the left of each file name.)
To select or deselect a highlighted file, press the F1 key.
To select all files, press the F2 (ALL SEL.) key.
To deselect all selected files, press the F3 (ALL REL.) key.
To display the project selection screen, press the F4 (PROJECT) key or the CANCEL key.
•If the total size of the selected files exceeds the available space on the destination disc, a popup message appears and all operations, excluding deselection of the files, will be dis- abled.
6Press the ENTER key to confirm the file selection.
If a project in the copy destination uses the same name as the selected source project, a screen will request confirmation for the copy operation.
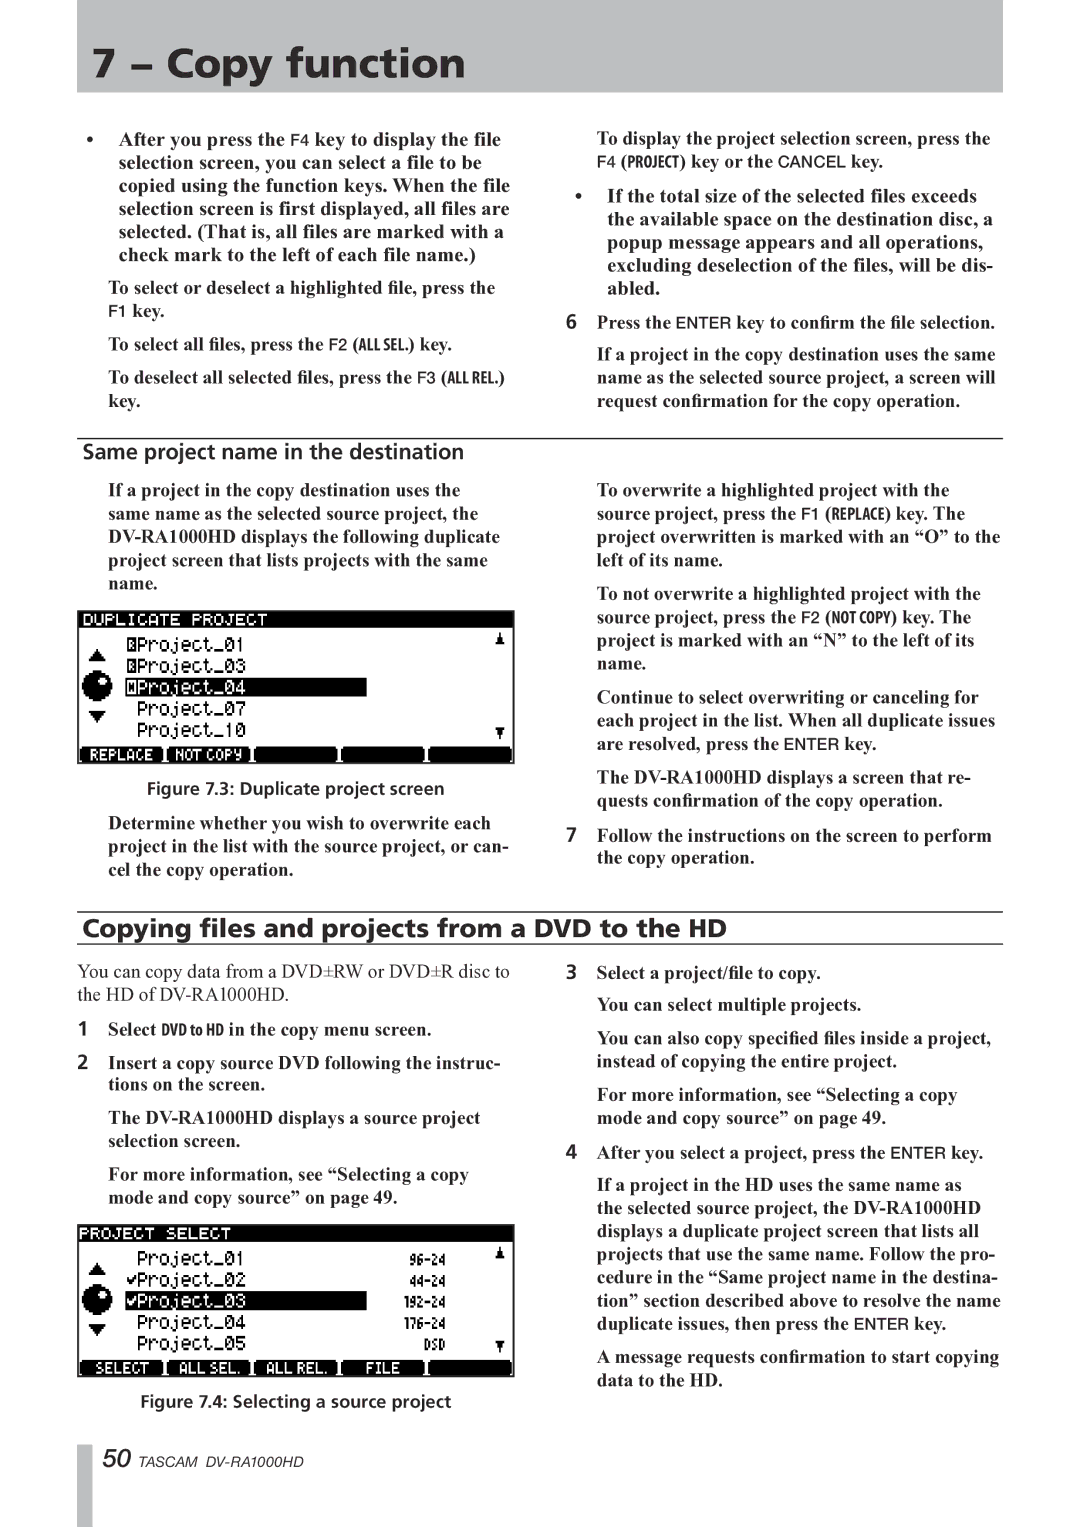
Same project name in the destination
If a project in the copy destination uses the same name as the selected source project, the
Figure 7.3: Duplicate project screen
Determine whether you wish to overwrite each project in the list with the source project, or can- cel the copy operation.
To overwrite a highlighted project with the source project, press the F1 (REPLACE) key. The project overwritten is marked with an “O” to the left of its name.
To not overwrite a highlighted project with the source project, press the F2 (NOT COPY) key. The project is marked with an “N” to the left of its name.
Continue to select overwriting or canceling for each project in the list. When all duplicate issues are resolved, press the ENTER key.
The
7Follow the instructions on the screen to perform the copy operation.
Copying files and projects from a DVD to the HD
You can copy data from a DVD±RW or DVD±R disc to the HD of
1Select DVD to HD in the copy menu screen.
2Insert a copy source DVD following the instruc- tions on the screen.
The
For more information, see “Selecting a copy mode and copy source” on page 49.
Figure 7.4: Selecting a source project
3Select a project/file to copy.
You can select multiple projects.
You can also copy specified files inside a project, instead of copying the entire project.
For more information, see “Selecting a copy mode and copy source” on page 49.
4After you select a project, press the ENTER key.
If a project in the HD uses the same name as the selected source project, the
A message requests confirmation to start copying data to the HD.
50 TASCAM