7 − Copy function
Creating an audio CD using a project on the HD
You can create an audio CD using project files on the HD of
1Select HD to CD in the copy menu screen.
2Insert a copy destination CD following the in- structions on the screen.
The
•If you have inserted a
Press the ENTER key to delete the data on the disc. To change the disc, press the CANCEL key.
The unit opens the tray and displays a popup message that prompts you to insert a disc.
After you delete the data on the
If you have inserted any other disc, the unit opens the tray and displays a popup message that requests that you insert a disc.
For more information, see “Selecting a copy mode and copy source” on page 49.
Figure 7.6: Selecting a source project
3Select files to copy.
First select a project that contains the file or files you wish to copy, then select the files.
4After you select files, press the ENTER key.
The
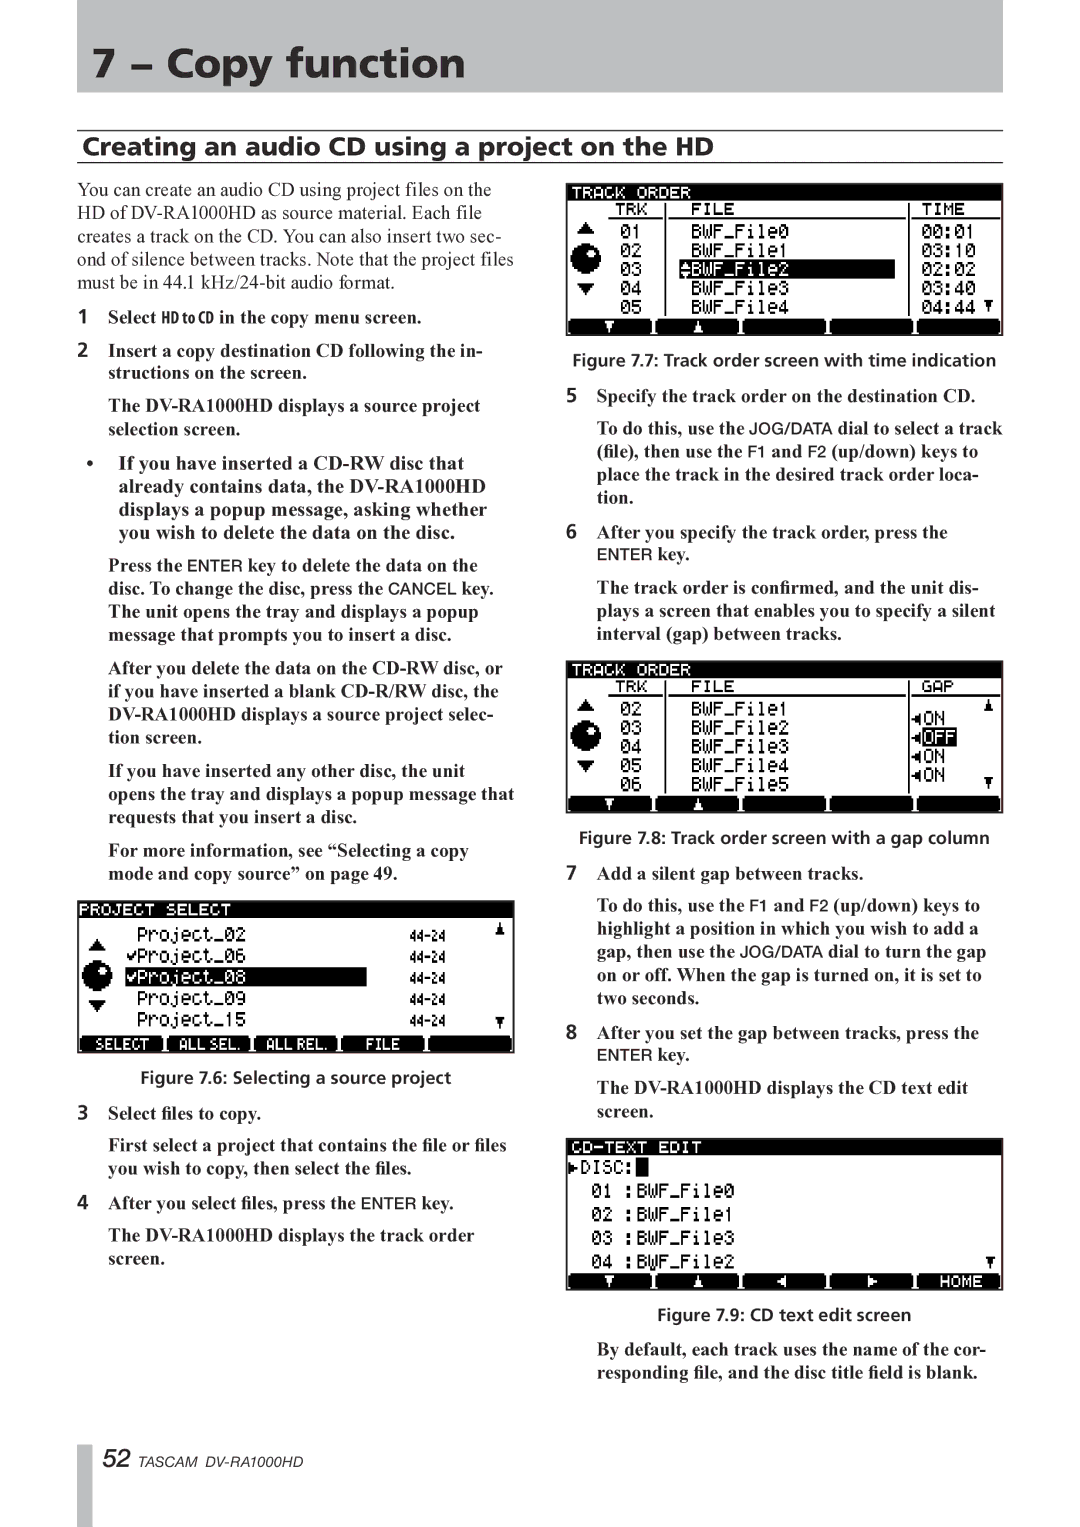
Figure 7.7: Track order screen with time indication
5Specify the track order on the destination CD.
To do this, use the JOG/DATA dial to select a track (file), then use the F1 and F2 (up/down) keys to place the track in the desired track order loca- tion.
6After you specify the track order, press the
ENTER key.
The track order is confirmed, and the unit dis- plays a screen that enables you to specify a silent interval (gap) between tracks.
Figure 7.8: Track order screen with a gap column
7Add a silent gap between tracks.
To do this, use the F1 and F2 (up/down) keys to highlight a position in which you wish to add a gap, then use the JOG/DATA dial to turn the gap on or off. When the gap is turned on, it is set to two seconds.
8After you set the gap between tracks, press the
ENTER key.
The DV-RA1000HD displays the CD text edit screen.
Figure 7.9: CD text edit screen
By default, each track uses the name of the cor- responding file, and the disc title field is blank.
52 TASCAM