6.Copy & File
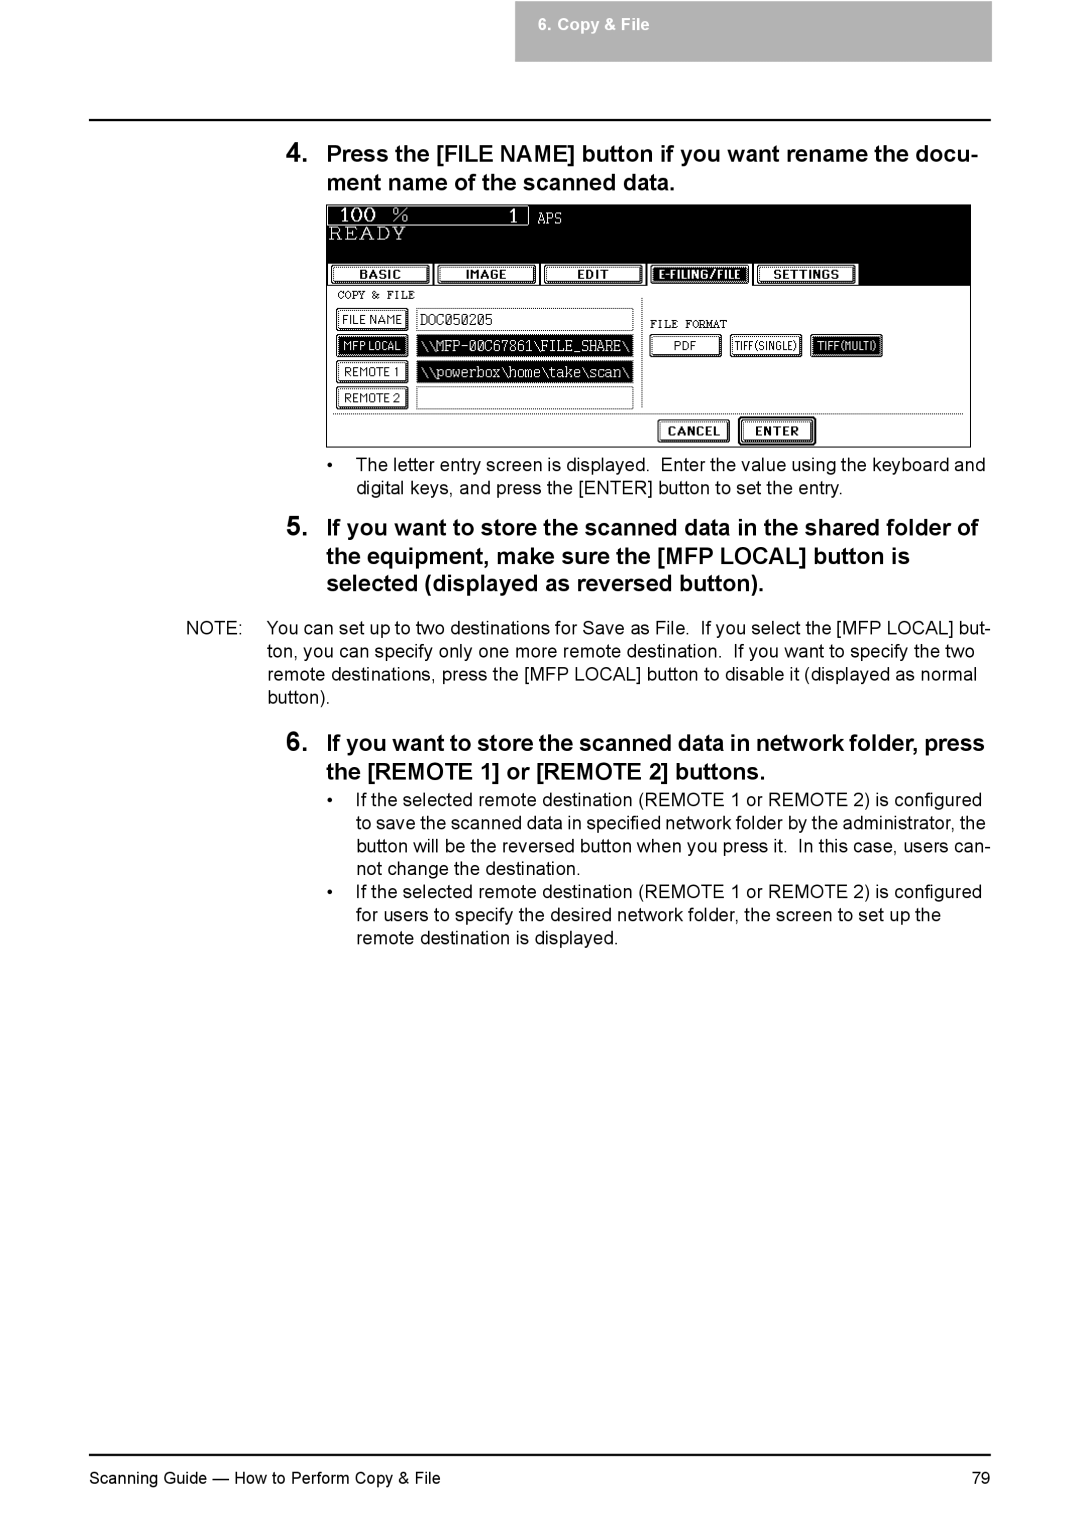
4.Press the [FILE NAME] button if you want rename the docu- ment name of the scanned data.
•The letter entry screen is displayed. Enter the value using the keyboard and digital keys, and press the [ENTER] button to set the entry.
5.If you want to store the scanned data in the shared folder of the equipment, make sure the [MFP LOCAL] button is selected (displayed as reversed button).
NOTE: You can set up to two destinations for Save as File. If you select the [MFP LOCAL] but- ton, you can specify only one more remote destination. If you want to specify the two remote destinations, press the [MFP LOCAL] button to disable it (displayed as normal button).
6.If you want to store the scanned data in network folder, press the [REMOTE 1] or [REMOTE 2] buttons.
•If the selected remote destination (REMOTE 1 or REMOTE 2) is configured to save the scanned data in specified network folder by the administrator, the button will be the reversed button when you press it. In this case, users can- not change the destination.
•If the selected remote destination (REMOTE 1 or REMOTE 2) is configured for users to specify the desired network folder, the screen to set up the remote destination is displayed.
Scanning Guide — How to Perform Copy & File | 79 |
