7. Internet Fax
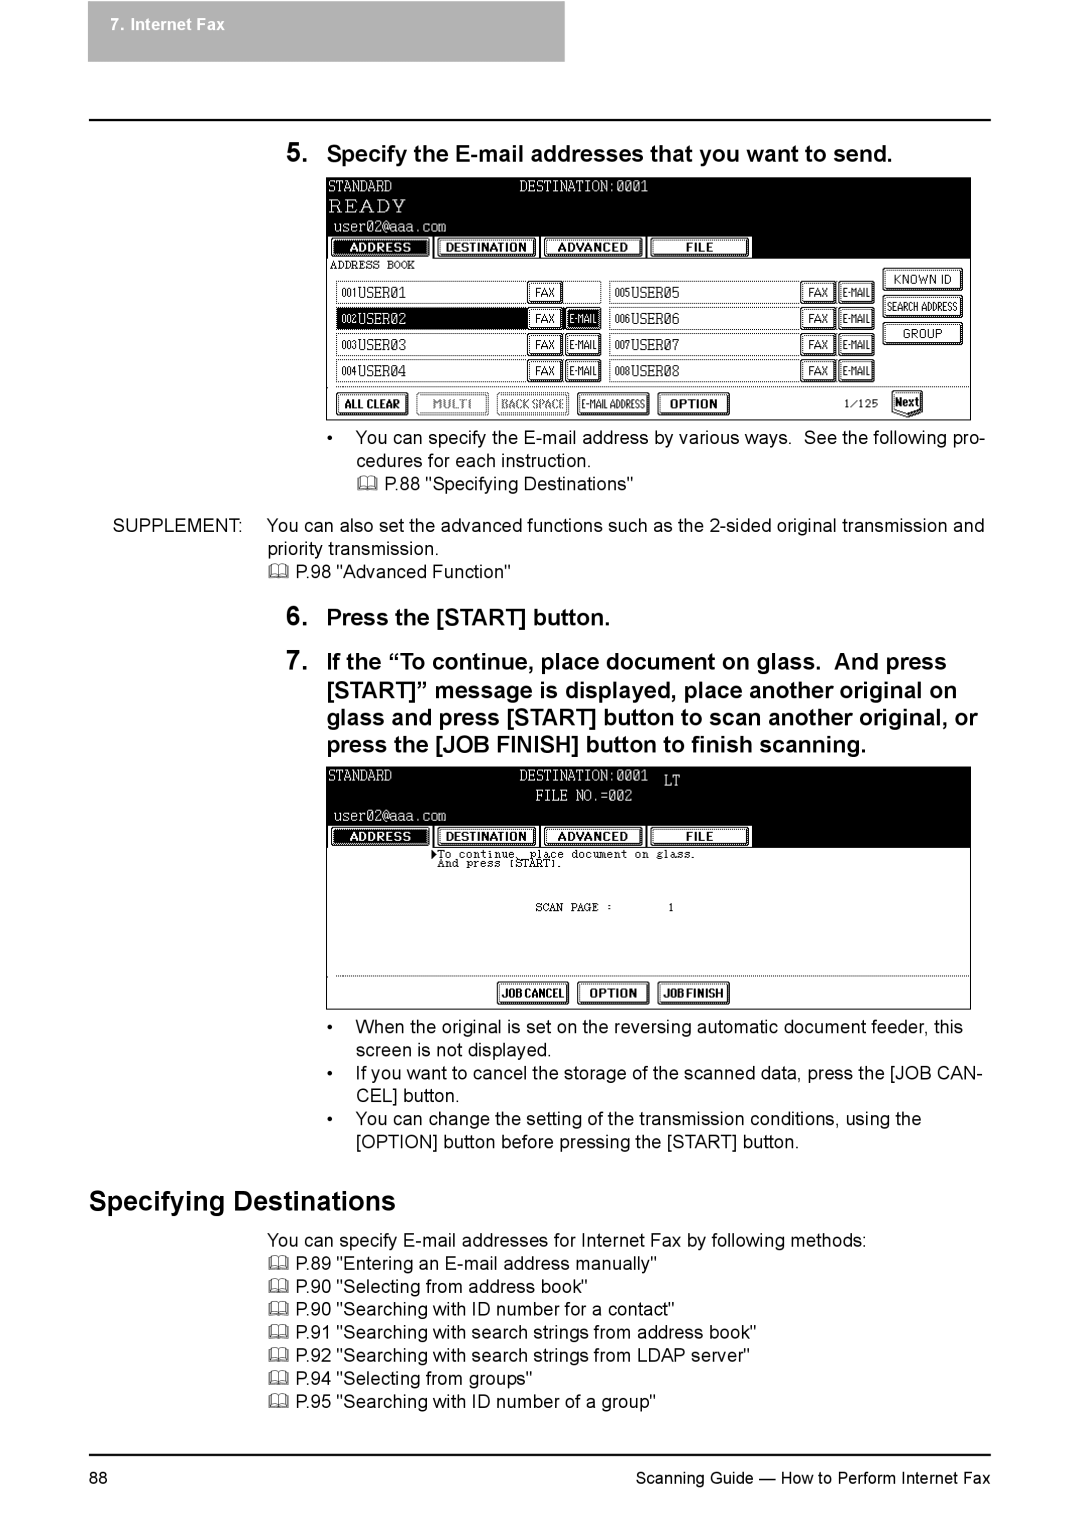
5.Specify the E-mail addresses that you want to send.
•You can specify the
P.88 "Specifying Destinations"
SUPPLEMENT: You can also set the advanced functions such as the
P.98 "Advanced Function"
6.Press the [START] button.
7.If the “To continue, place document on glass. And press [START]” message is displayed, place another original on glass and press [START] button to scan another original, or press the [JOB FINISH] button to finish scanning.
•When the original is set on the reversing automatic document feeder, this screen is not displayed.
•If you want to cancel the storage of the scanned data, press the [JOB CAN- CEL] button.
•You can change the setting of the transmission conditions, using the [OPTION] button before pressing the [START] button.
Specifying Destinations
You can specify
P.89 "Entering an
P.90 "Selecting from address book"
P.90 "Searching with ID number for a contact"
P.91 "Searching with search strings from address book"
P.92 "Searching with search strings from LDAP server"
P.94 "Selecting from groups"
P.95 "Searching with ID number of a group"
88 | Scanning Guide — How to Perform Internet Fax |