8. INSTALLING AND REPLACING THE RECEIPT AND JOURNAL ROLLS |
8.2 Installing/Replacing the Journal Roll
#/NS | RF | JF |
| C | X/TIME |
7 | 8 | 9 |
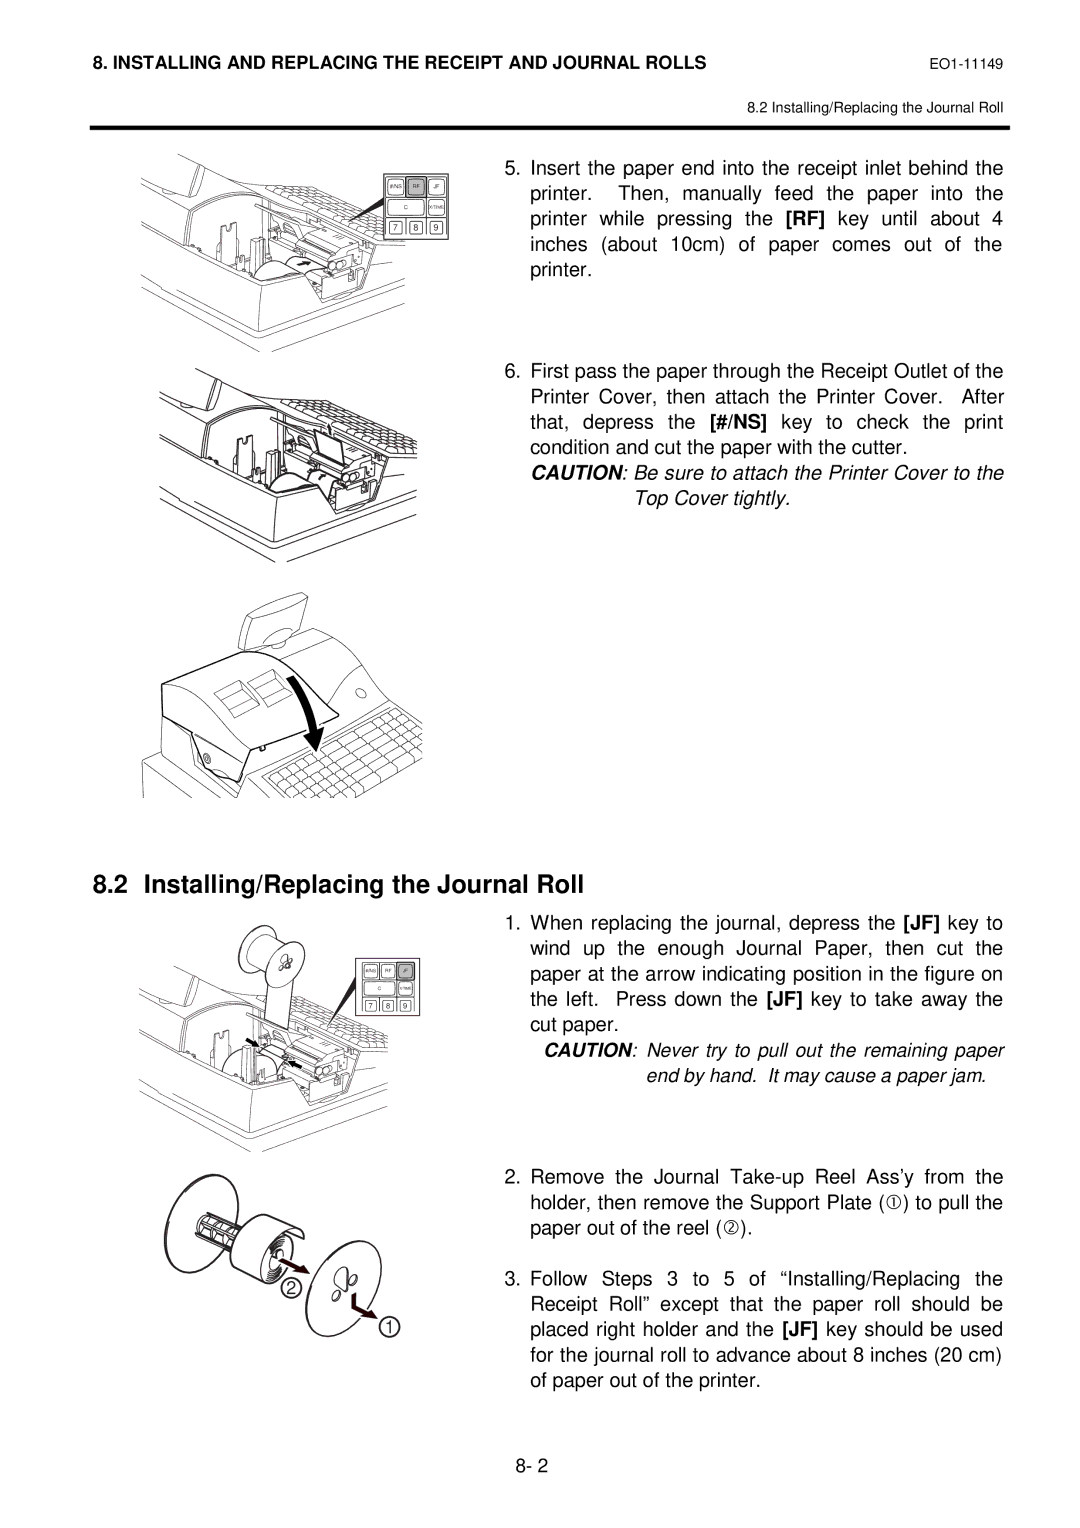
5.Insert the paper end into the receipt inlet behind the printer. Then, manually feed the paper into the printer while pressing the [RF] key until about 4 inches (about 10cm) of paper comes out of the printer.
6. First pass the paper through the Receipt Outlet of the Printer Cover, then attach the Printer Cover. After that, depress the [#/NS] key to check the print condition and cut the paper with the cutter.
CAUTION: Be sure to attach the Printer Cover to the
Top Cover tightly.
8.2 Installing/Replacing the Journal Roll
#/NS RF JF
C X/TIME
7 8 9
2
1
1.When replacing the journal, depress the [JF] key to wind up the enough Journal Paper, then cut the paper at the arrow indicating position in the figure on the left. Press down the [JF] key to take away the cut paper.
CAUTION: Never try to pull out the remaining paper end by hand. It may cause a paper jam.
2.Remove the Journal
3.Follow Steps 3 to 5 of “Installing/Replacing the Receipt Roll” except that the paper roll should be placed right holder and the [JF] key should be used for the journal roll to advance about 8 inches (20 cm) of paper out of the printer.
8- 2
