MODEL C24EA - DRAIN BOX
Adjustment
1.Reinstall striker with slot pointing upward and hand tighten nut only.
2.Close door to center striker in front panel mounting hole.
3.Open door and check striker slot for horizontal alignment. The slot on striker must be kept horizontal in order for door latch to catch properly and latch.
4.Once proper slot alignment has been set, hold striker close to its base then tighten the striker nut. Be careful not to damage striker slot when tightening or door may not latch properly.
NOTE: Do not
NOTE: If door does not open easily, add shims between striker and cabinet front. When adding shims make certain that door gasket seals properly and steamer does not leak. Remove shims as necessary until leaking stops.
DRAIN BOX
WARNING: DISCONNECT THE ELECTRICAL POWER TO THE MACHINE AND FOLLOW LOCKOUT / TAGOUT PROCEDURES.
REMOVAL AND REPLACEMENT
1.Turn off machine to drain steam generator tank. Allow steamer to complete drain cycle.
A. Turn off water supply.
2.Disconnect the drain plumbing from drain box outlet fitting.
3.Remove the RIGHT AND LEFT SIDE PANELS as outlined in COVERS AND PANELS.
NOTE: Use plumbing sealant when reinstalling condensate thermostat.
4.Disconnect the condensate thermostat electrical wiring.
A.Remove the condensate thermostat from drain box.
5.Disconnect the cooling solenoid and cooking compartment drain hoses.
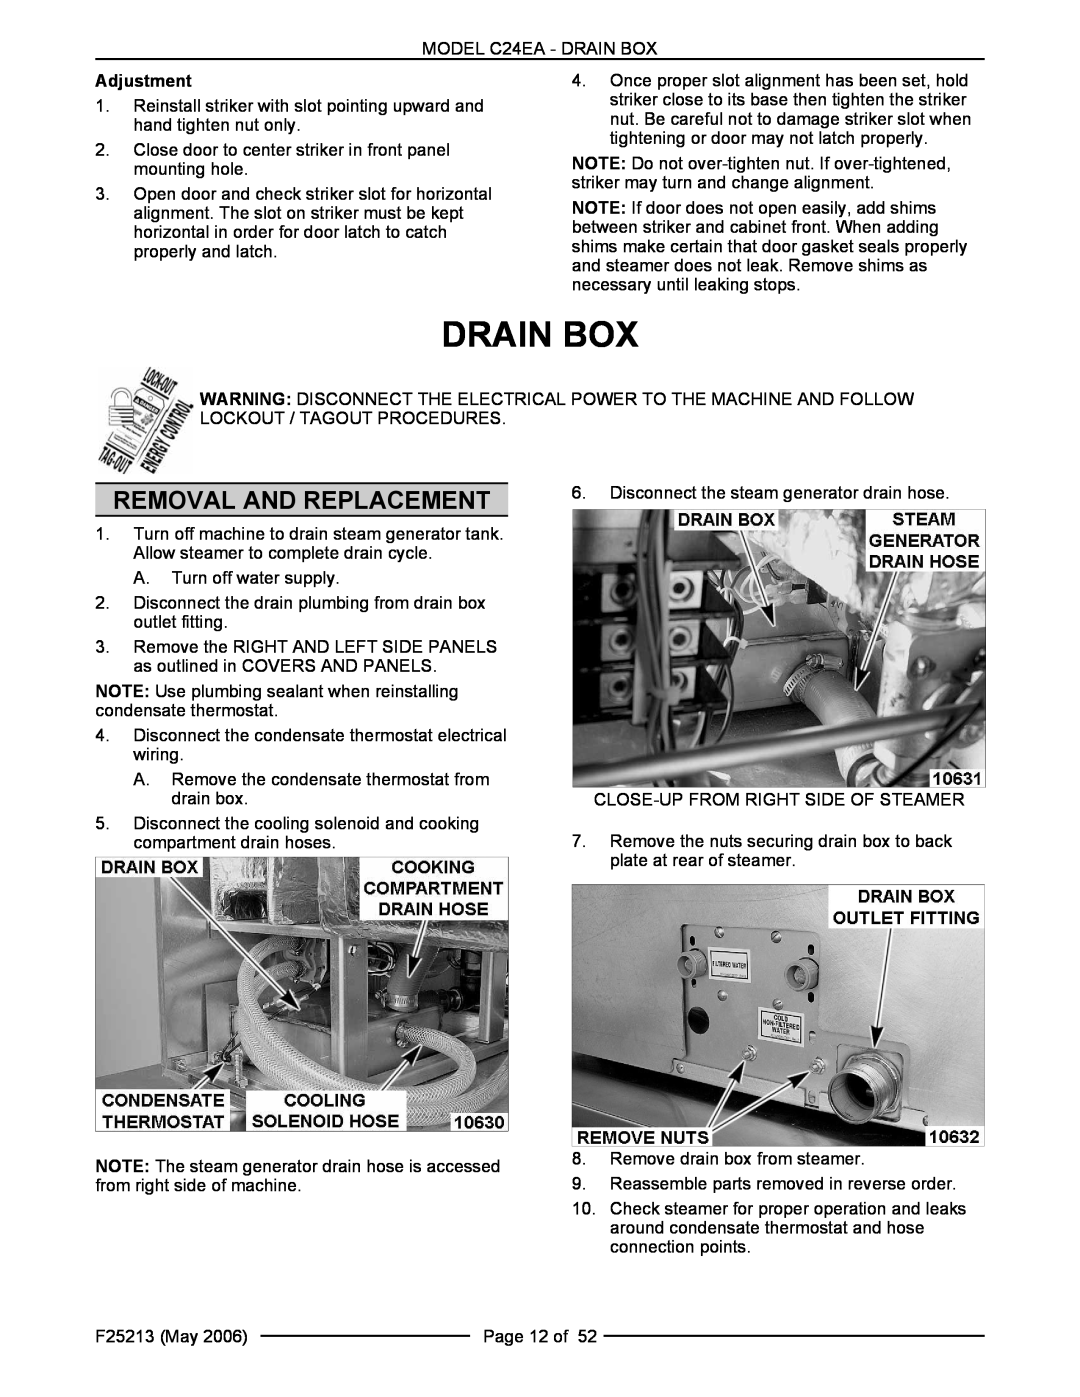
6.Disconnect the steam generator drain hose.
7.Remove the nuts securing drain box to back plate at rear of steamer.
NOTE: The steam generator drain hose is accessed from right side of machine.
8.Remove drain box from steamer.
9.Reassemble parts removed in reverse order.
10.Check steamer for proper operation and leaks around condensate thermostat and hose connection points.
F25213 (May 2006) |
| Page 12 of 52 |
|