MODEL C24EA - STEAM GENERATOR TANK
STEAM GENERATOR TANK
WARNING: DISCONNECT THE ELECTRICAL POWER TO THE MACHINE AND FOLLOW LOCKOUT / TAGOUT PROCEDURES.
REMOVAL AND REPLACEMENT
1.Turn off machine to drain steam generator tank. Allow steamer to complete drain cycle.
A. Turn off water supply.
2.Remove the TOP COVER, RIGHT and REAR PANEL as outlined under COVERS AND PANELS.
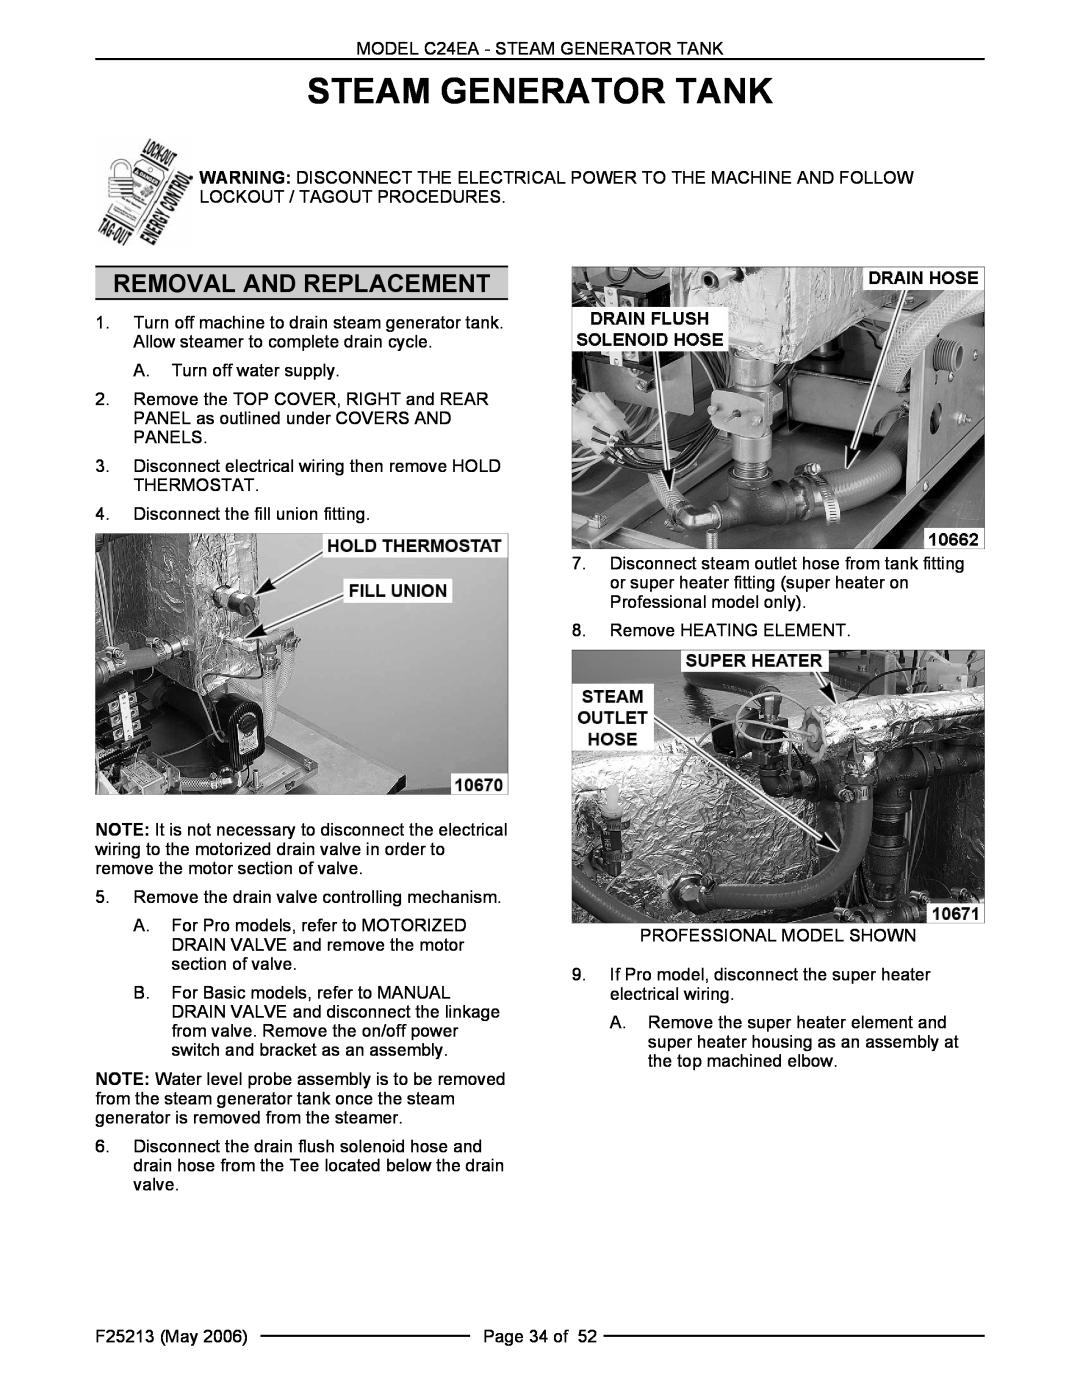
3.Disconnect electrical wiring then remove HOLD THERMOSTAT.
4.Disconnect the fill union fitting.
NOTE: It is not necessary to disconnect the electrical wiring to the motorized drain valve in order to remove the motor section of valve.
5.Remove the drain valve controlling mechanism.
A.For Pro models, refer to MOTORIZED DRAIN VALVE and remove the motor section of valve.
B.For Basic models, refer to MANUAL DRAIN VALVE and disconnect the linkage from valve. Remove the on/off power switch and bracket as an assembly.
NOTE: Water level probe assembly is to be removed from the steam generator tank once the steam generator is removed from the steamer.
6.Disconnect the drain flush solenoid hose and drain hose from the Tee located below the drain valve.
7.Disconnect steam outlet hose from tank fitting or super heater fitting (super heater on Professional model only).
8.Remove HEATING ELEMENT.
PROFESSIONAL MODEL SHOWN
9.If Pro model, disconnect the super heater electrical wiring.
A.Remove the super heater element and super heater housing as an assembly at the top machined elbow.
F25213 (May 2006) |
| Page 34 of 52 |
|