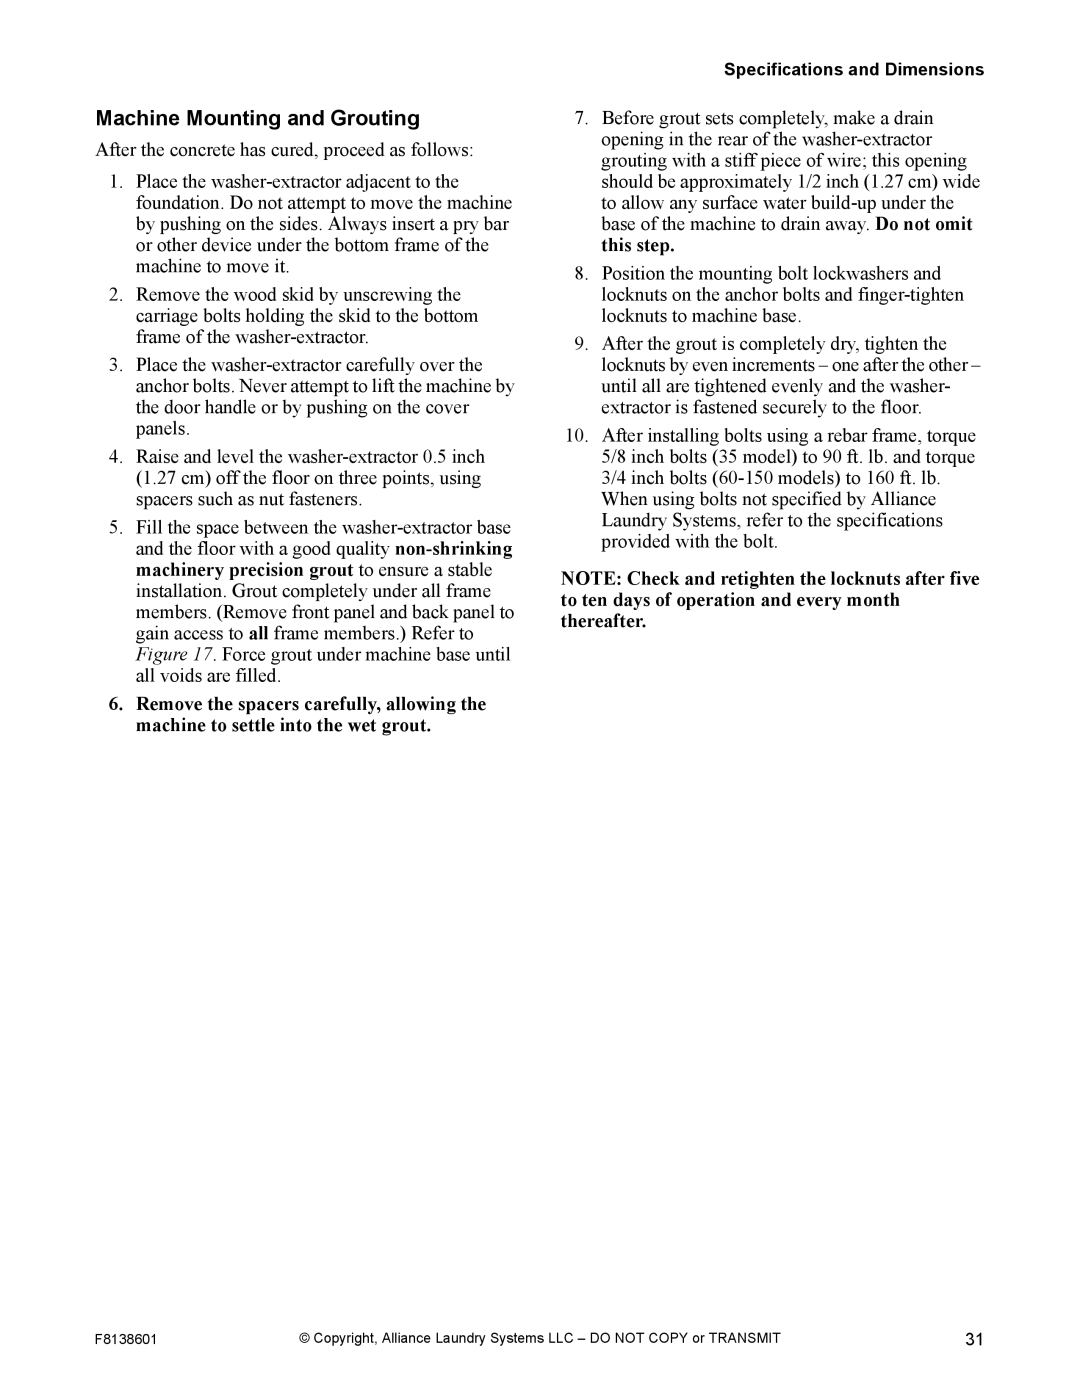
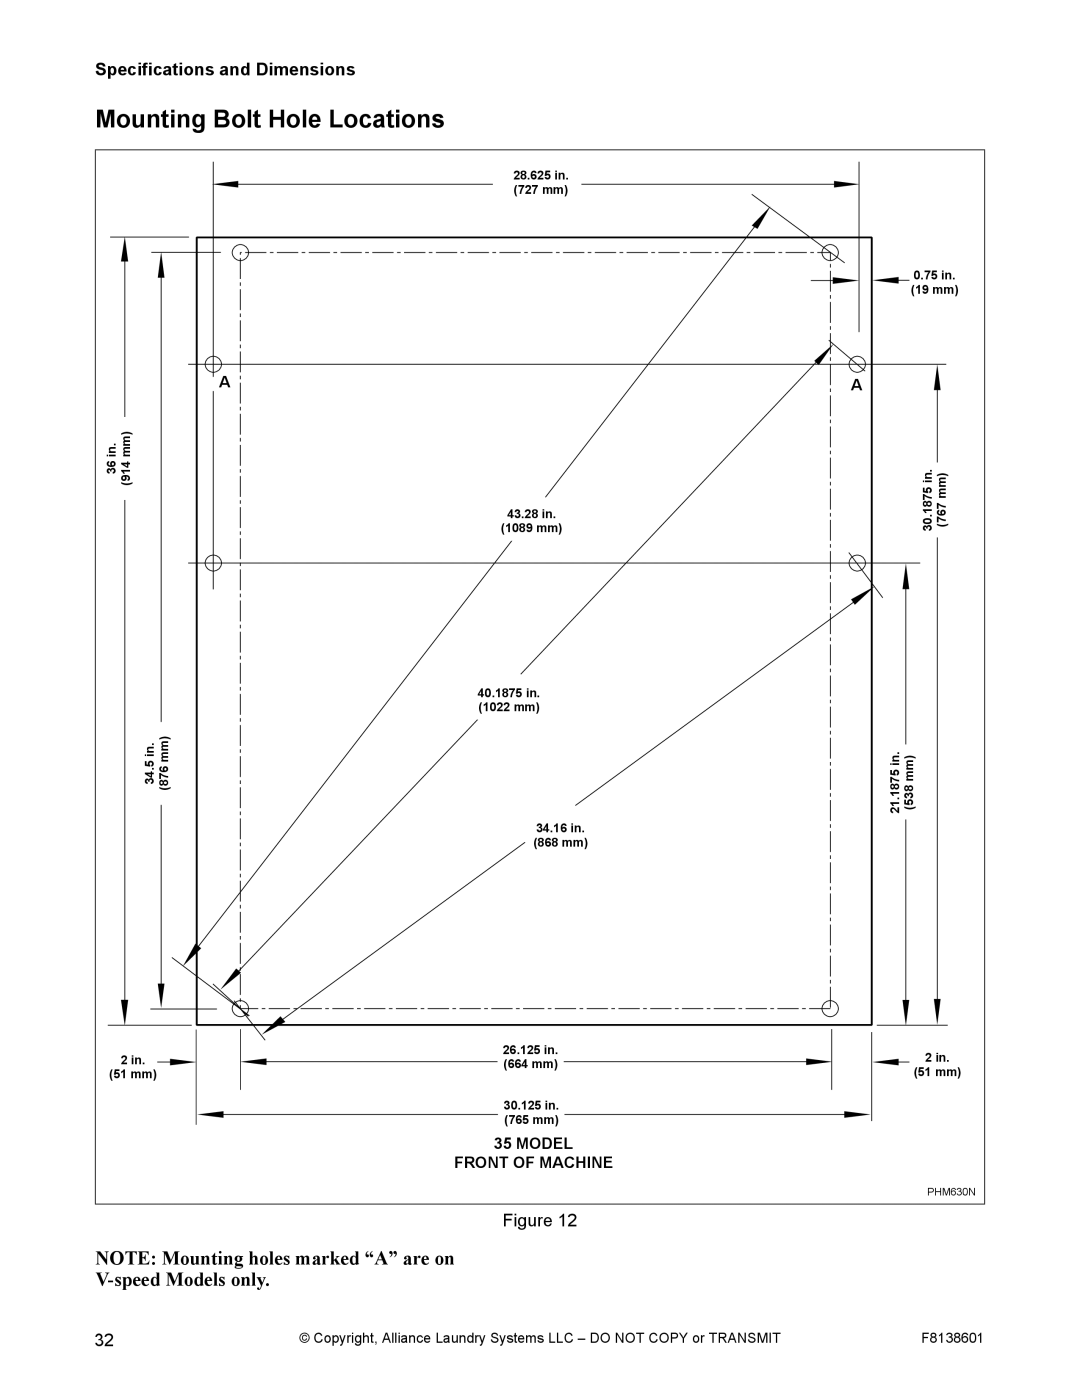
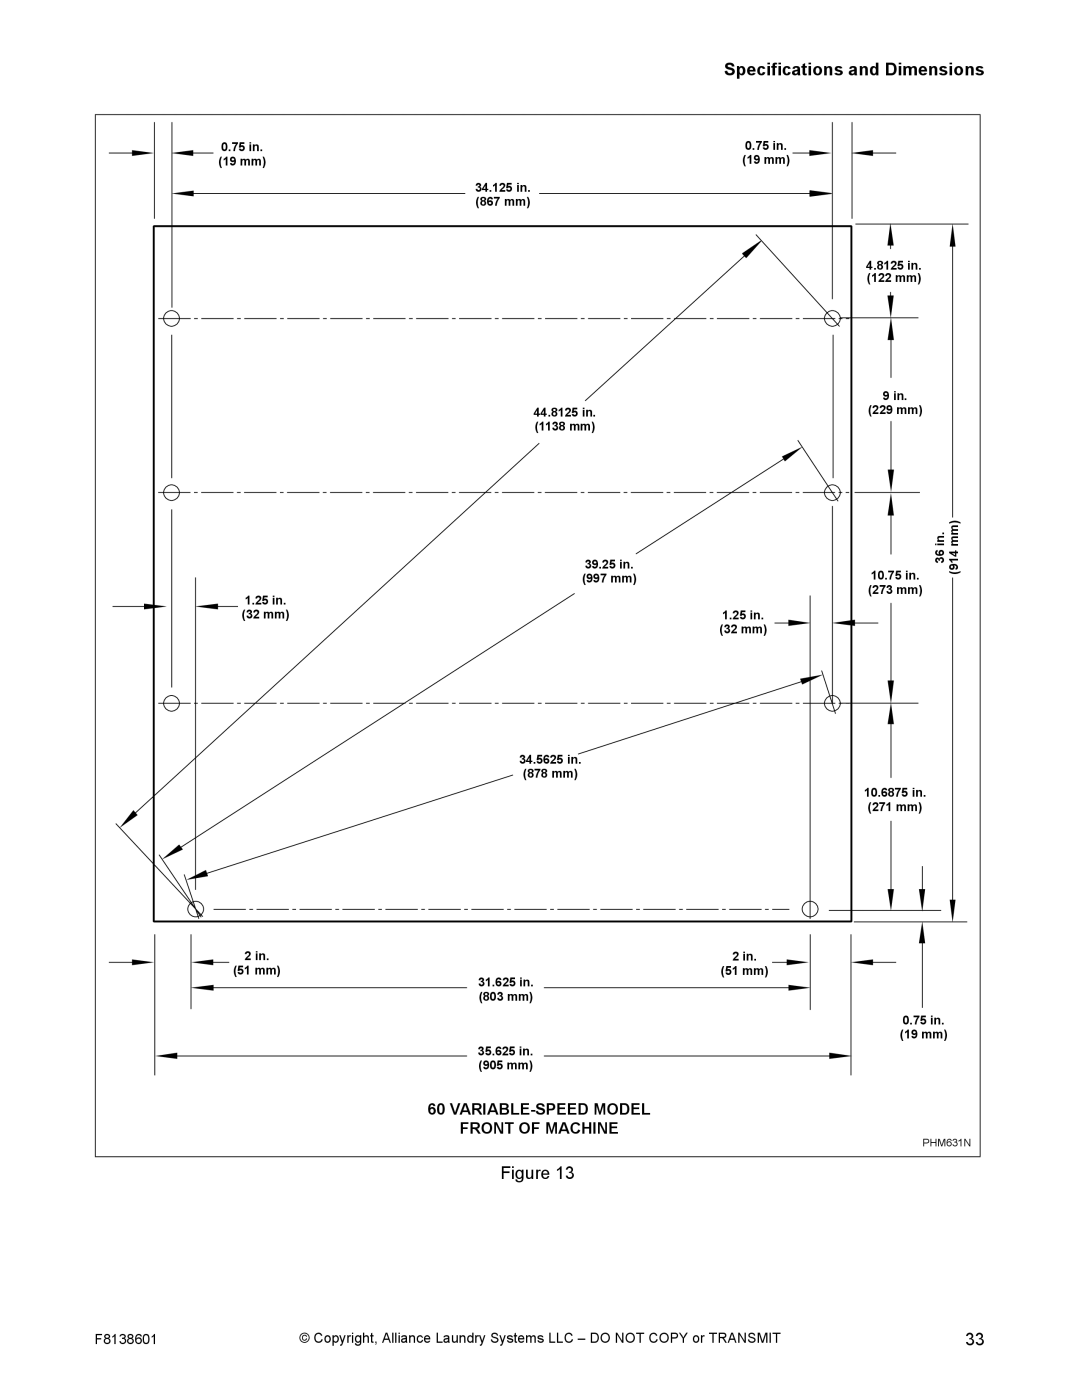
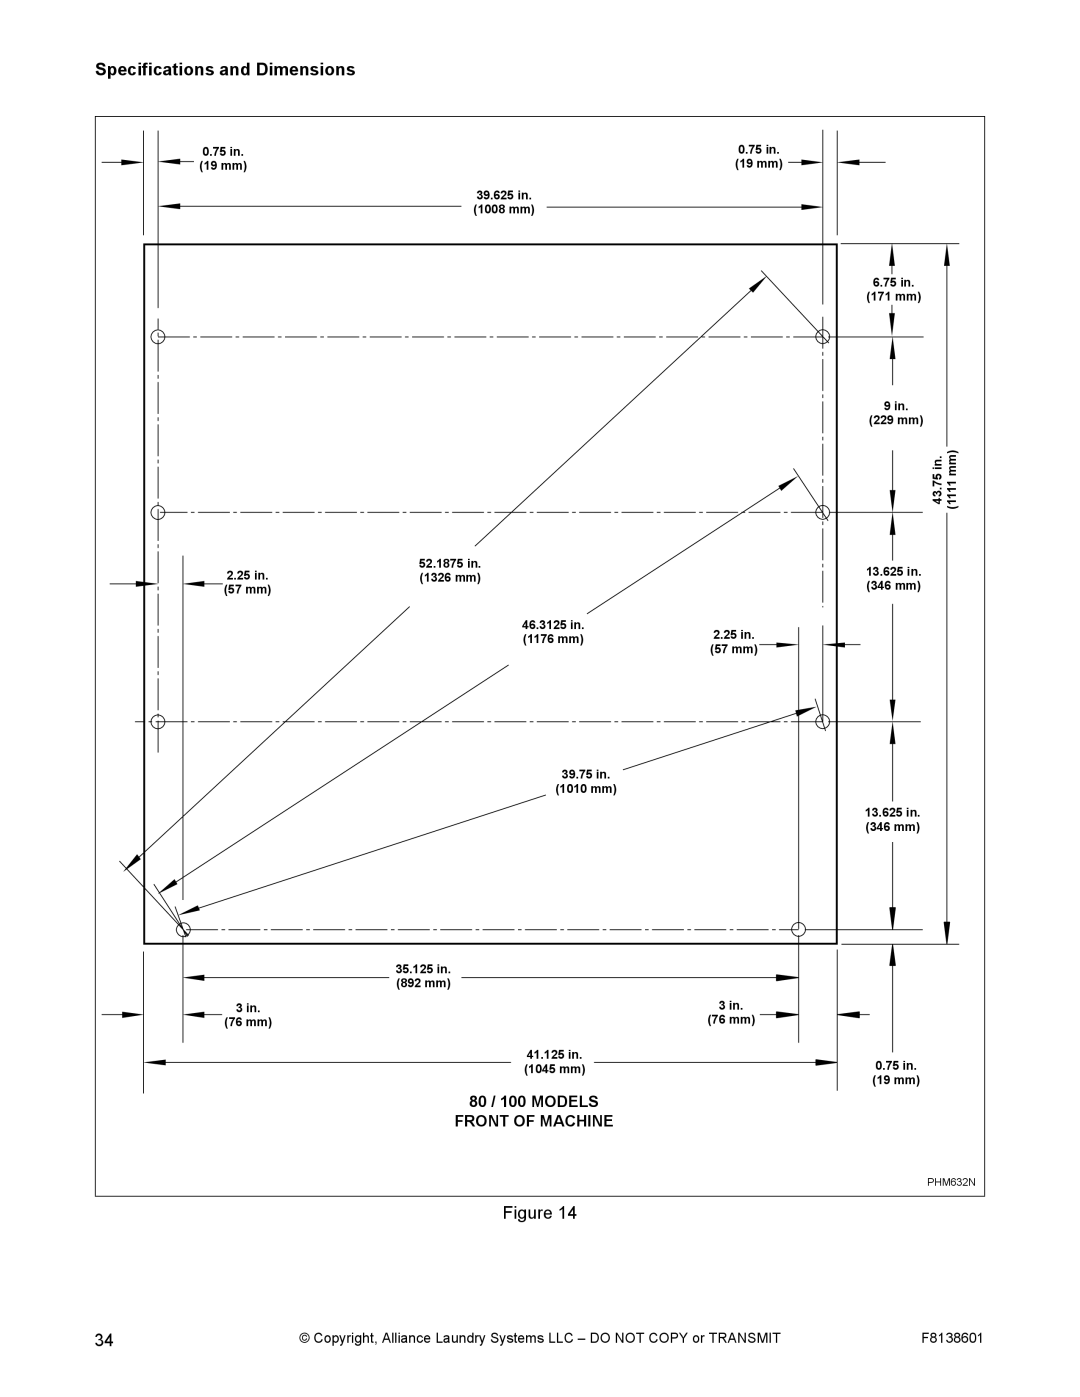
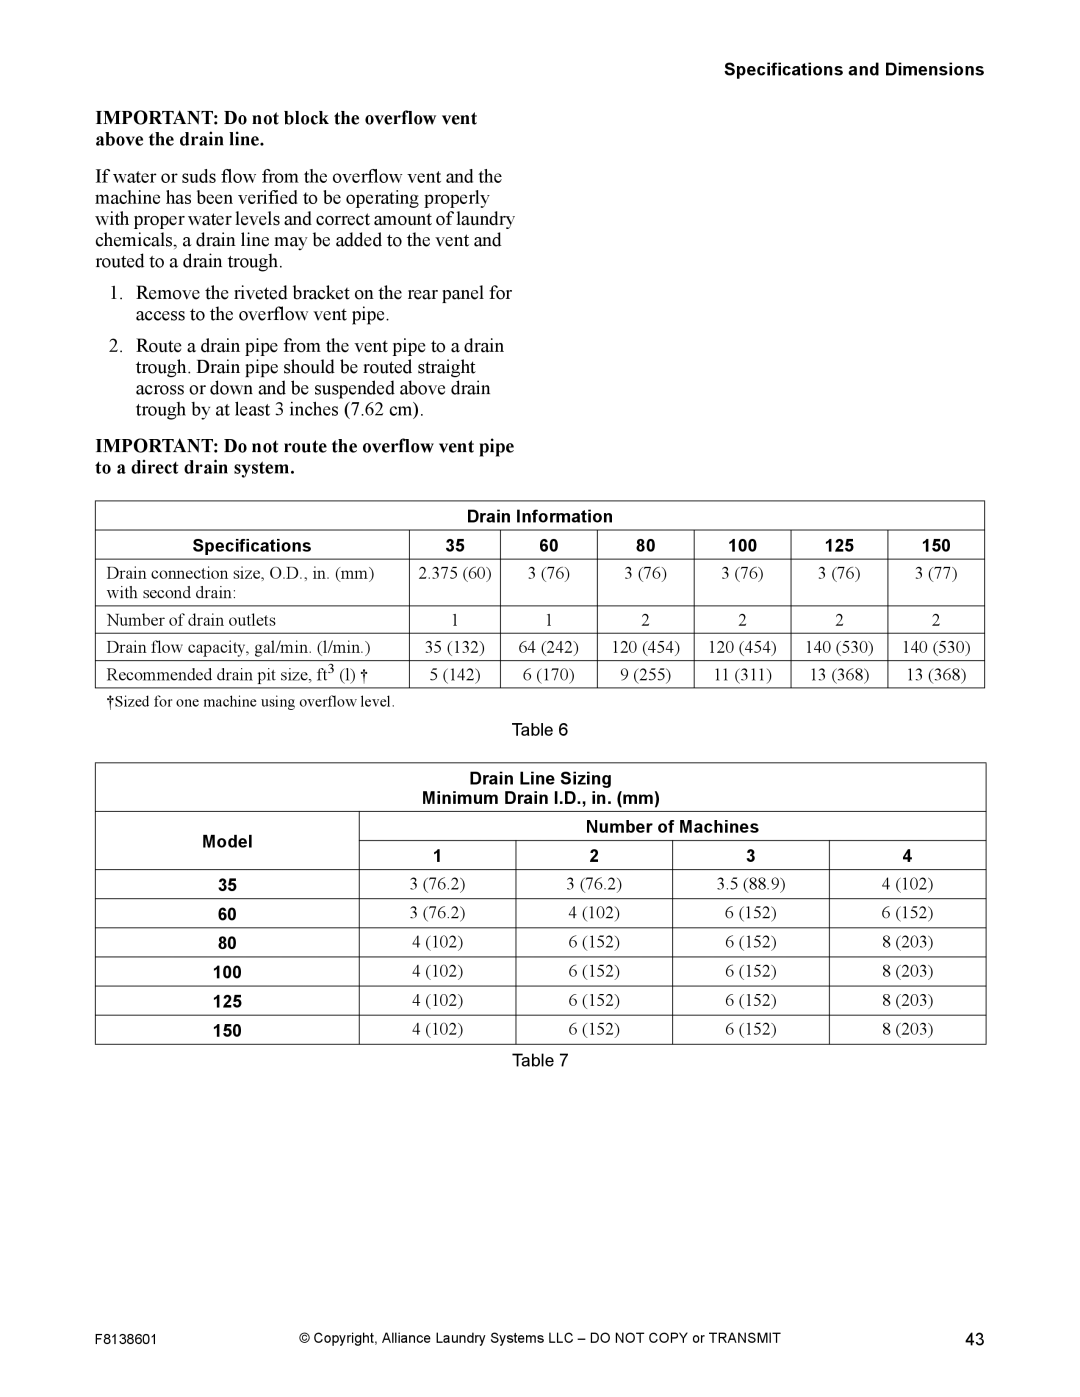
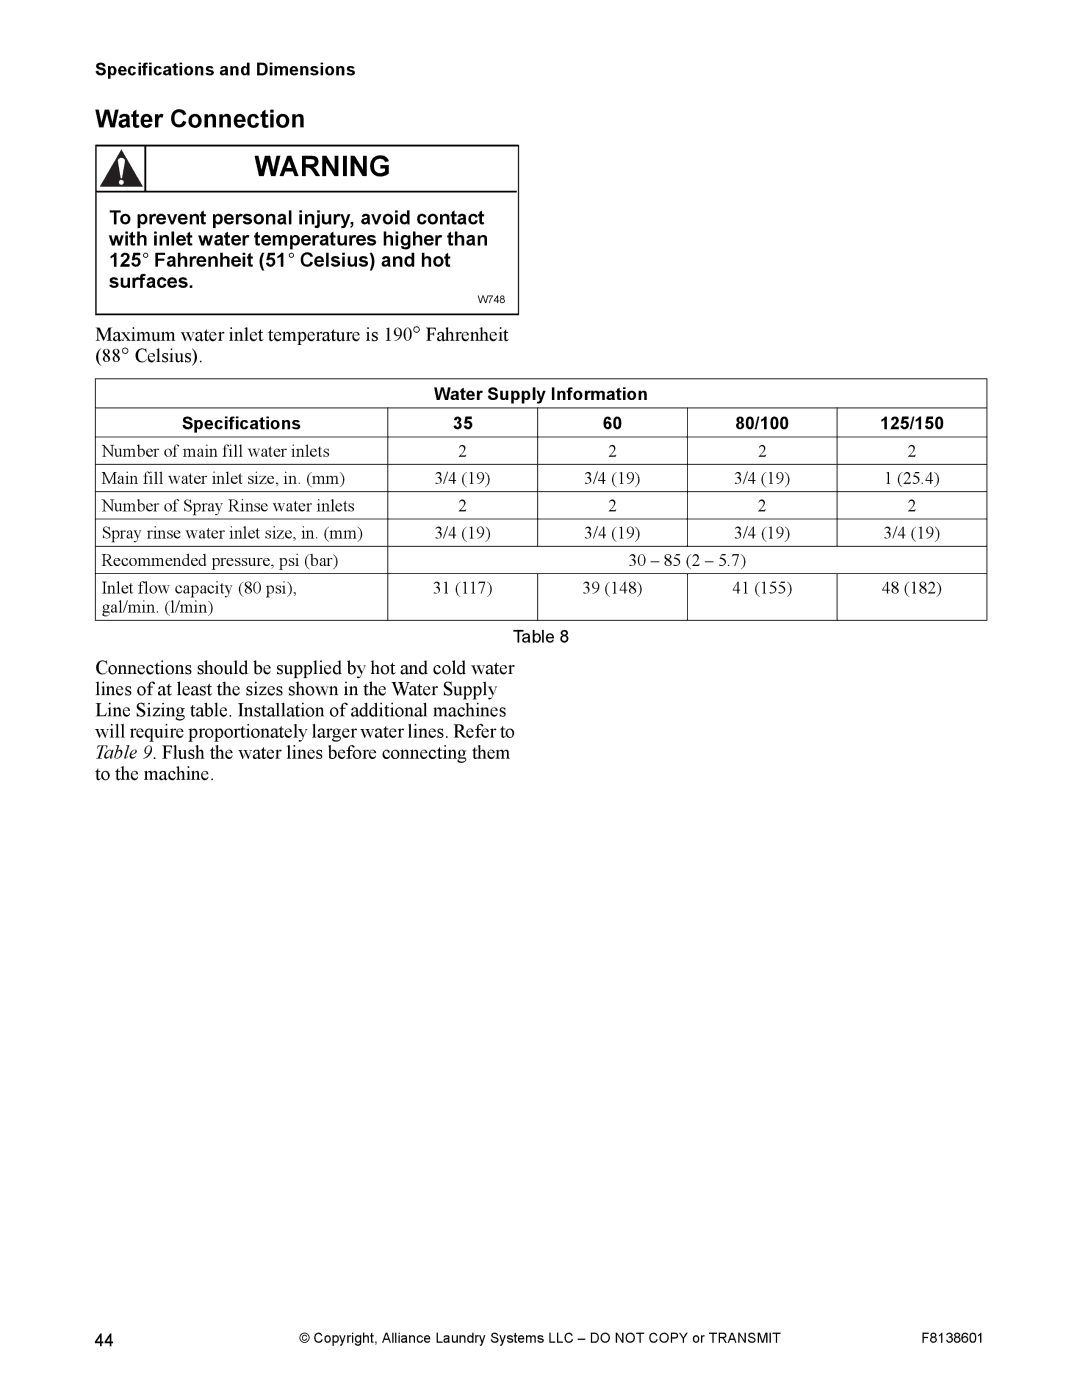
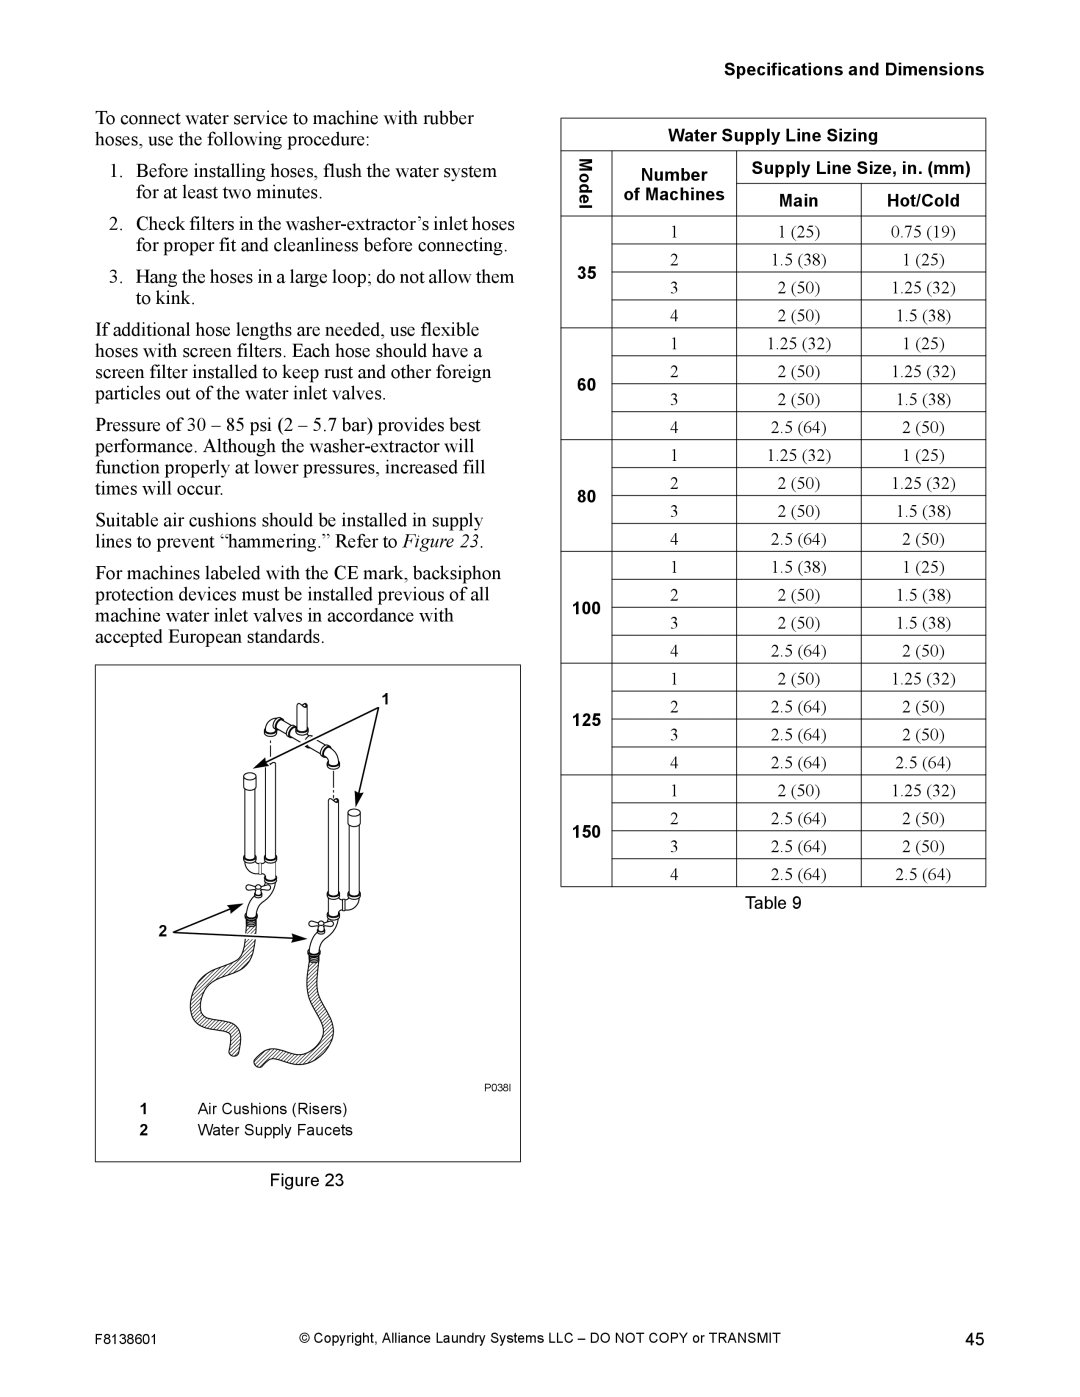
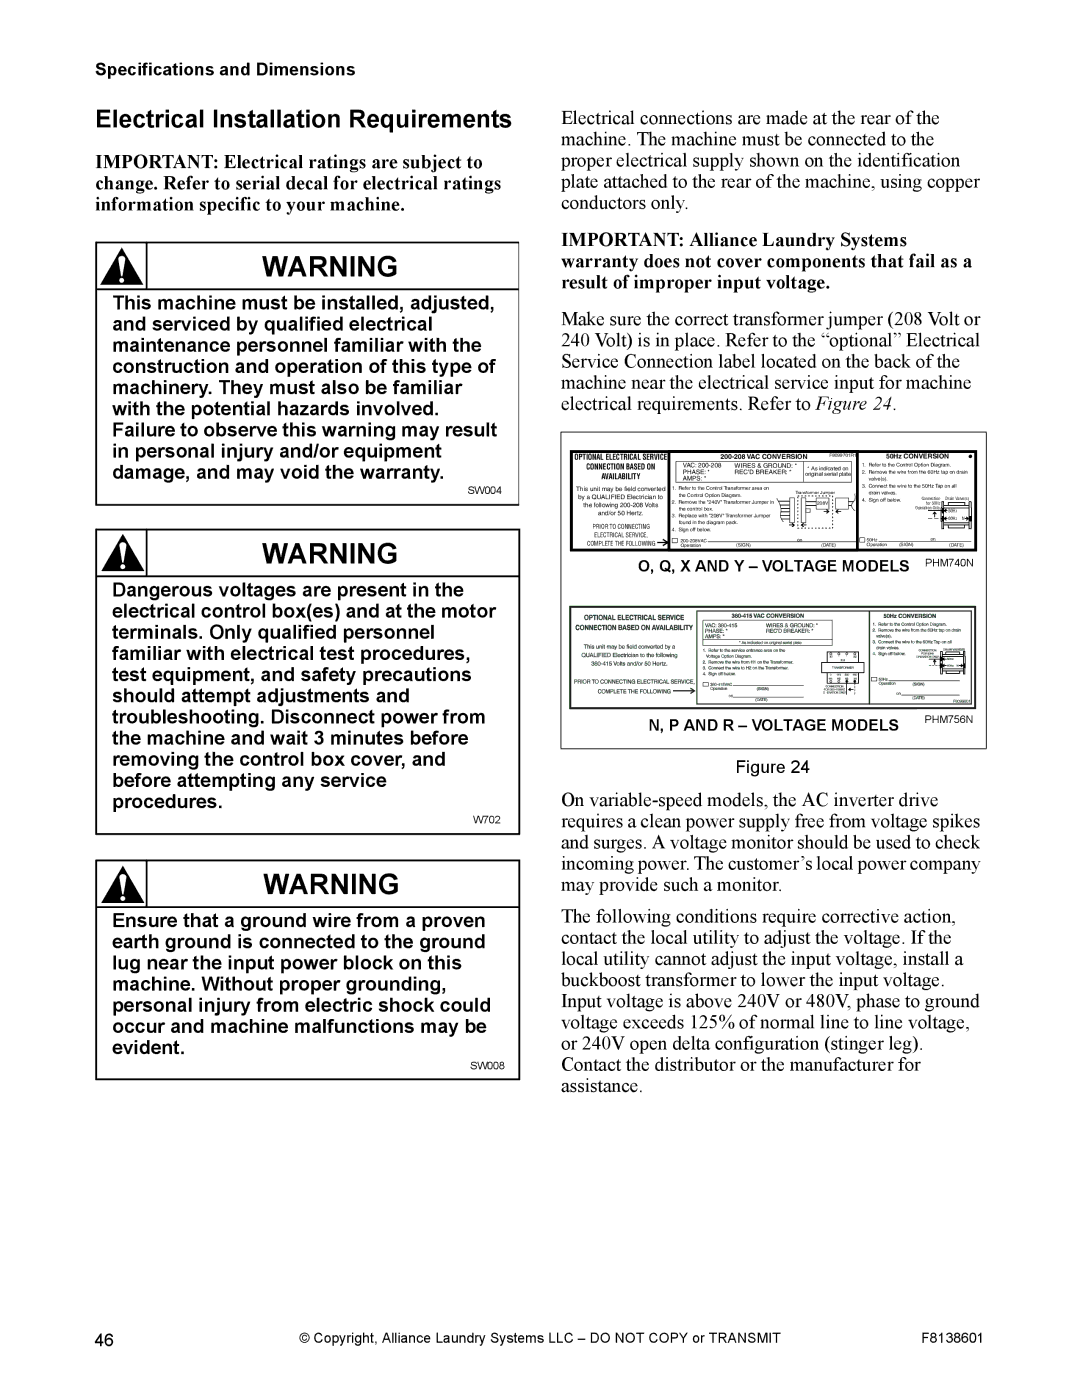
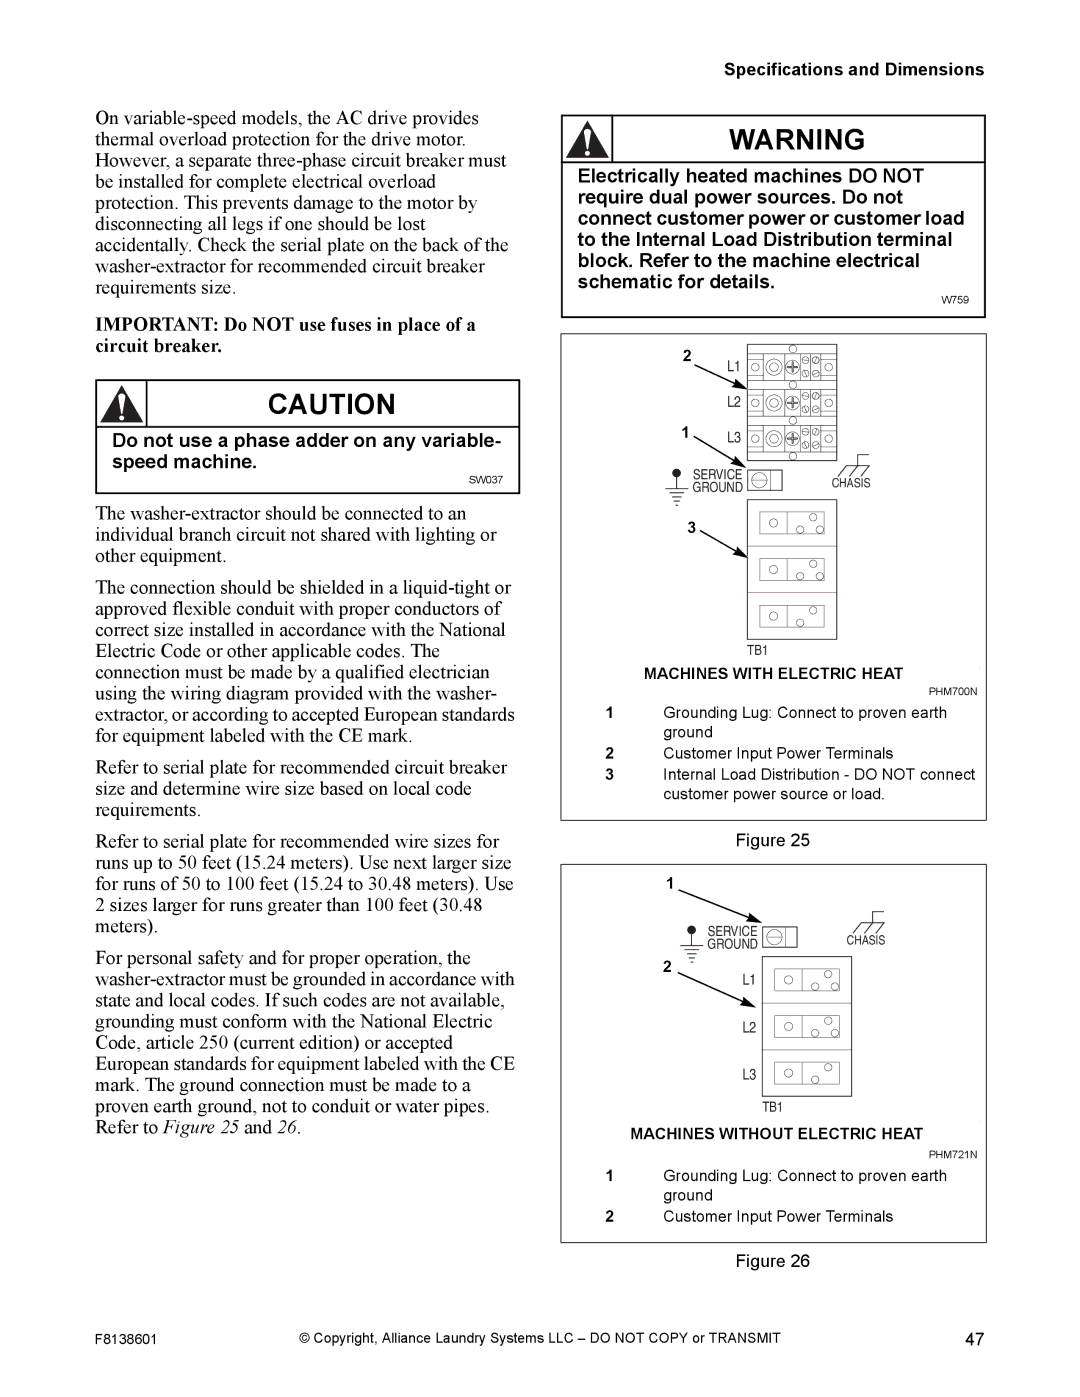
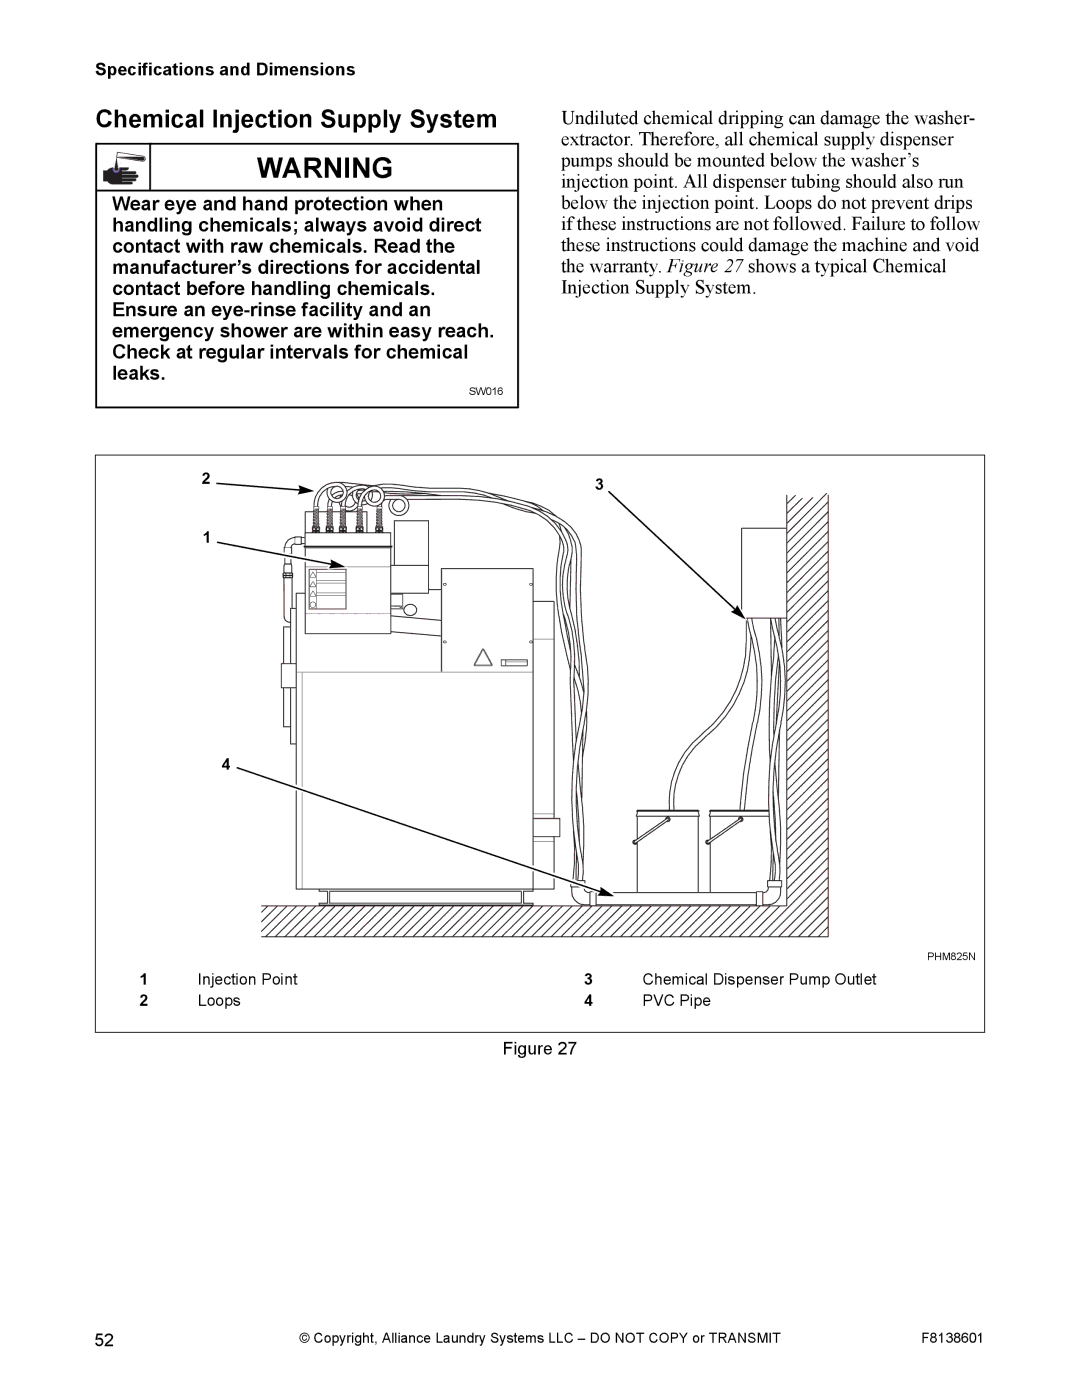
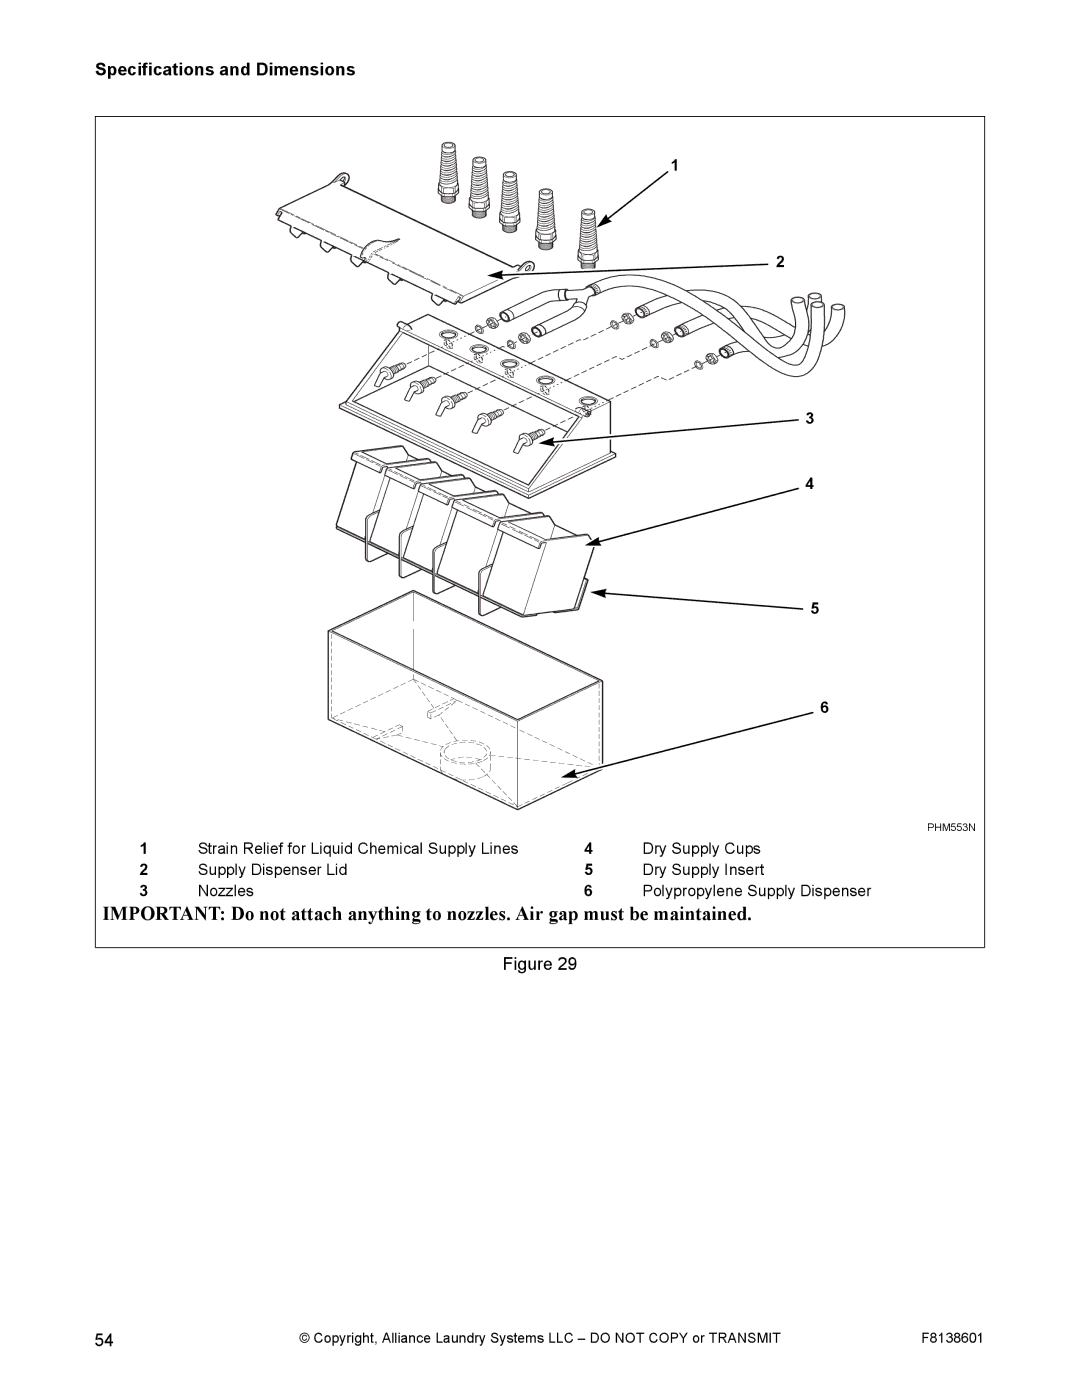
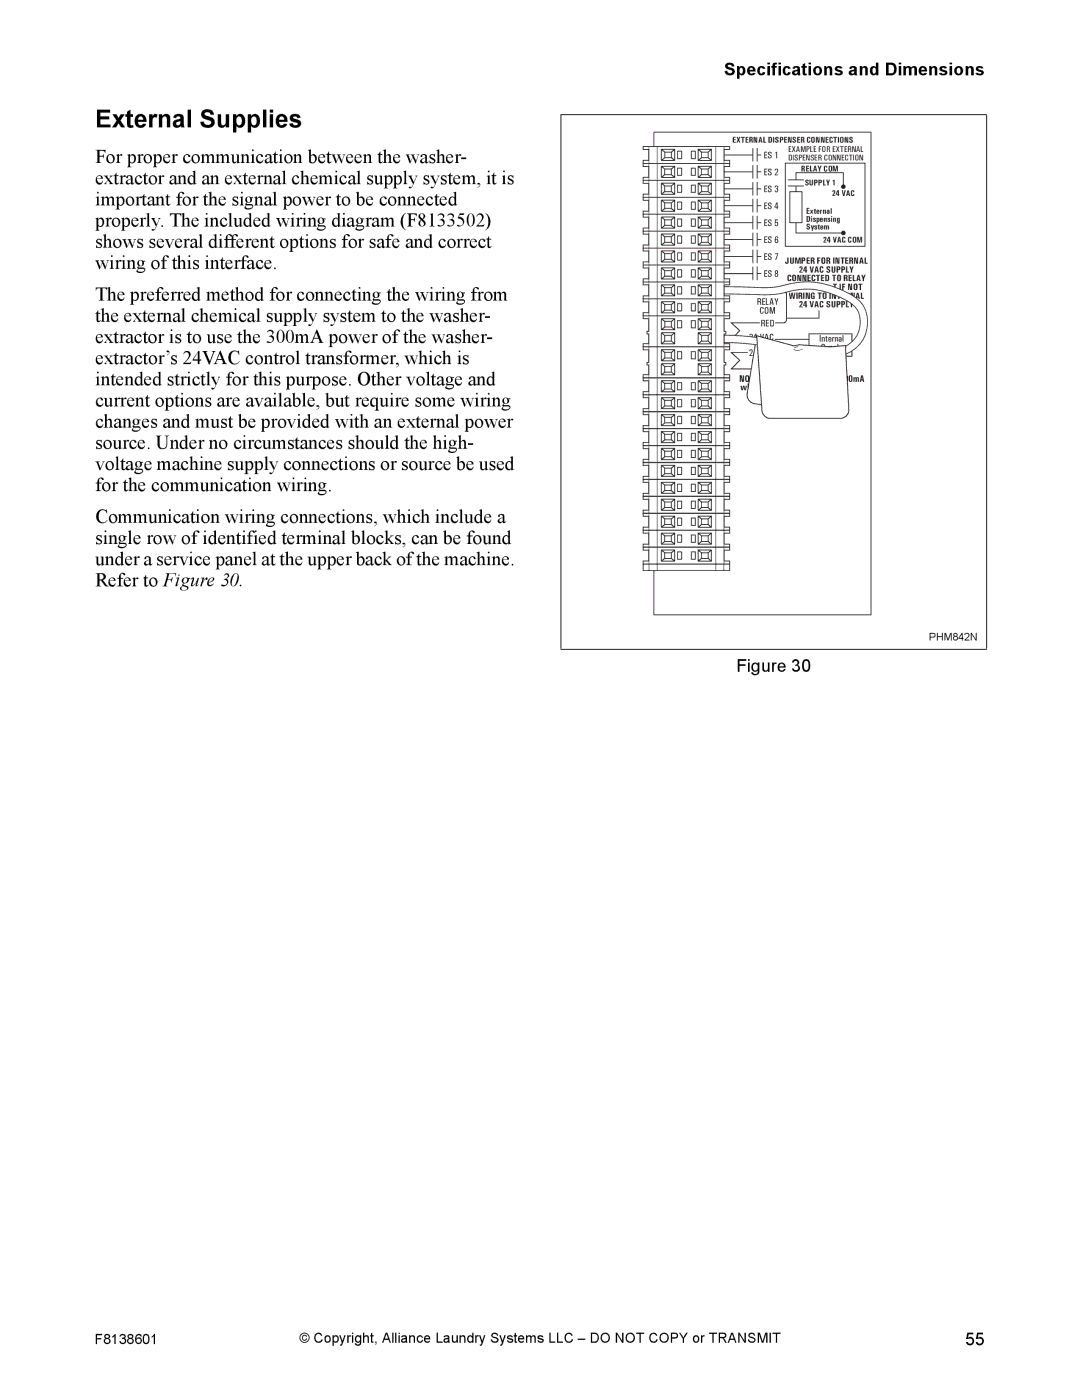
Alliance Laundry Systems PHM798N, PHM802N manual Drain Information Specifications 100 125 150

Page 45

Specifications and Dimensions

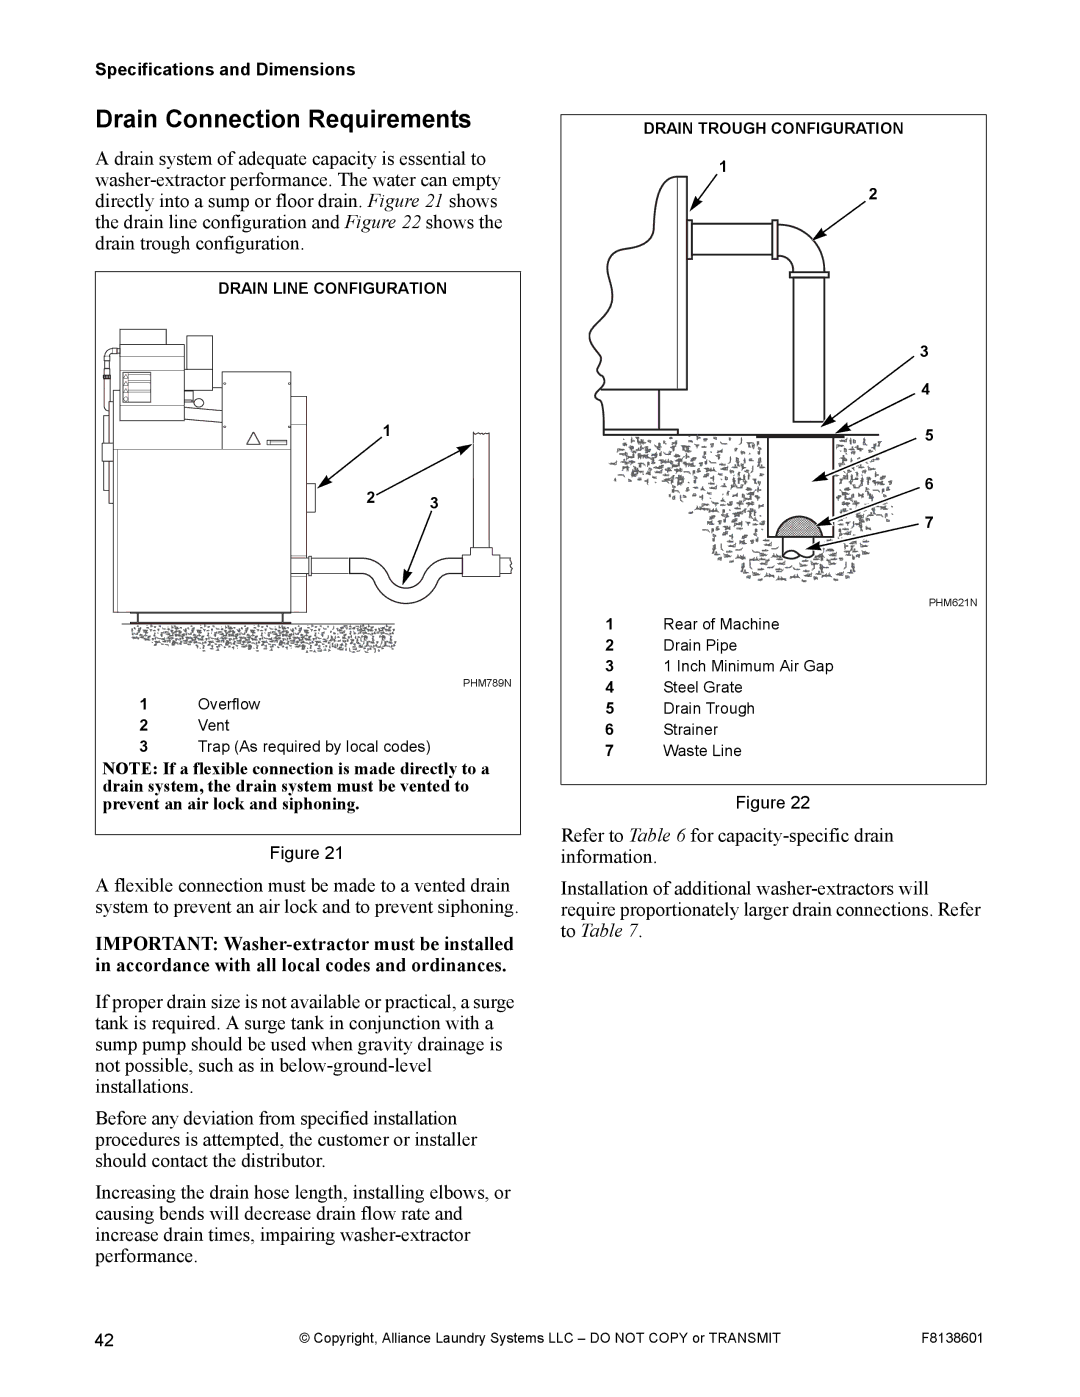
IMPORTANT: Do not block the overflow vent above the drain line.

If water or suds flow from the overflow vent and the machine has been verified to be operating properly with proper water levels and correct amount of laundry chemicals, a drain line may be added to the vent and routed to a drain trough.

1.Remove the riveted bracket on the rear panel for access to the overflow vent pipe.

2.Route a drain pipe from the vent pipe to a drain trough. Drain pipe should be routed straight across or down and be suspended above drain trough by at least 3 inches (7.62 cm).

IMPORTANT: Do not route the overflow vent pipe to a direct drain system.

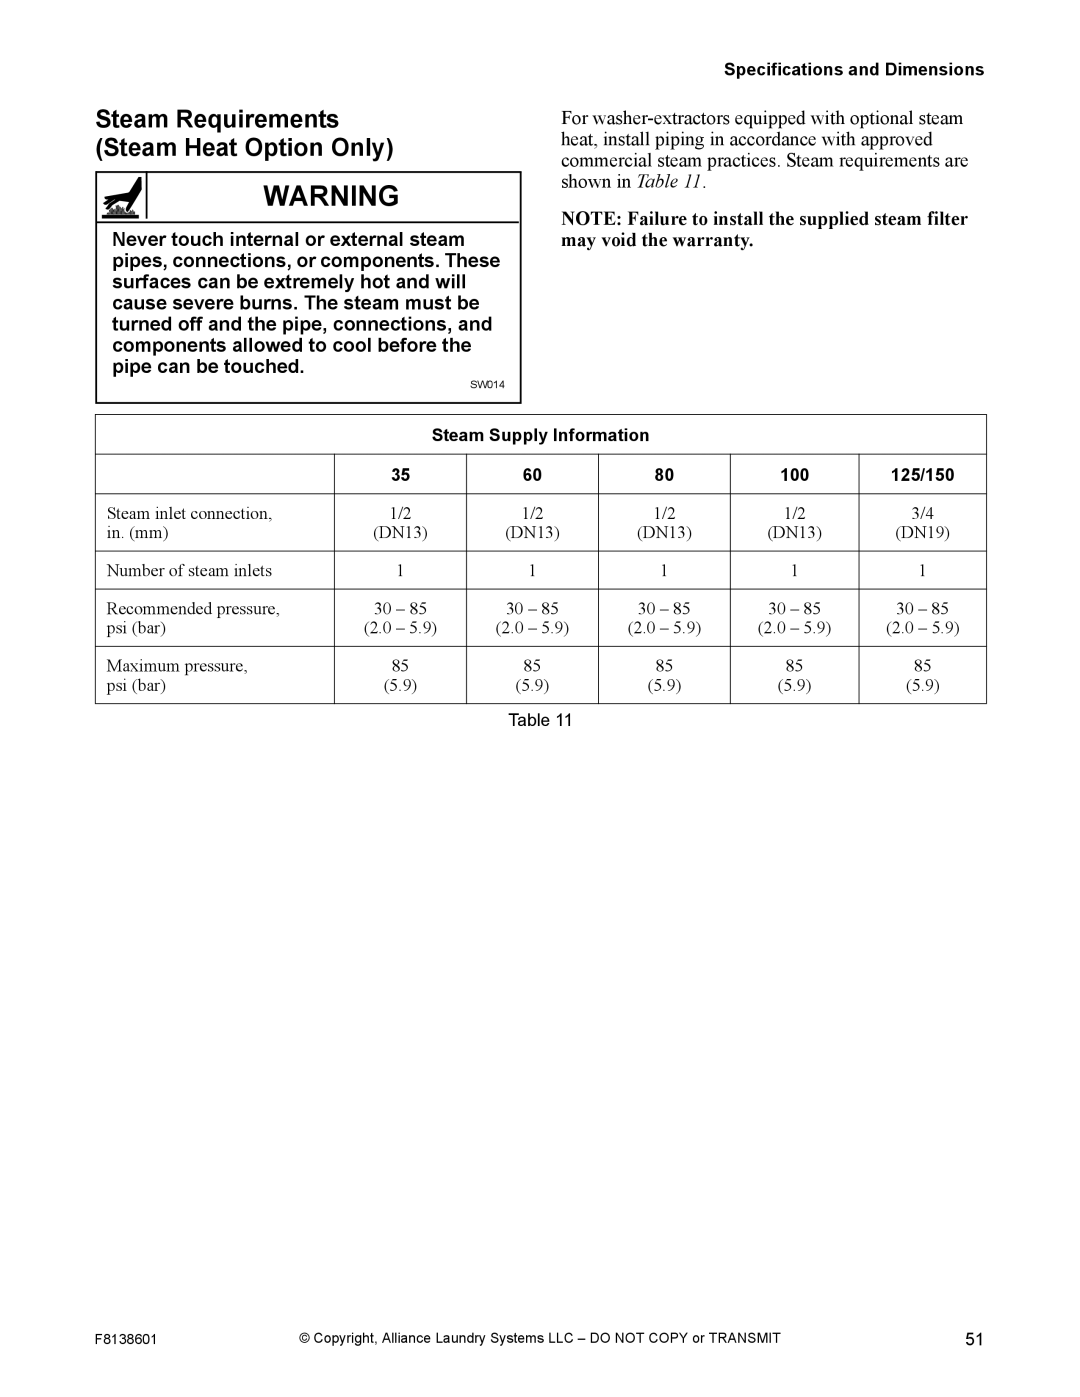
Drain Information

Specifications

35


60

80

100

125

150

Drain connection size, O.D., in. (mm)

2.375 (60)

3

(76)

3 (76)

3

(76)

3

(76)

3

(77)

with second drain:


Number of drain outlets

1


1

2


2


2


2

Drain flow capacity, gal/min. (l/min.)

35 (132)

64

(242)

120 (454)

120 (454)

140 (530)

140 (530)

Recommended drain pit size, ft3 (l)

5 (142)

6 (170)

9 (255)

11

(311)

13

(368)

13

(368)

†Sized for one machine using overflow level.


Table 6

Drain Line Sizing

Minimum Drain I.D., in. (mm)

Model


Number of Machines


1

2

3

4


35

3 (76.2)

3 (76.2)

3.5 (88.9)

4 (102)

60

3 (76.2)

4 (102)

6 (152)

6 (152)

80

4 (102)

6 (152)

6 (152)

8 (203)

100

4 (102)

6 (152)

6 (152)

8 (203)

125

4 (102)

6 (152)

6 (152)

8 (203)

150

4 (102)

6 (152)

6 (152)

8 (203)

Table 7

F8138601

© Copyright, Alliance Laundry Systems LLC – DO NOT COPY or TRANSMIT

43

Image 45
Contents Washer-Extractors Page Contents Important Safety Instructions Explanation of Safety MessagesSafety Information Safety Decals Operator Safety Safe Operating Environment Environmental ConditionsMachine Location AC Inverter Drive Input and Output ServicesModel Identification IntroductionCustomer Service Replacement PartsDelivery Inspection Name plate LocationModel Number Familiarization Guide Models Starting 4/1/09 0001Wash Cylinder Information Weight And Shipping InformationDoor Opening Information Drive Train InformationBalance Detection Direct Steam Heating OptionalElectrical Heating Optional Overall width, in. mm MED Specifications and Dimensions Machine DimensionsCrush hazard Uwtv Models Through 3/31/09UW35TV UW125TV Models UW150TV Models Dimension 35 125 Models Models UW Design 3 Models starting 10/4/10 Refer to and Figure Base BA Base Overall PHM807N Machine Foundation Requirements Proceed to Machine Mounting and Grouting section Concrete Foundation Pad InstallationLength for ONE Machine Floor Load Data 1272 1442 Speed 1745 2392 Speed 1797 2342 10.4 Mounting Bolt Installation Requirements Machine Mounting and Grouting Speed Models only Mounting Bolt Hole LocationsVARIABLE-SPEED Model Front of Machine 80 / 100 Models 1181 mm 178 mm 254 mm Model 35 2-SPEED Model Grout PlacementFor UniLinc Models, Navigate to the Inputs Outputs Menu Gap Setting for Vibration SwitchPound Model 60, 80, 100 and 125 Pound Models Design 1 150 Pound Model Drain Connection Requirements Drain Trough ConfigurationDrain Information Specifications 100 125 150 Water Connection Water Supply Information Specifications 80/100 125/150Air Cushions Risers 50Hz Conversion Electrical Installation RequirementsDo not use a phase adder on any variable- speed machine Specifications and Dimensions Cycle CodeM30 Control Models only Steam Supply Information 100 125/150 Steam Requirements Steam Heat Option OnlyChemical Injection Supply System Chemical Injection Supply System Connecting External Liquid Supplies to the Washer-ExtractorPHM553N External Supplies Chemical Injection Using Internal 24VAC Control Transformer Chemical injection Using External AC Power Source External Supply Signals ES1 Power supply Supply 1 Signal K1 Contact