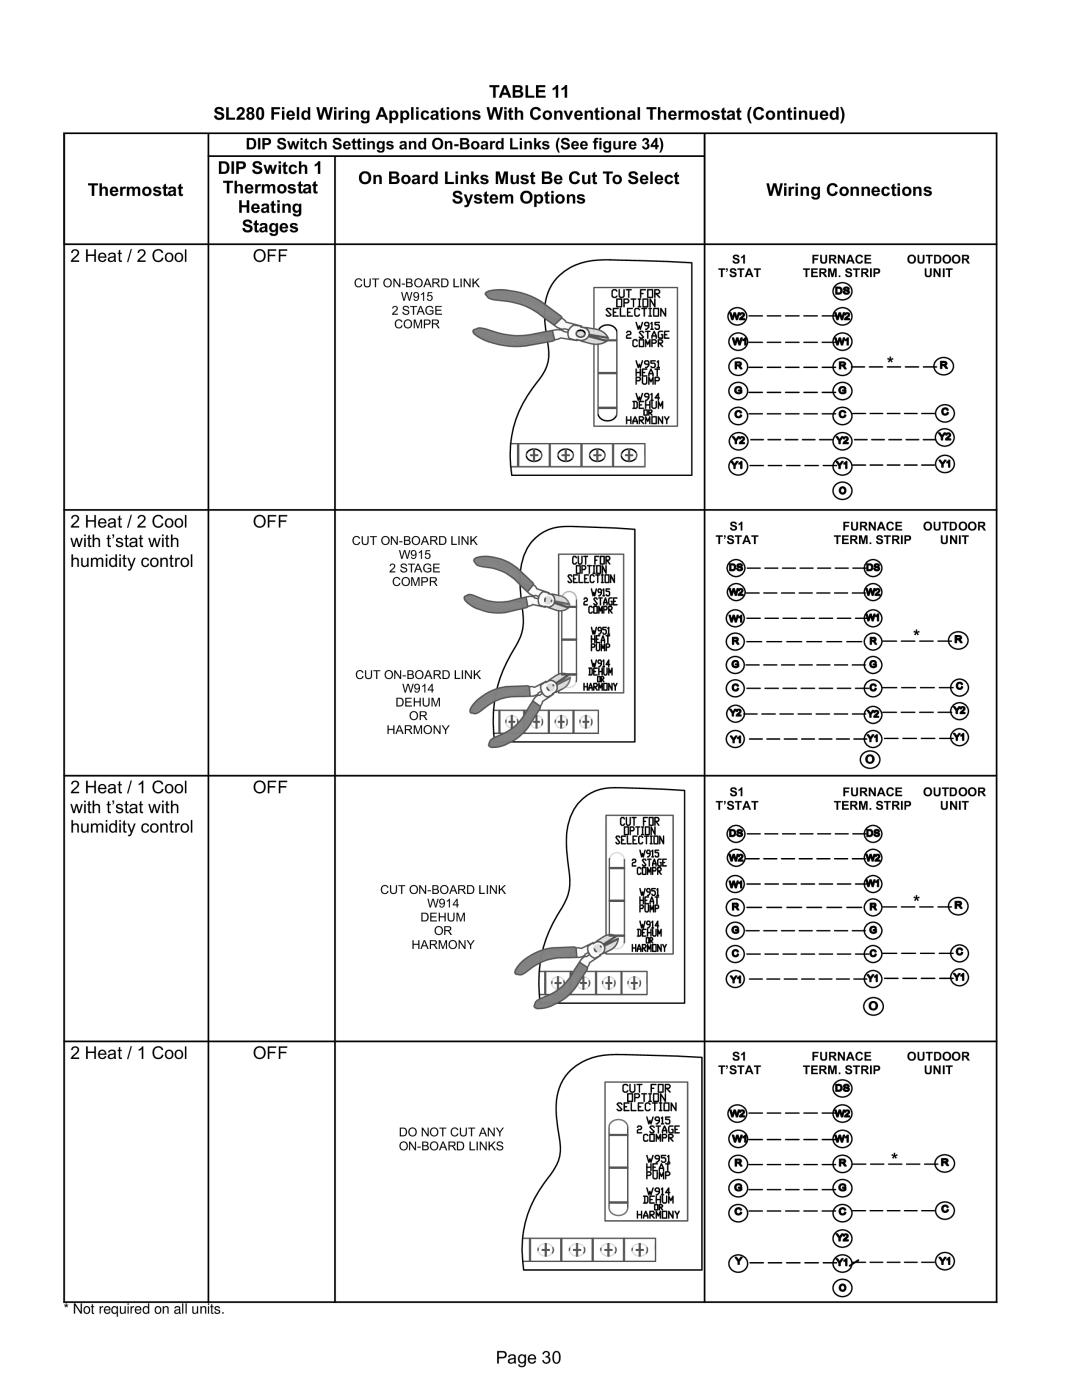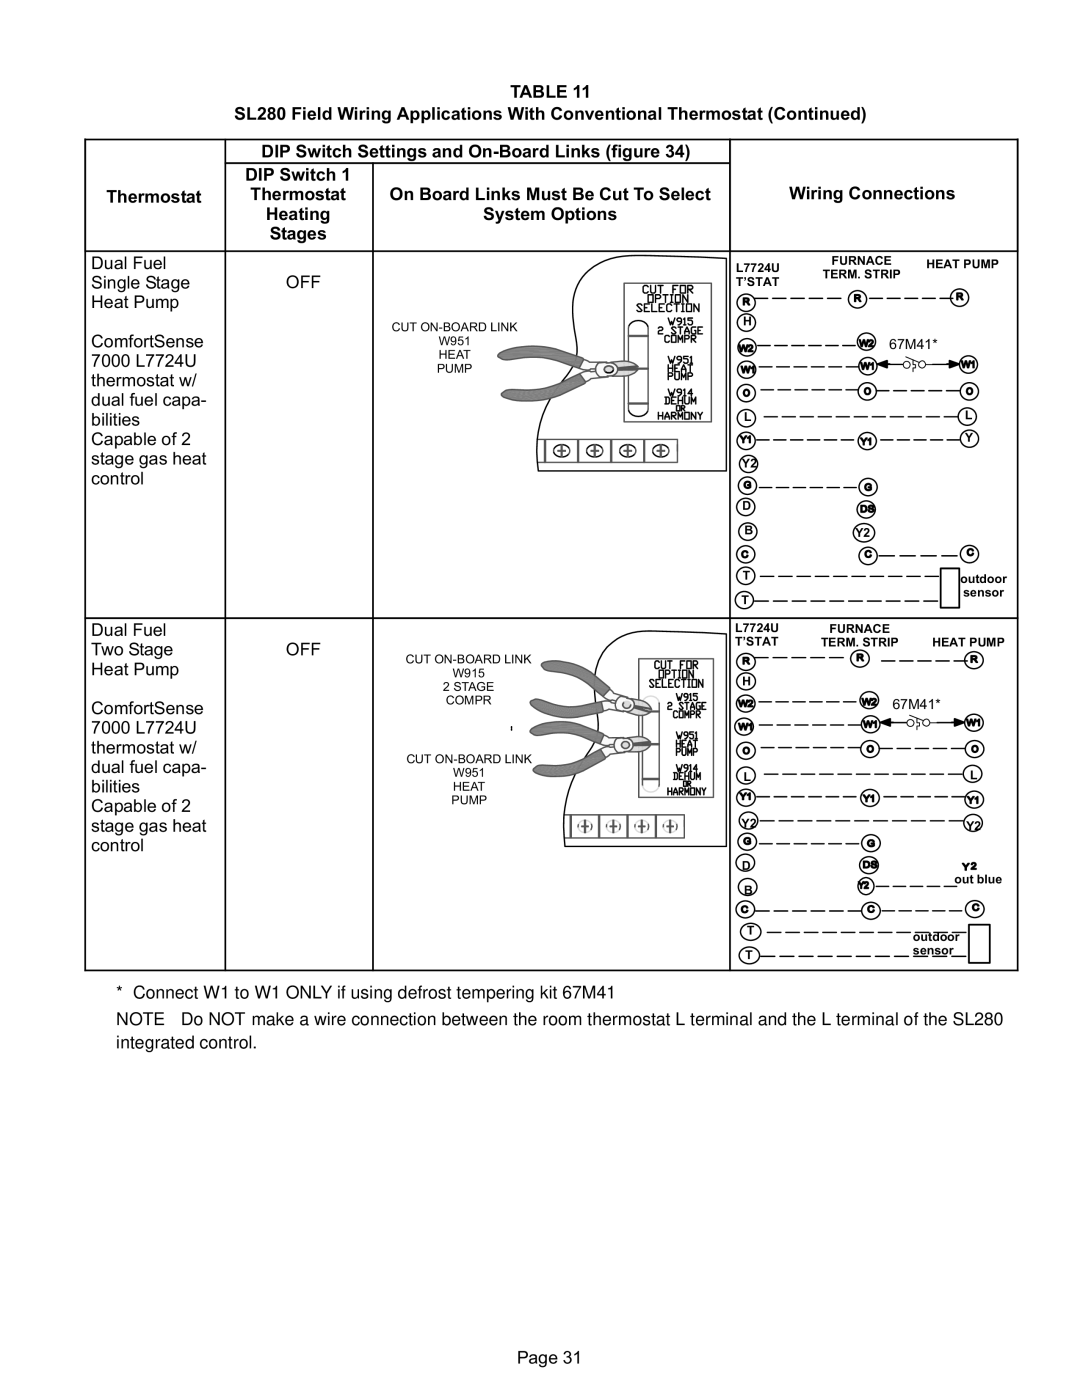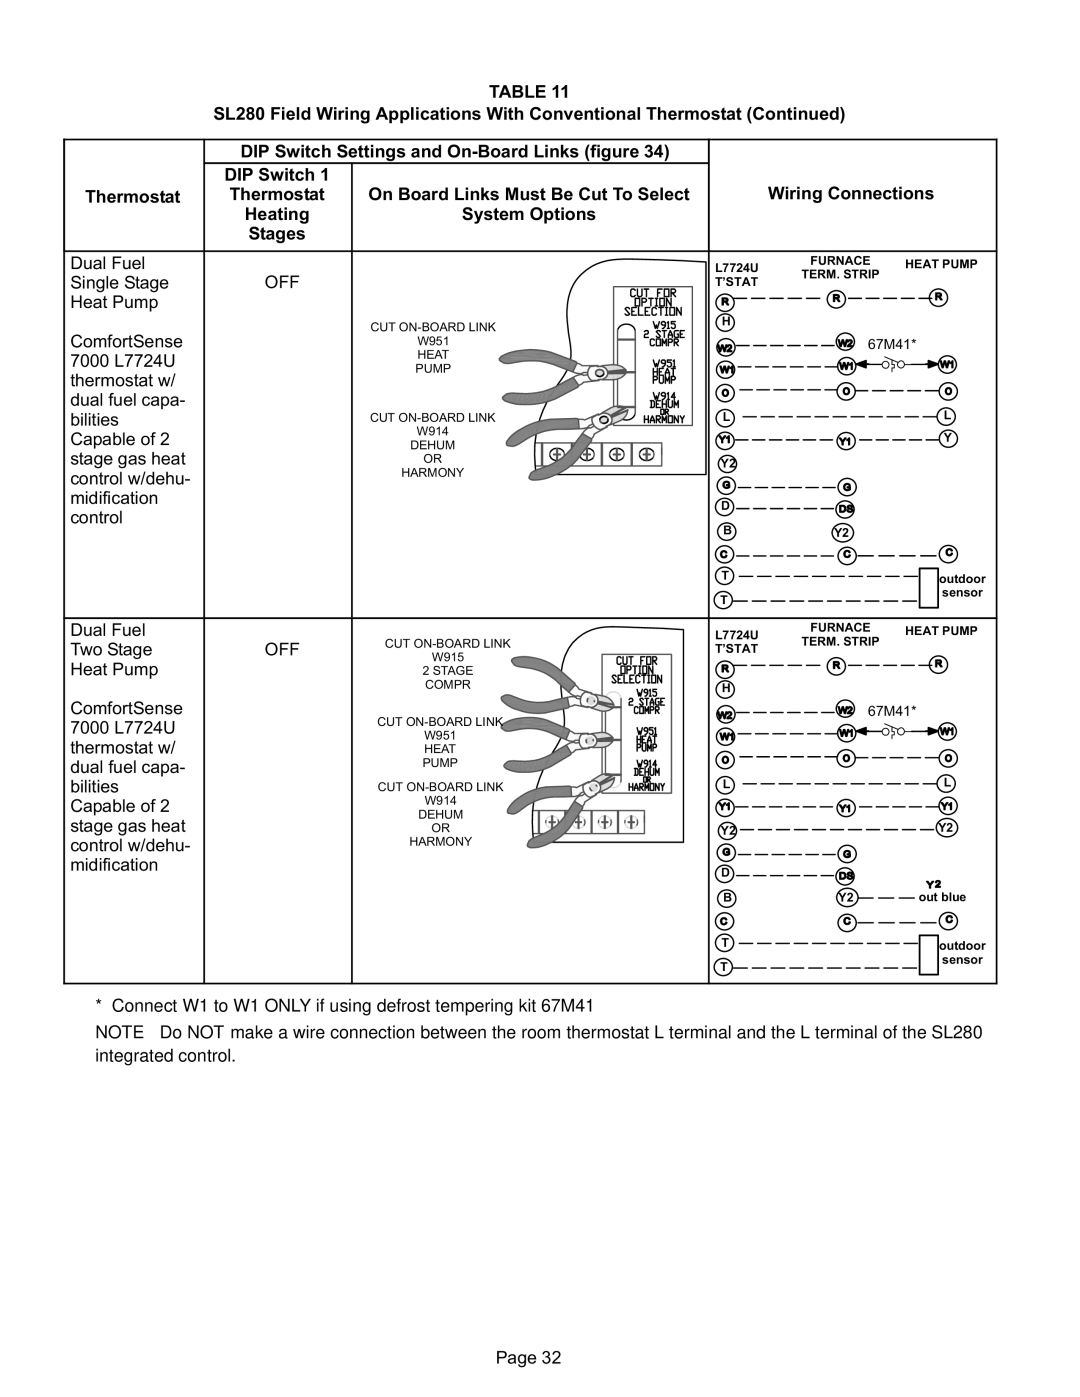
On−Board Links
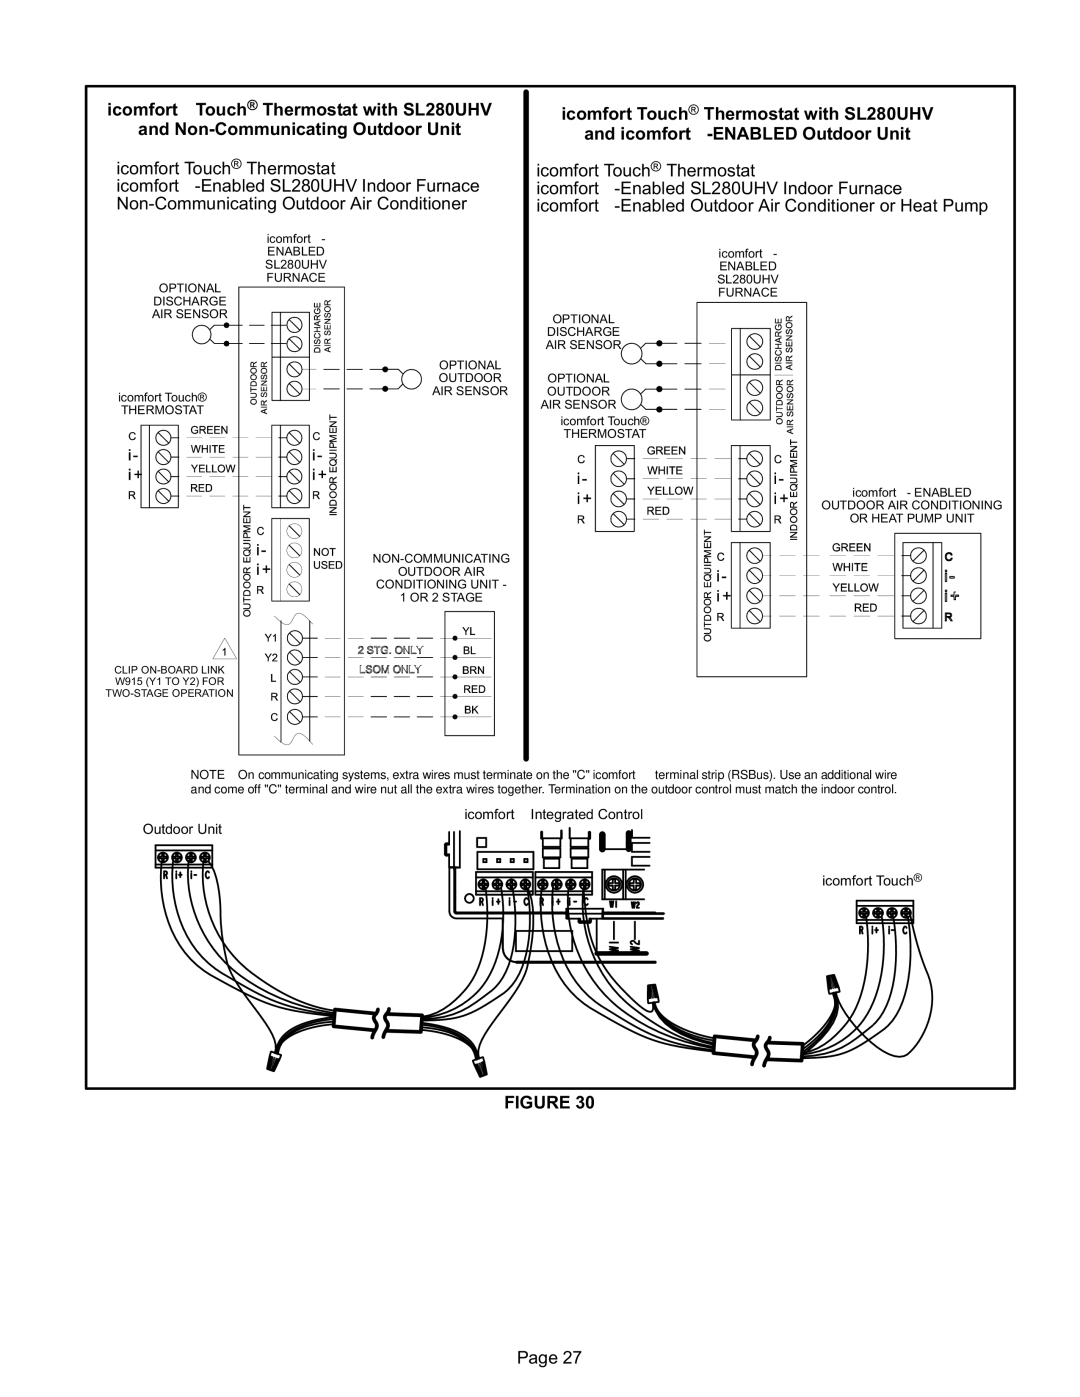
Note: In icomfortt systems with a conventional outdoor unit (non−communicating), the on−board clippable links must be set to properly configure the system.
![]() WARNING
WARNING
Carefully review all configuration information pro- vided. Failure to properly set DIP switches, jumpers and on−board links can result in improper operation!
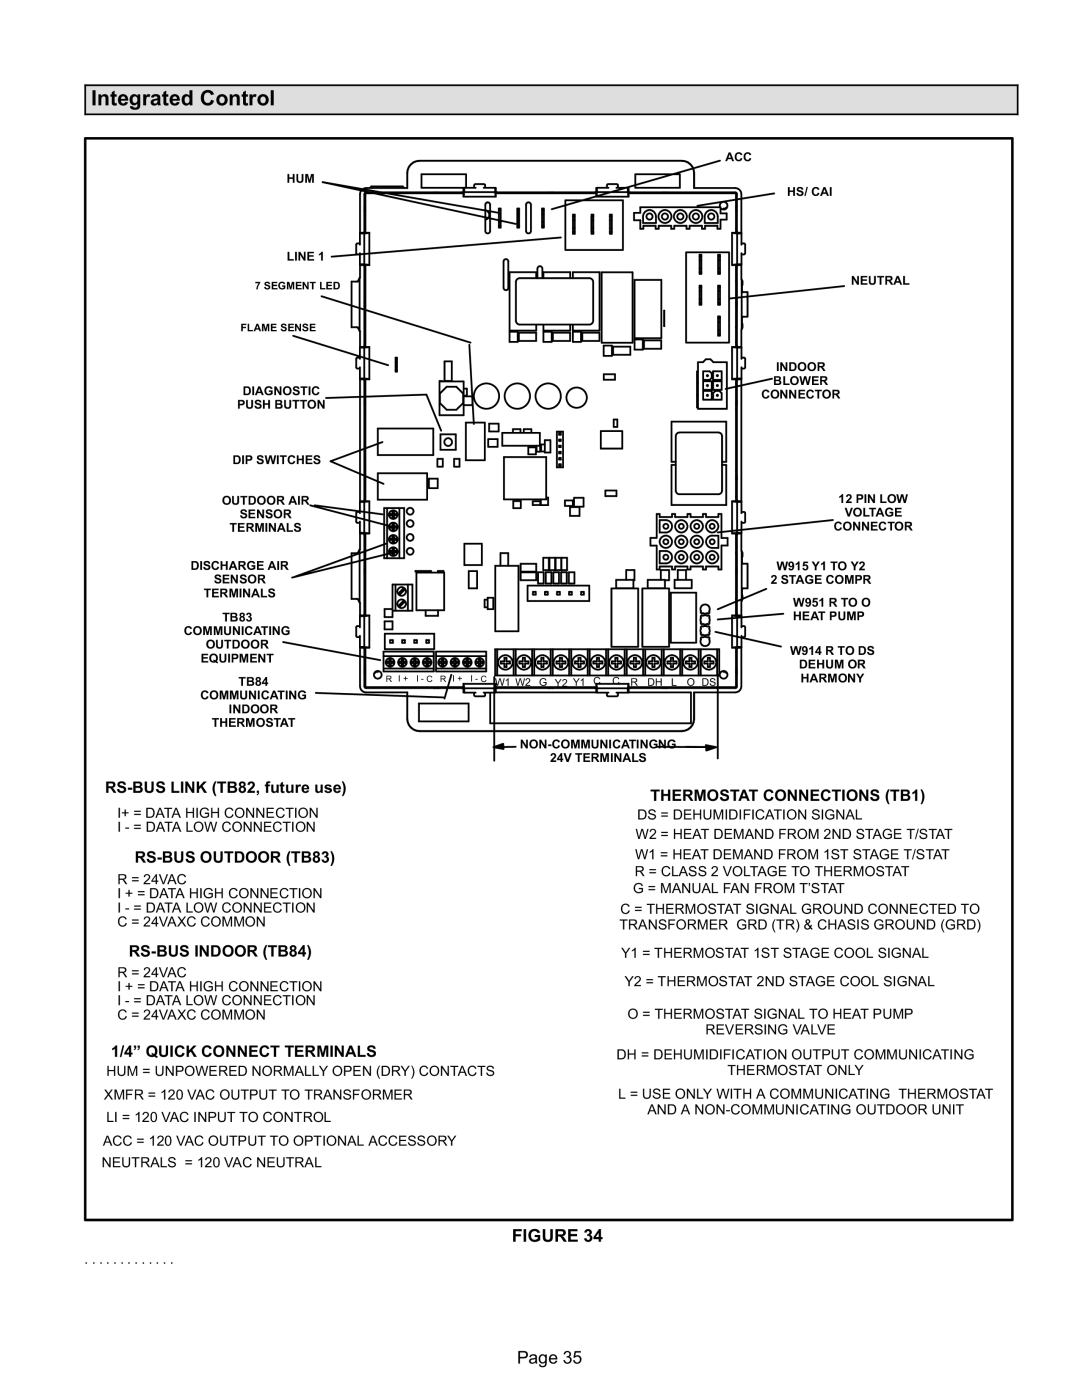
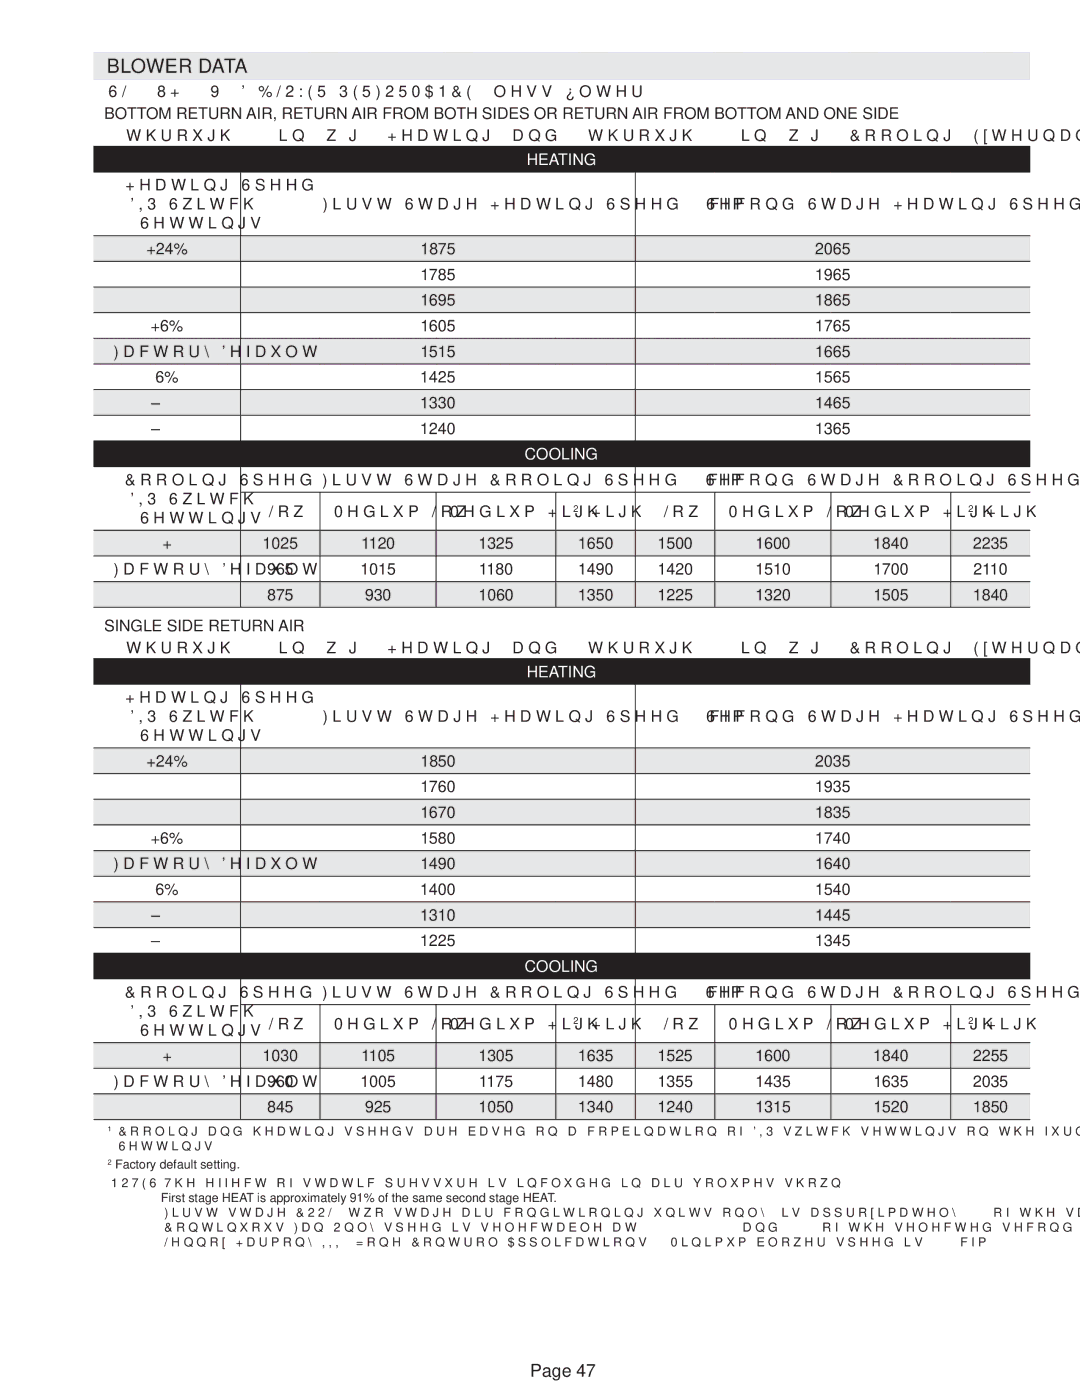
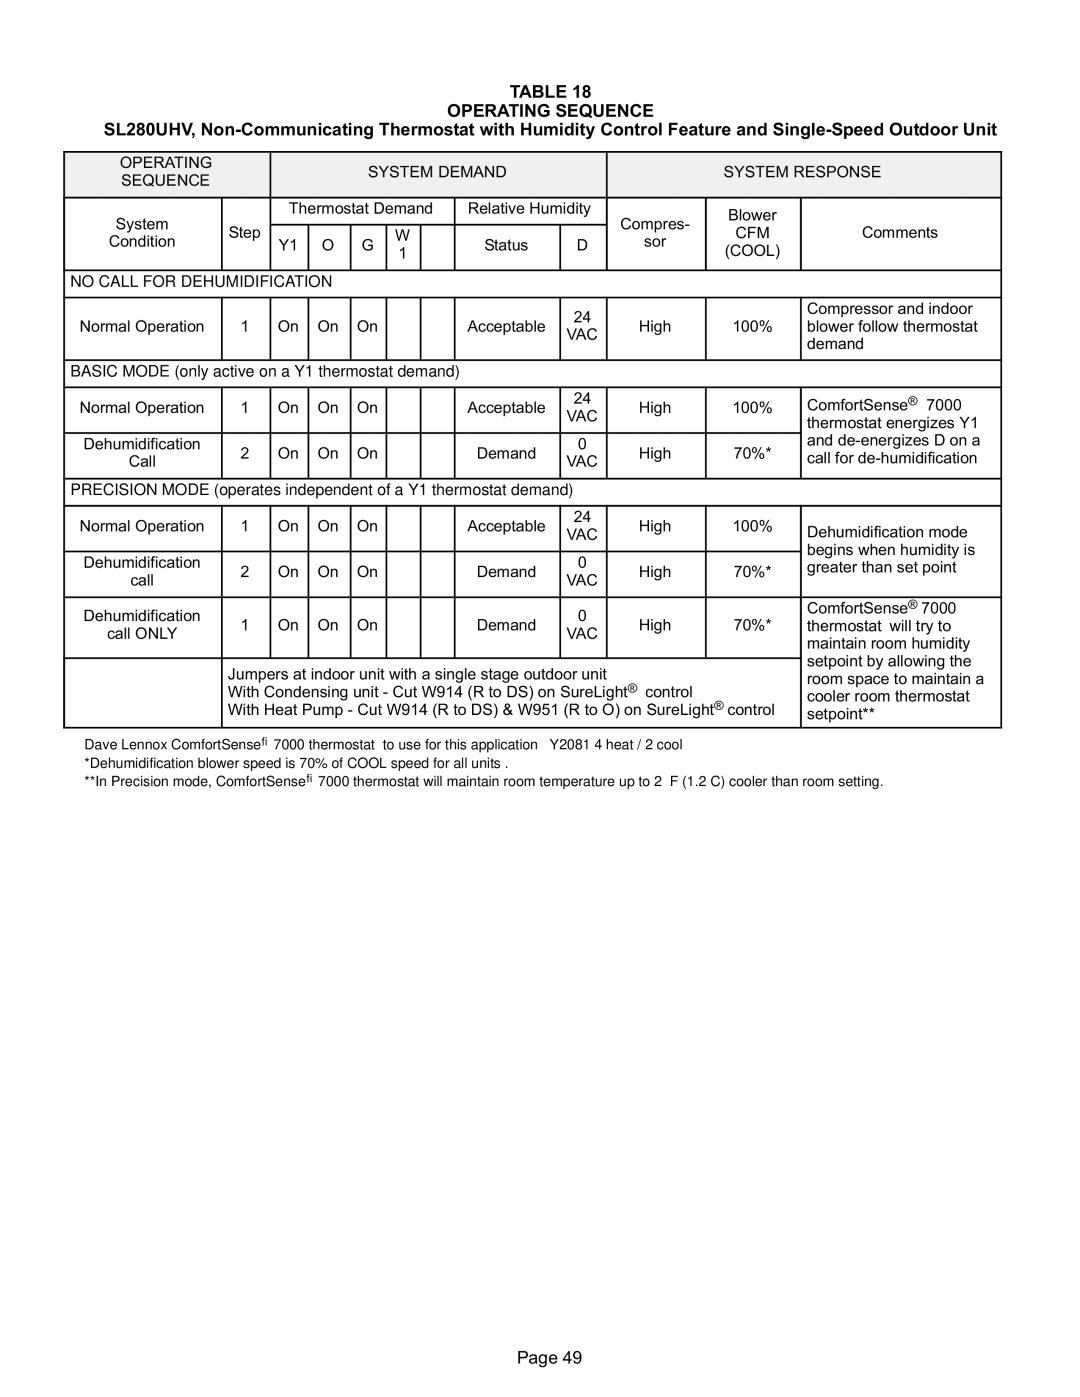
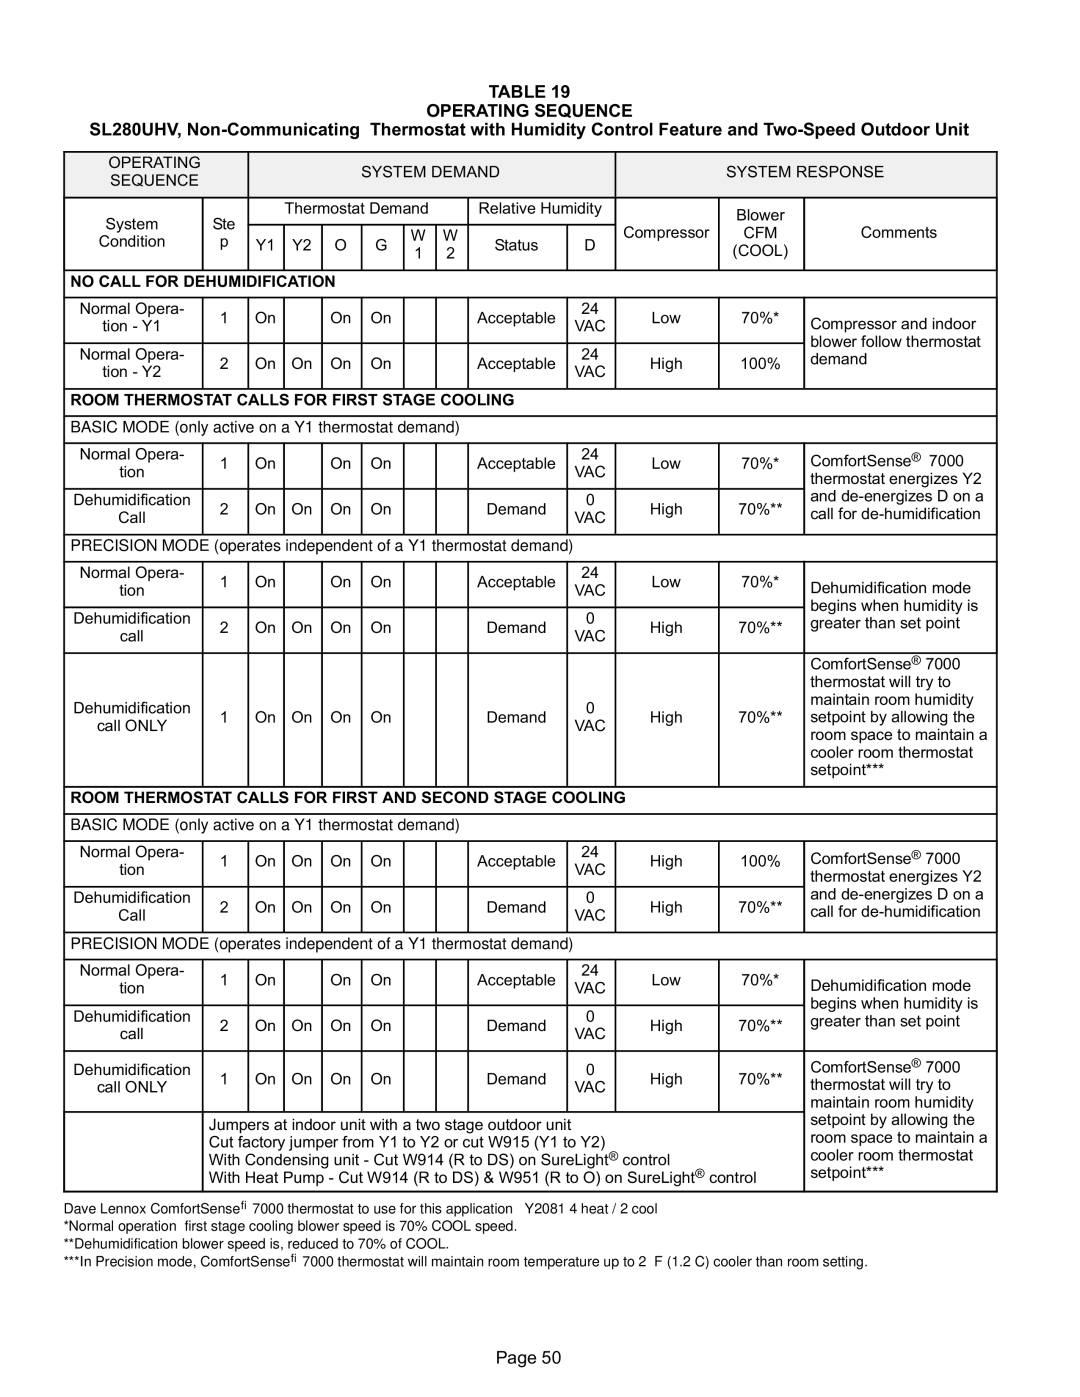
On−Board Link W914 Dehum or Harmony (R to DS) On−board link W914, is a clippable connection between ter- minals R and DS on the integrated control. W914 must be cut when the furnace is installed with either the Harmony IIIt zone control or a thermostat which features humidity control. If the link is left intact the PMW signal from the Har- mony III control will be blocked and also lead to control damage. Refer to table 18 for operation sequence in ap- plications including SL280UHV, a thermostat which fea- tures humidity control and a single−speed outdoor unit. Table 19 gives the operation sequence in applications with a two−speed outdoor unit.
On−Board Link W951 Heat Pump (R to O)
On−board link W951 is a clippable connection between ter- minals R and O on the integrated control. W951 must be cut when the furnace is installed in applications which include a heat pump unit and a thermostat which features dual fuel use. If the link is left intact, terminal
gized eliminating the HEAT MODE in the heat pump.
On−Board Link W915 2 Stage Compr (Y1 to Y2) On−board link W915 is a clippable connection between ter- minals Y1 and Y2 on the integrated control. W915 must be cut if two−stage cooling will be used. If the Y1 to Y2 link is not cut the outdoor unit will operate in second−stage cooling only.
Diagnostic LED (Figure 34)
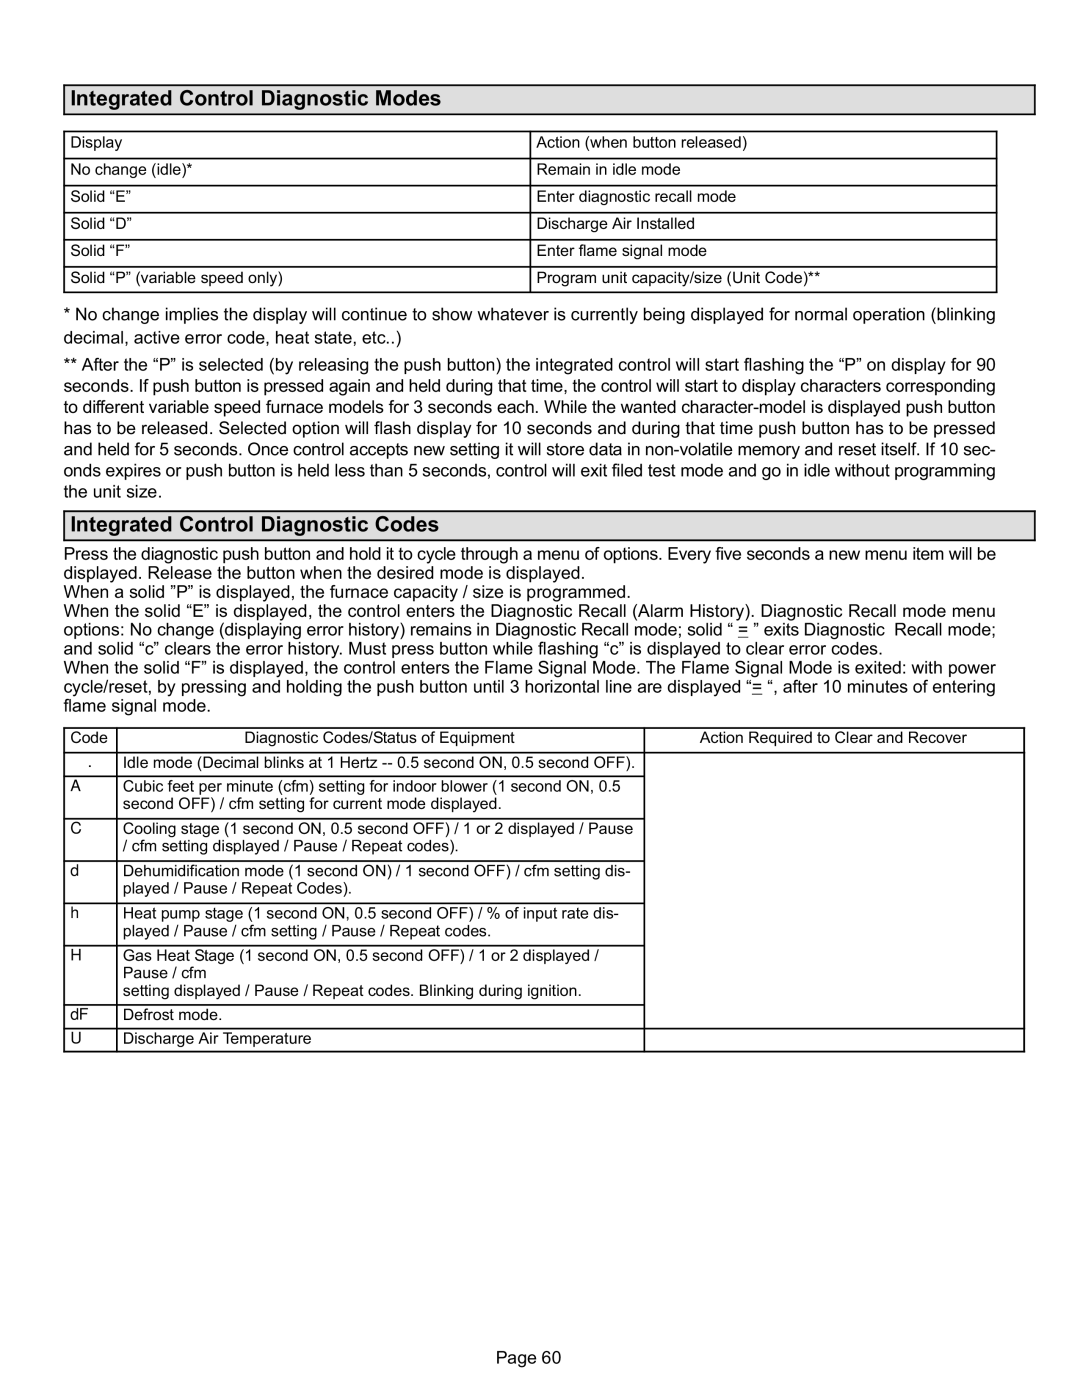
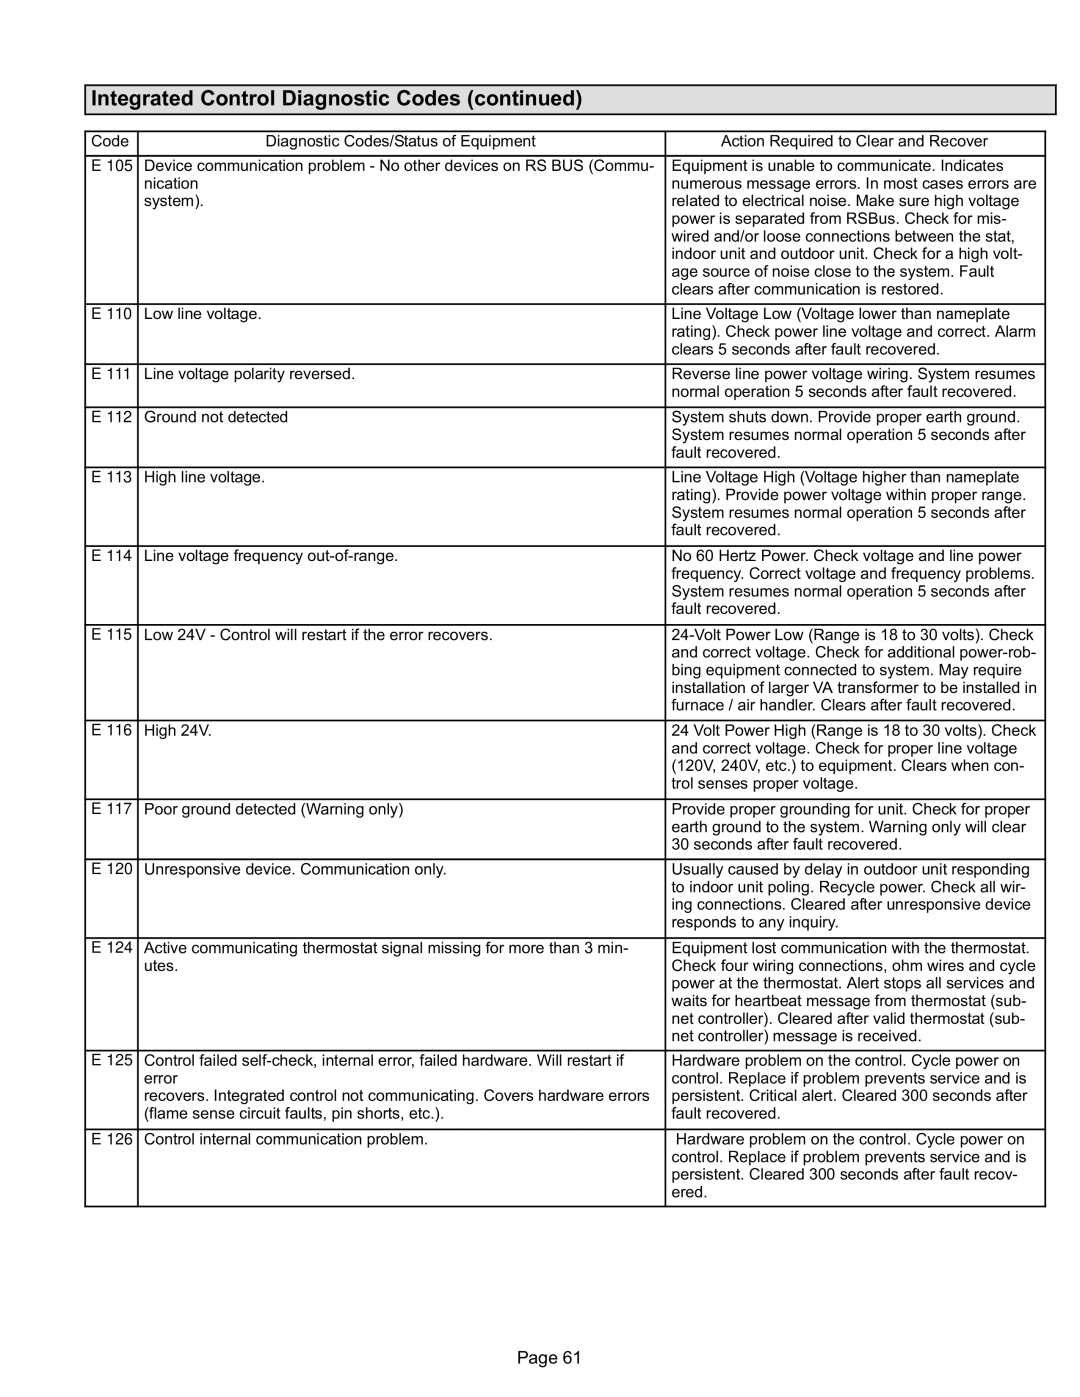
The seven−segment diagnostic LED displays operating status, target airflow, error codes and other information. The table beginning on Page 60 lists diagnostic LED codes.
Diagnostic Push Button (Figure 34)
The diagnostic push button is located adjacent to the seven−segment diagnostic LED. This button is used to en- able the Error Code Recall
mode. Press the button and hold it to cycle through a menu of options. Every five seconds a new menu item will be displayed. When the button is released, the displayed item will be selected. Once all items in the menu have been displayed, the menu resumes from the beginning until the button is released.
Error Code Recall Mode
Select "E" from the menu to access the most recent 10 error codes. Select
all error codes. Button must be pressed a second time while
Press the button until a solid ≡" is displayed to exit the Error Code Recall mode.
Flame Signal Mode
Select "F" from the menu to access the flame signal mode. The integrated control will display the flame current on 7 segment LED in in micro amps (uA).
Flame signal mode is exited after the following:
DPower is reset
DPressing and holding push button until 3 horizontal lines ≡" are displayed
D 10 minutes of entering the flame sense mode.
Page 38
