MODEL NO. 3CSOHO100-TX
Fast Ethernet Network Interface Card User Guide
Lifetime Limited Warranty
Asia
OfficeConnect Fast Ethernet Network Interface Card User Guide
Member of the 3Com OfficeConnect family
Part No. 09-1569-000 Published October
UNITED STATES GOVERNMENT LEGEND
3Com Corporation 5400 Bayfront Plaza Santa Clara, California
2 INSTALLING THE NETWORK INTERFACE CARD
CONTENTS
3 INSTALLING THE NETWORK DRIVER
ABOUT THIS GUIDE
4 TROUBLESHOOTING INSTALLATION PROBLEMS
5 CONFIGURING THE NIC
A SPECIFICATIONS AND CABLING REQUIREMENTS
GLOSSARY INDEX 3COM CORPORATION LIMITED WARRANTY
Access by Digital Modem
B TECHNICAL SUPPORT
World Wide Web Site
Page
Connecting the Network Cable to the NIC
FIGURES
Sample Network
Inserting the NIC
TABLES
Notice Icons
Text Conventions
Conventions
ABOUT THIS GUIDE
Year 2000 Compliance
Menu commands
and buttons
GETTING STARTED
What This Guide Covers
What This Chapter Covers
Understanding Networking
Peer-to-Peer Networks
Ethernet and Fast Ethernet Networking Protocols
Client/Server Networks
For more information on networking, see the
Network Assistant CD included in your package
About the OfficeConnect NIC
Understanding Network Interface Cards
Required Hardware
Required Cabling
Required Software
INSTALLING THE
Preparing for Installation
NETWORK INTERFACE CARD
power cable. Detach all other cables from the PC
2 Turn the power off to the PC. Unplug the
Inserting the NIC
1 Remove all jewelry from your hands and wrists
6 Fasten the NIC with the backplate screw you removed in step
Do not turn on the power to the PC
7 Replace the PC cover
8 Reconnect any cables that you disconnected before you opened the PC
Figure 4 Connecting the Network Cable to the NIC
Connecting the NIC to Your Network
Do not turn on the power to the PC
2 Insert the other end of the UTP cable into an active network port
The next step is to install the network driver. Go to Chapter
Connecting the NIC to Your Network
Page
Windows
NETWORK DRIVER
1 Right-click the My Computer icon, and then click Properties
INSTALLING THE
2 Turn on the power to the PC
Windows 95 Version A
2 Check the version number on the General screen, under System
5 Click OK
You must reboot your PC to complete the installation
7 Insert the Windows 95 CD in the CD-ROM drive, and then click OK
8 Remove the EtherDisk diskette from drive A, and then click Yes
Windows 95 Version B
9 Enter your user name and password, and then click OK
3 Insert the EtherDisk diskette in drive A, and then click Next
2 Turn on the power to the PC
4 Click Finish
8 Insert the Windows 95 CD in the CD-ROM drive, and then click OK
5 Click OK
9 Remove the EtherDisk diskette from drive A, and then click Yes
10 Enter your user name and password, and then click OK
You must reboot your PC to complete the installation
2 Turn on the power to the PC
7 Insert the Windows 98 CD in the CD-ROM drive, and then click OK
6 Click Next. Files are copied
8 Click Finish
9 Click Yes to restart the PC
Windows NT
9 Click Close to continue the installation
Windows NT
4 Click the Adapters tab
5 Click the down arrow to expand the
4 Click Add Adapter
6 Click Continue
2 Turn on the power to the PC
10 Click OK in the Network Settings window
Verifying Successful Installation
Windows 95 and Windows
11 Remove the EtherDisk diskette from drive A
2 Double-click Network adapters
2 Click the Adapters tab
1 Double-click the Network icon in the Control Panel
1 Double-click the File Manager icon
2 From the Disk menu, select Connect Network Drive
TROUBLESHOOTING
INSTALLATION PROBLEMS
Basic Troubleshooting Tips
Interpreting the LEDs
See Figure 2 in Chapter 1 for a picture of the LEDs
Table 4 explains the LED states
Starting the 3Com NIC Diagnostics Program
1 Double-click the 3Com icon in the Windows system tray
c Click 3nicdiag
3 Click Cancel to exit the 3Com NIC Diagnostics program
2 Click OK
The 3Com NIC Diagnostics General screen Figure 10 appears
Running the NIC Self-Tests
3 Click the Diagnostics tab
1 Double-click the 3Com icon in the Windows system tray
2 Click OK
4 Click Start in the Self-Test panel
Running the Echo Test
1 On both PCs
c Click 3nicdiag. d Click OK
3 On the first PC the sending PC
42 CHAPTER 4 TROUBLESHOOTING INSTALLATION PROBLEMS
Figure 13 Echo Test Sender Screen
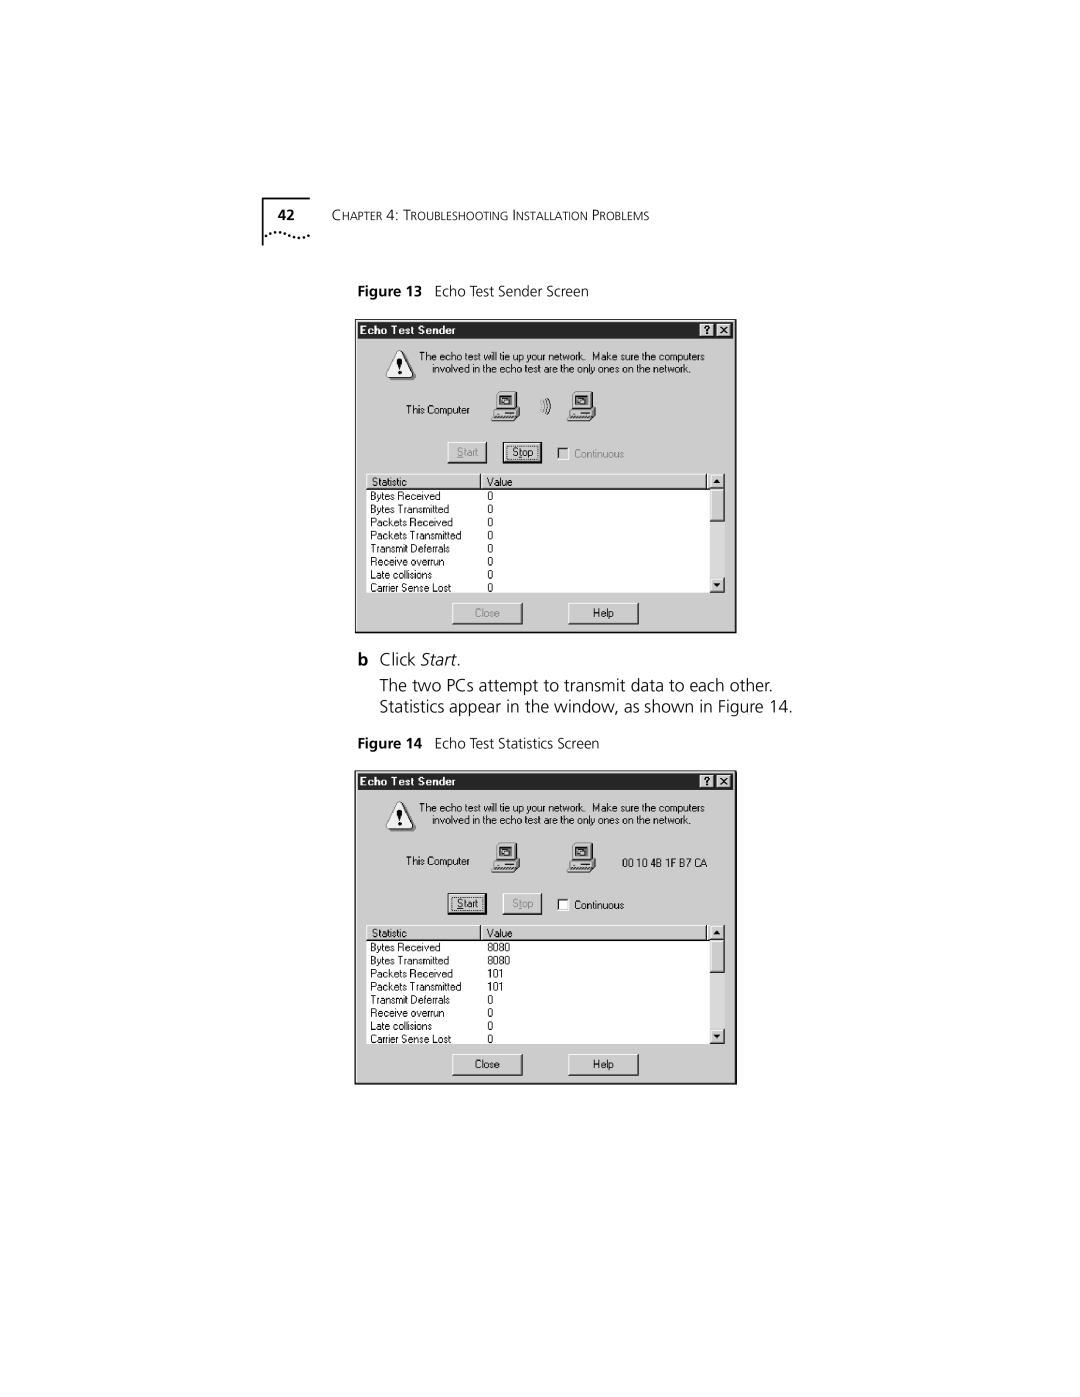
Figure 14 Echo Test Statistics Screen
Accessing the Help System
1 From the Windows Start menu, select Programs
2 Select 3Com NIC Utilities 3 Click 3nichelp
2 Click OK 3 Click the Support tab. The Support screen appears
Accessing 3Com Support Services
4 Click Release Notes
1 Double-click the 3Com icon in the Windows system tray
2 Click OK 3 Click the Support tab
2 Click the Device Manager tab
Removing NIC Software
3 Double-click Network adapters
5 Click Remove 6 Click OK to confirm the device removal
5 Click Close to close the Network screen
4 Click Yes to confirm the removal
1 In the Main Program window, double-click
3 Click Yes
4 Click OK
Frequently Asked Questions
Table 5 Frequently Asked Questions continued
Frequently Asked Questions
Diagnostics program
Question
Page
case, select Minimize CPU Utilization
CONFIGURING THE NIC
2 Double-click the 3Com icon in the Windows system tray
Displaying Configuration Settings
3 Click OK
c Click 3nicdiag
4 Click NIC Details
Displaying Configuration Settings
The NIC Details screen Figure 17 appears
5 Click OK to exit this screen
Changing Configuration Settings
2 Click OK 3 Click the Properties tab
1 Double-click the 3Com icon in the Windows system tray
4 Change the NIC’s configuration
5 Click OK to save values or Cancel to exit without saving values
Page
Physical Dimensions
SPECIFICATIONS AND
Power Requirements
CABLING REQUIREMENTS
10BASE-T Operation
Unshielded Twisted-Pair Cable
100BASE-TX Operation
10BASE-T Specifications
100BASE-TX Specifications
Cabling Requirements
Page
TECHNICAL SUPPORT
Online Technical Services
World Wide Web Site
3Com FTP Site
Access by Analog Modem
3Com Bulletin Board Service
Access by Digital Modem
1 847 262
Support from Your Network Supplier
3ComFacts Automated Fax Service
Support from 3Com
1 408 727
Country
Below is a list of worldwide technical telephone support numbers
Telephone Number
Asia Pacific Rim
Returning Products for Repair
To obtain an RMA number, call or fax
Returning Products for Repair
Telephone Number
Country
Fax Number
66 APPENDIX B TECHNICAL SUPPORT
GLOSSARY
BIOS
10BASE-T
100BASE-TX
full-duplex
Fast Ethernet
half-duplex
network
peer-to-peer network
switch
server
unshielded twisted pair UTP cabling
Page
Numbers
INDEX
Page
INDEX
Page
YEAR 2000 WARRANTY
3Com Corporation LIMITED WARRANTY
OBTAINING WARRANTY SERVICE
HARDWARE
WARRANTIES EXCLUSIVE
FCC CLASS B STATEMENT
LIMITATION OF LIABILITY
DISCLAIMER
3COM END USER SOFTWARE LICENSE AGREEMENT
FCC DECLARATION OF CONFORMITY
IMPORTANT Read Before Using This Product
The Interference Handbook
3Com is a registered trademark of 3Com Corporation