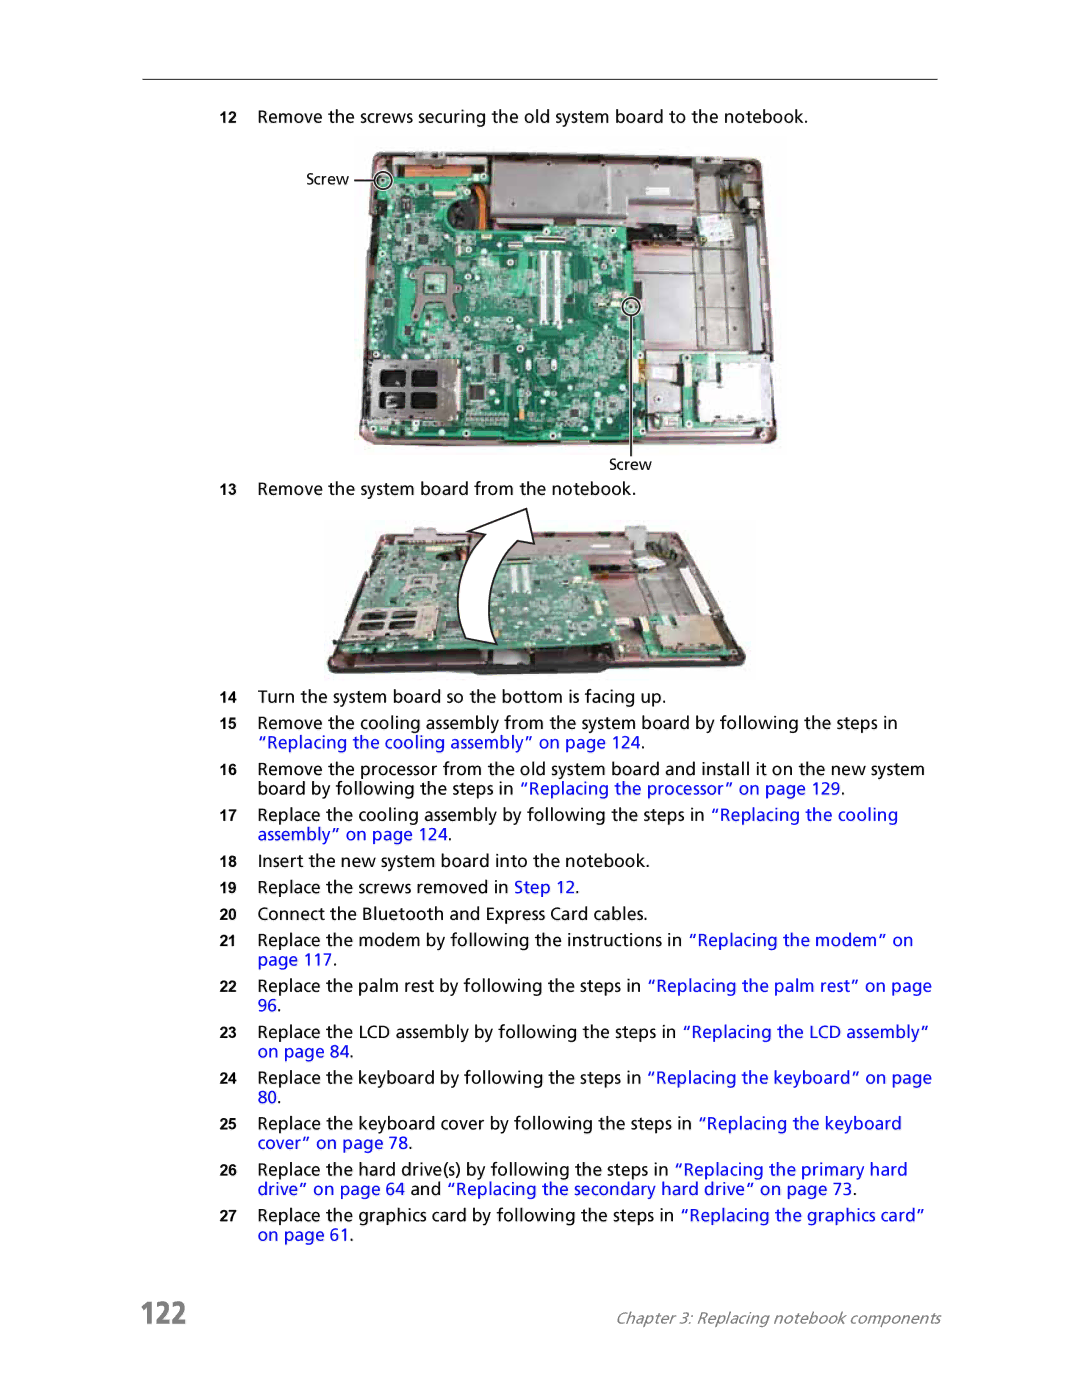
12Remove the screws securing the old system board to the notebook.
Screw
Screw
13Remove the system board from the notebook.
14Turn the system board so the bottom is facing up.
15Remove the cooling assembly from the system board by following the steps in “Replacing the cooling assembly” on page 124.
16Remove the processor from the old system board and install it on the new system board by following the steps in “Replacing the processor” on page 129.
17Replace the cooling assembly by following the steps in “Replacing the cooling assembly” on page 124.
18Insert the new system board into the notebook.
19Replace the screws removed in Step 12.
20Connect the Bluetooth and Express Card cables.
21Replace the modem by following the instructions in “Replacing the modem” on page 117.
22Replace the palm rest by following the steps in “Replacing the palm rest” on page 96.
23Replace the LCD assembly by following the steps in “Replacing the LCD assembly” on page 84.
24Replace the keyboard by following the steps in “Replacing the keyboard” on page 80.
25Replace the keyboard cover by following the steps in “Replacing the keyboard cover” on page 78.
26Replace the hard drive(s) by following the steps in “Replacing the primary hard drive” on page 64 and “Replacing the secondary hard drive” on page 73.
27Replace the graphics card by following the steps in “Replacing the graphics card” on page 61.
122 | Chapter 3: Replacing notebook components |