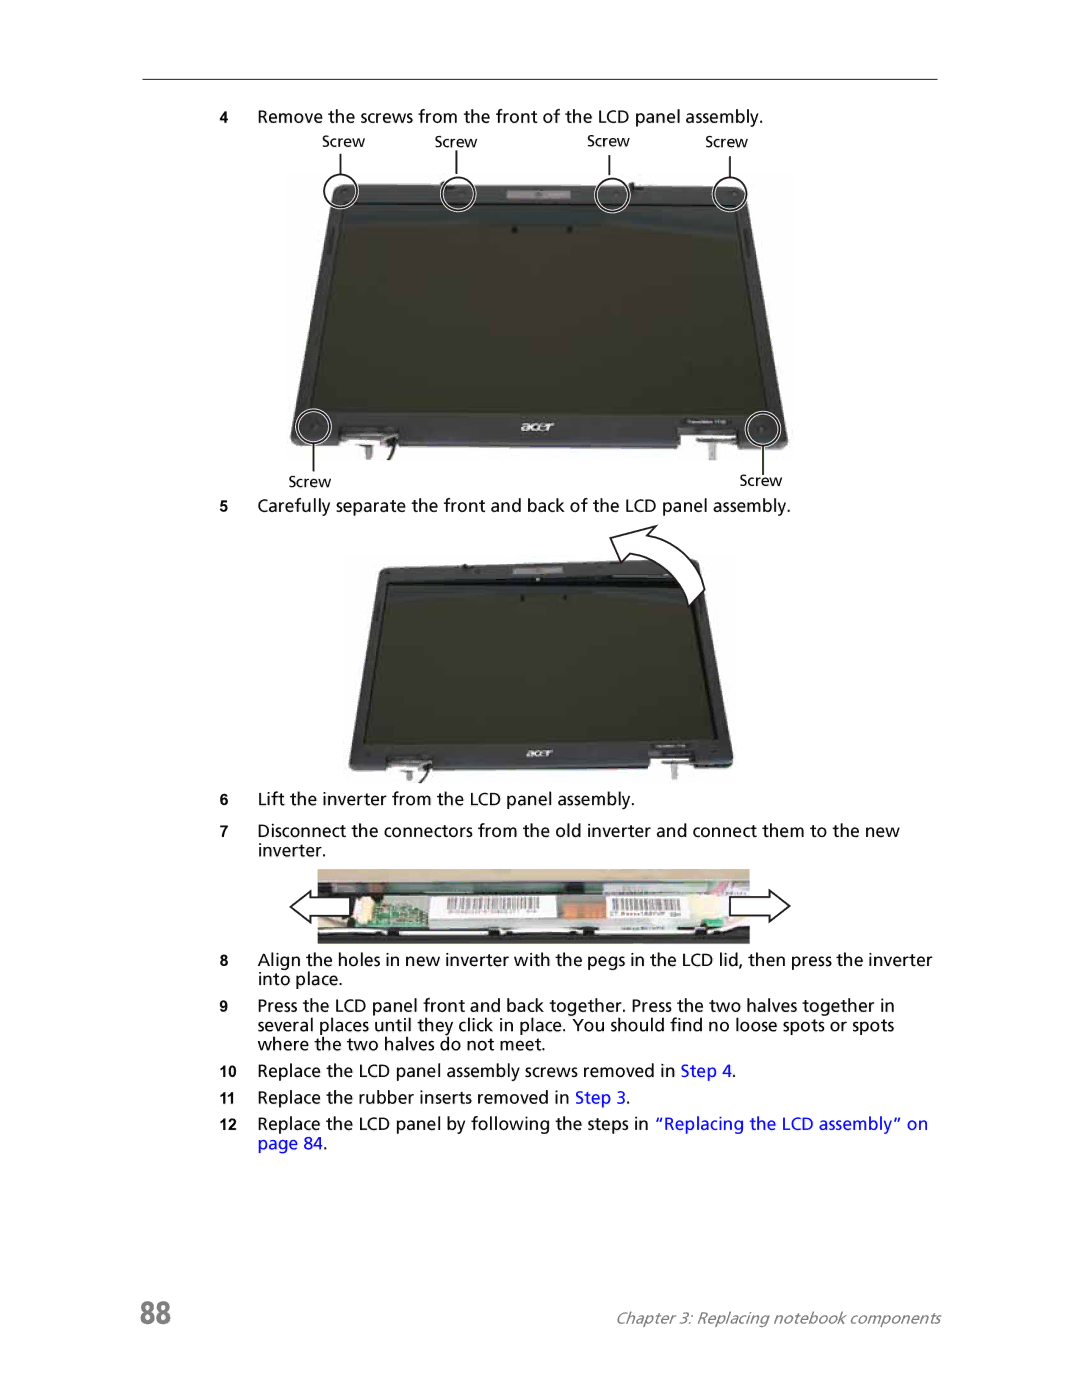
4Remove the screws from the front of the LCD panel assembly.
Screw | Screw | Screw | Screw |
Screw | Screw |
5Carefully separate the front and back of the LCD panel assembly.
6Lift the inverter from the LCD panel assembly.
7Disconnect the connectors from the old inverter and connect them to the new inverter.
8Align the holes in new inverter with the pegs in the LCD lid, then press the inverter into place.
9Press the LCD panel front and back together. Press the two halves together in several places until they click in place. You should find no loose spots or spots where the two halves do not meet.
10Replace the LCD panel assembly screws removed in Step 4.
11Replace the rubber inserts removed in Step 3.
12Replace the LCD panel by following the steps in “Replacing the LCD assembly” on page 84.
88 | Chapter 3: Replacing notebook components |