To replace the cooling assembly:
1Complete the steps in “Preparing the notebook” on page 55.
2Remove the memory from the old system board and install it on the new system board by following the steps in “Adding or replacing memory modules” on page 57.
3Remove the graphics card by following the steps in “Replacing the graphics card” on page 61.
4Remove the hard drive(s) by following the steps in “Replacing the primary hard drive” on page 64 and “Replacing the secondary hard drive” on page 73.
5If the notebook has wireless networking built in, remove the wireless card from the old system board and install it on the new system board by following the steps in “Replacing the IEEE 802.11 wireless card” on page 67.
6Remove the keyboard cover by following the steps in “Replacing the keyboard cover” on page 78.
7Remove the keyboard by following the steps in “Replacing the keyboard” on page 80.
8Remove the LCD assembly by following the steps in “Replacing the LCD assembly” on page 84.
9Remove the palm rest by following the instructions in “Replacing the palm rest” on page 96.
10Remove the modem by following the instructions in “Replacing the modem” on page 117.
11Remove the system board by following the instructions in “Replacing the system board” on page 120.
12Turn the system board so the bottom is facing up.
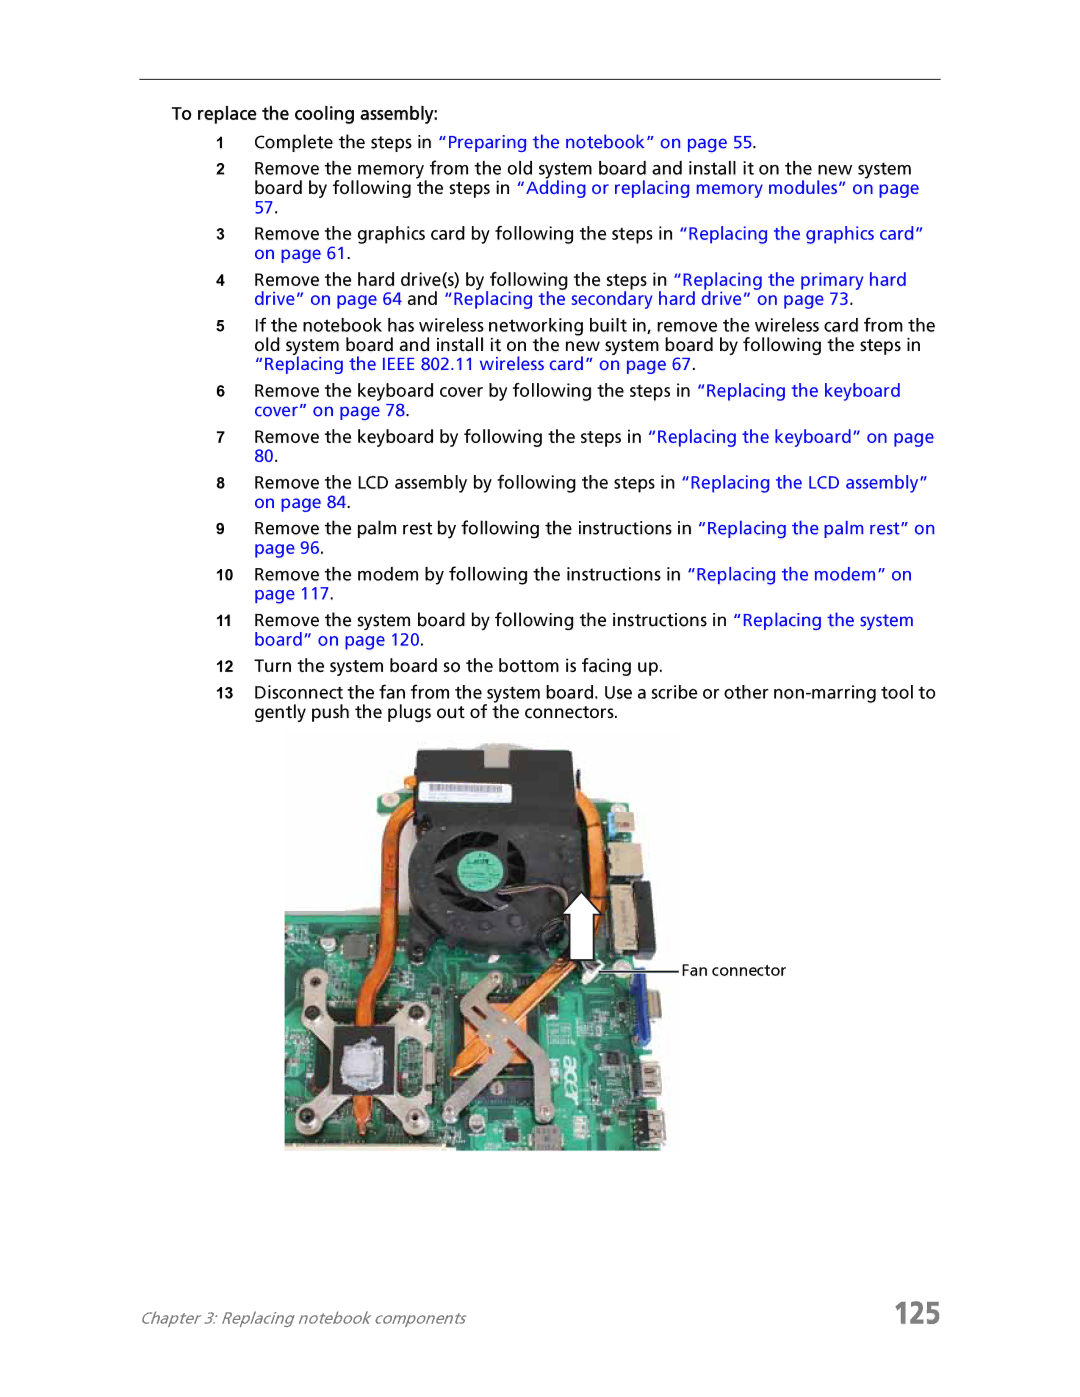
13Disconnect the fan from the system board. Use a scribe or other
Fan connector
Chapter 3: Replacing notebook components | 125 |