6Remove the screws on the bottom that secure the LCD panel hinges to the chassis.
Screw | Screw |
7Remove the keyboard cover by following the steps in “Replacing the keyboard cover” on page 78.
8Remove the keyboard by following the steps in “Replacing the keyboard” on page 80.
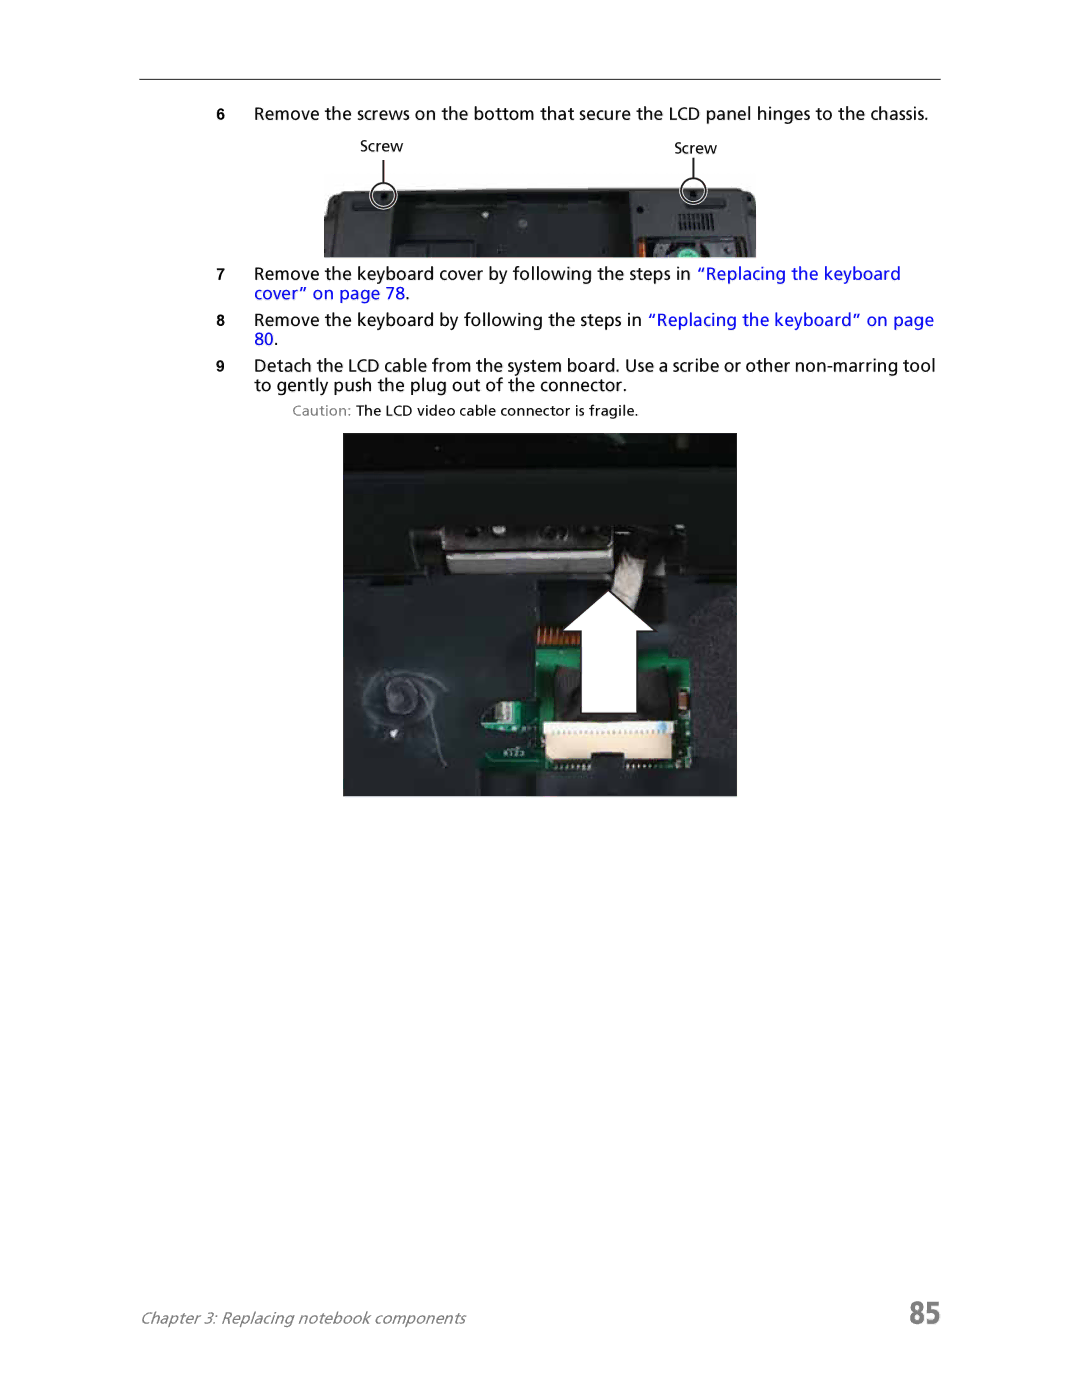
9Detach the LCD cable from the system board. Use a scribe or other
Caution: The LCD video cable connector is fragile.
Chapter 3: Replacing notebook components | 85 |