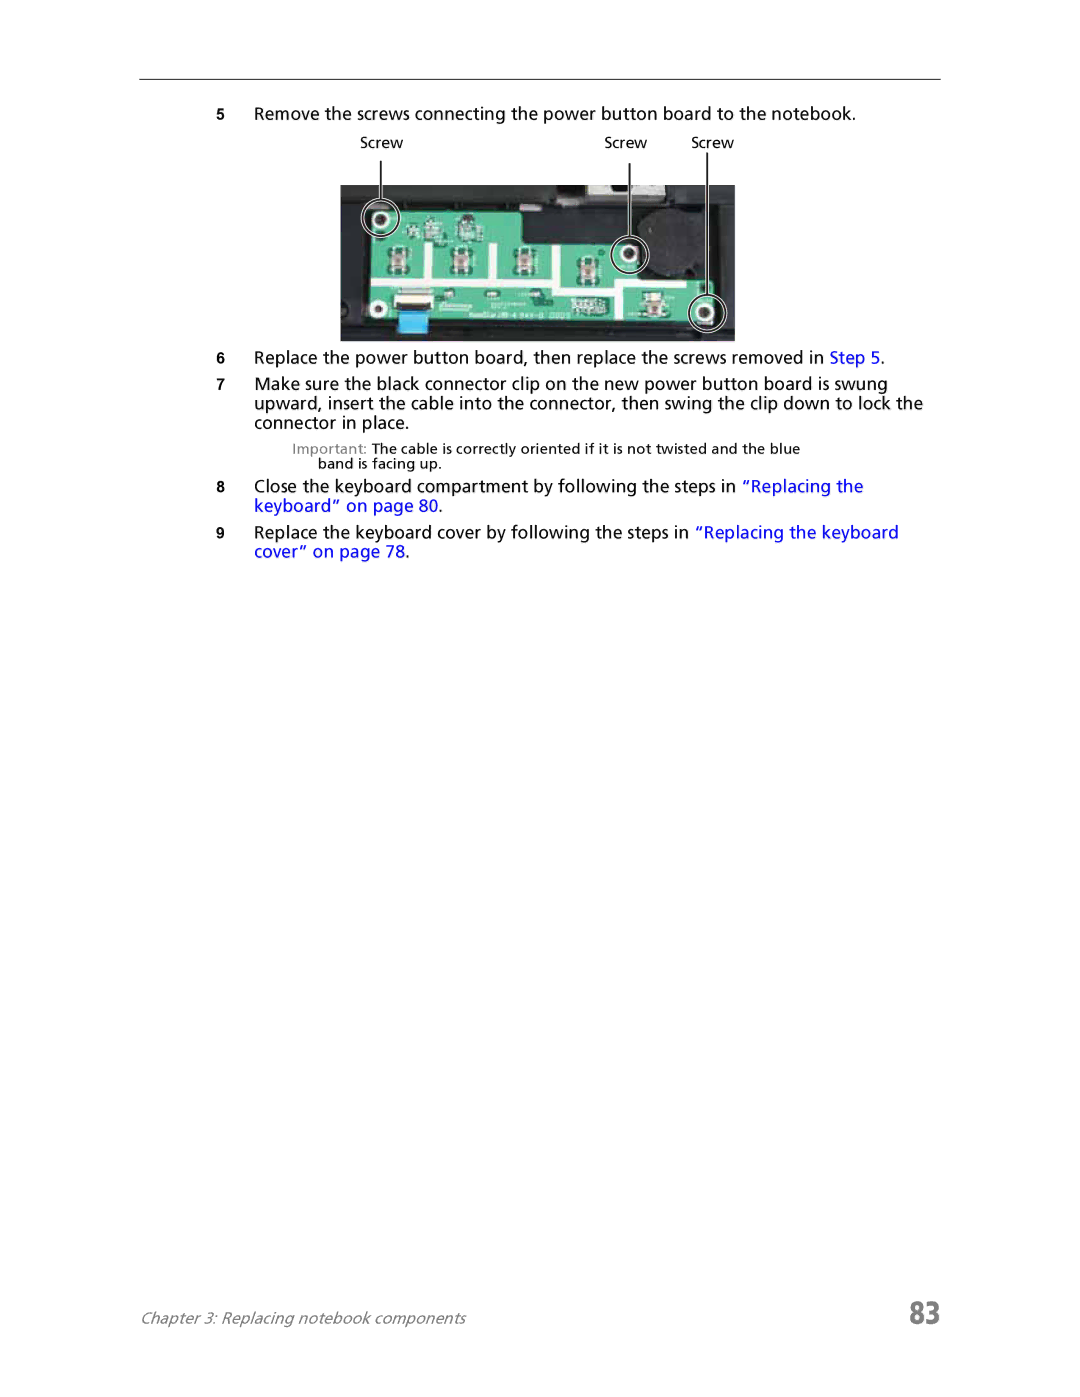
5Remove the screws connecting the power button board to the notebook.
Screw | Screw | Screw |
6Replace the power button board, then replace the screws removed in Step 5.
7Make sure the black connector clip on the new power button board is swung upward, insert the cable into the connector, then swing the clip down to lock the connector in place.
Important: The cable is correctly oriented if it is not twisted and the blue band is facing up.
8Close the keyboard compartment by following the steps in “Replacing the keyboard” on page 80.
9Replace the keyboard cover by following the steps in “Replacing the keyboard cover” on page 78.
Chapter 3: Replacing notebook components | 83 |