Replacing the Optical Drive
1.If removed, install the optical drive board to the optical drive with two T6 screws.
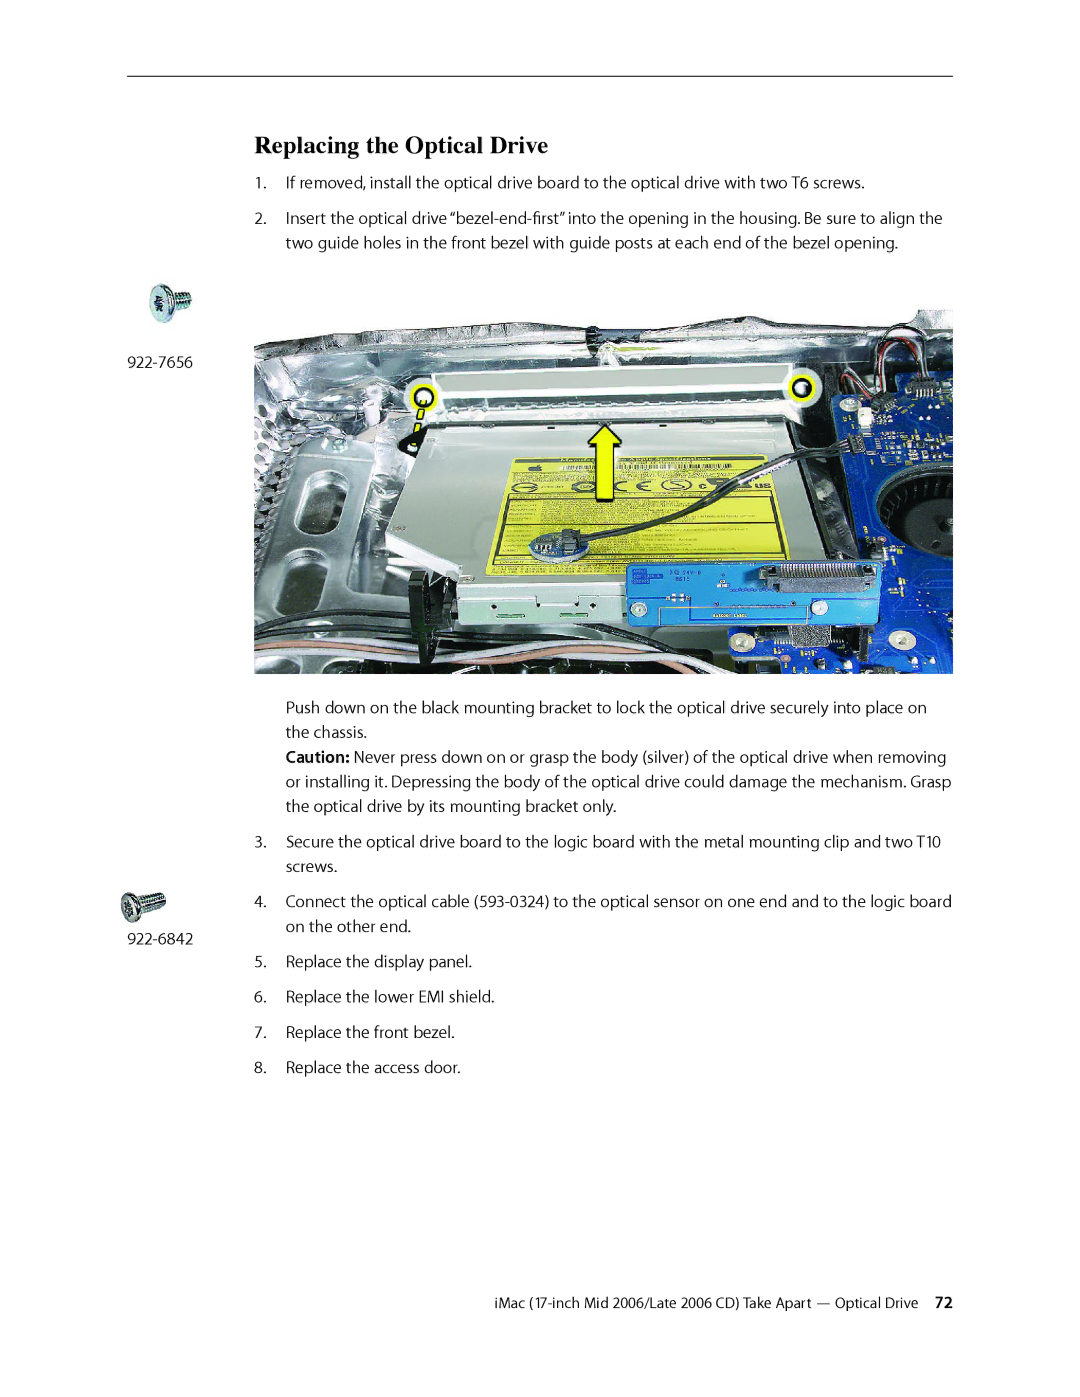
2.Insert the optical drive
Push down on the black mounting bracket to lock the optical drive securely into place on the chassis.
Caution: Never press down on or grasp the body (silver) of the optical drive when removing or installing it. Depressing the body of the optical drive could damage the mechanism. Grasp the optical drive by its mounting bracket only.
3.Secure the optical drive board to the logic board with the metal mounting clip and two T10 screws.
4.Connect the optical cable
5.Replace the display panel.
6.Replace the lower EMI shield.
7.Replace the front bezel.
8.Replace the access door.
