Setup and Installation
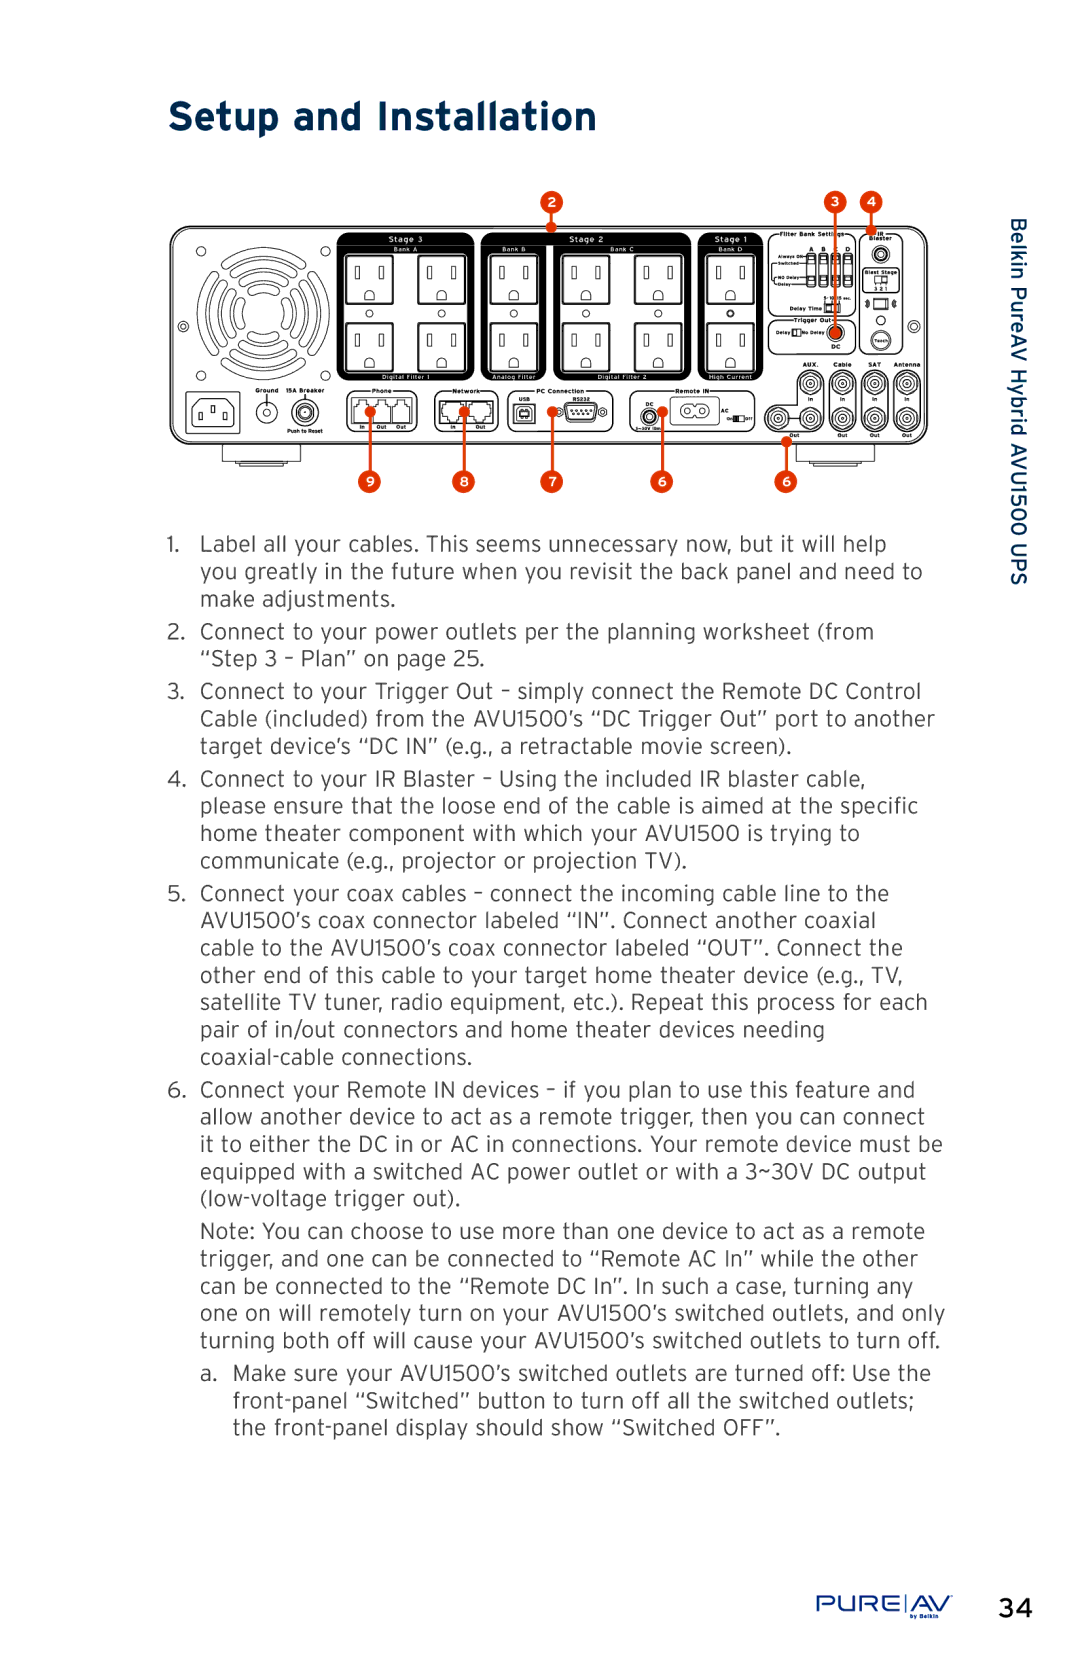
2 | 3 | 4 |
9 | 8 | 7 | 6 | 6 |
1.Label all your cables. This seems unnecessary now, but it will help you greatly in the future when you revisit the back panel and need to make adjustments.
2.Connect to your power outlets per the planning worksheet (from “Step 3 – Plan” on page 25.
3.Connect to your Trigger Out – simply connect the Remote DC Control Cable (included) from the AVU1500’s “DC Trigger Out” port to another target device’s “DC IN” (e.g., a retractable movie screen).
4.Connect to your IR Blaster – Using the included IR blaster cable, please ensure that the loose end of the cable is aimed at the specific home theater component with which your AVU1500 is trying to communicate (e.g., projector or projection TV).
5.Connect your coax cables – connect the incoming cable line to the AVU1500’s coax connector labeled “IN”. Connect another coaxial cable to the AVU1500’s coax connector labeled “OUT”. Connect the other end of this cable to your target home theater device (e.g., TV, satellite TV tuner, radio equipment, etc.). Repeat this process for each pair of in/out connectors and home theater devices needing
6.Connect your Remote IN devices – if you plan to use this feature and allow another device to act as a remote trigger, then you can connect it to either the DC in or AC in connections. Your remote device must be equipped with a switched AC power outlet or with a 3~30V DC output
Note: You can choose to use more than one device to act as a remote trigger, and one can be connected to “Remote AC In” while the other can be connected to the “Remote DC In”. In such a case, turning any one on will remotely turn on your AVU1500’s switched outlets, and only turning both off will cause your AVU1500’s switched outlets to turn off.
a.Make sure your AVU1500’s switched outlets are turned off: Use the
Belkin PureAV Hybrid AVU1500 UPS
®34