Chapter 4: E2 Controller
NOTE: You may turn the A/C unit on and off at any time by pressing and holding the Enter key for 3 seconds.
Other status messages that may appear at the bottom of the screen are:
“OFF by remote shutdown” indicates the Remote Start/Stop feature is enabled and requires a remote start switch to be turned On.
“OFF by Network” indicates the unit is part of a group and is off because of a grouping priority command such as a compressor alarm or loss of airflow, or the BMS communication feature is enabled and the unit received a network signal to pause operation.
“OFF by Internal Alarm” indicates that the unit is off because of a group alarm condition. (Only active with grouped units.)
“Unit on CL Lockout” indicates cooling has been locked out while there is a demand for dehumidification because the temperature is below the minimum temperature allowable for dehumidification (factory default setting is 4° F below setpoint).
4.After the initialization period expires, the controller enables the control output to the fluid control valve
5.The Black Box logo in the display is replaced with a blower ![]() symbol. The fans begin operating in stages with
symbol. The fans begin operating in stages with
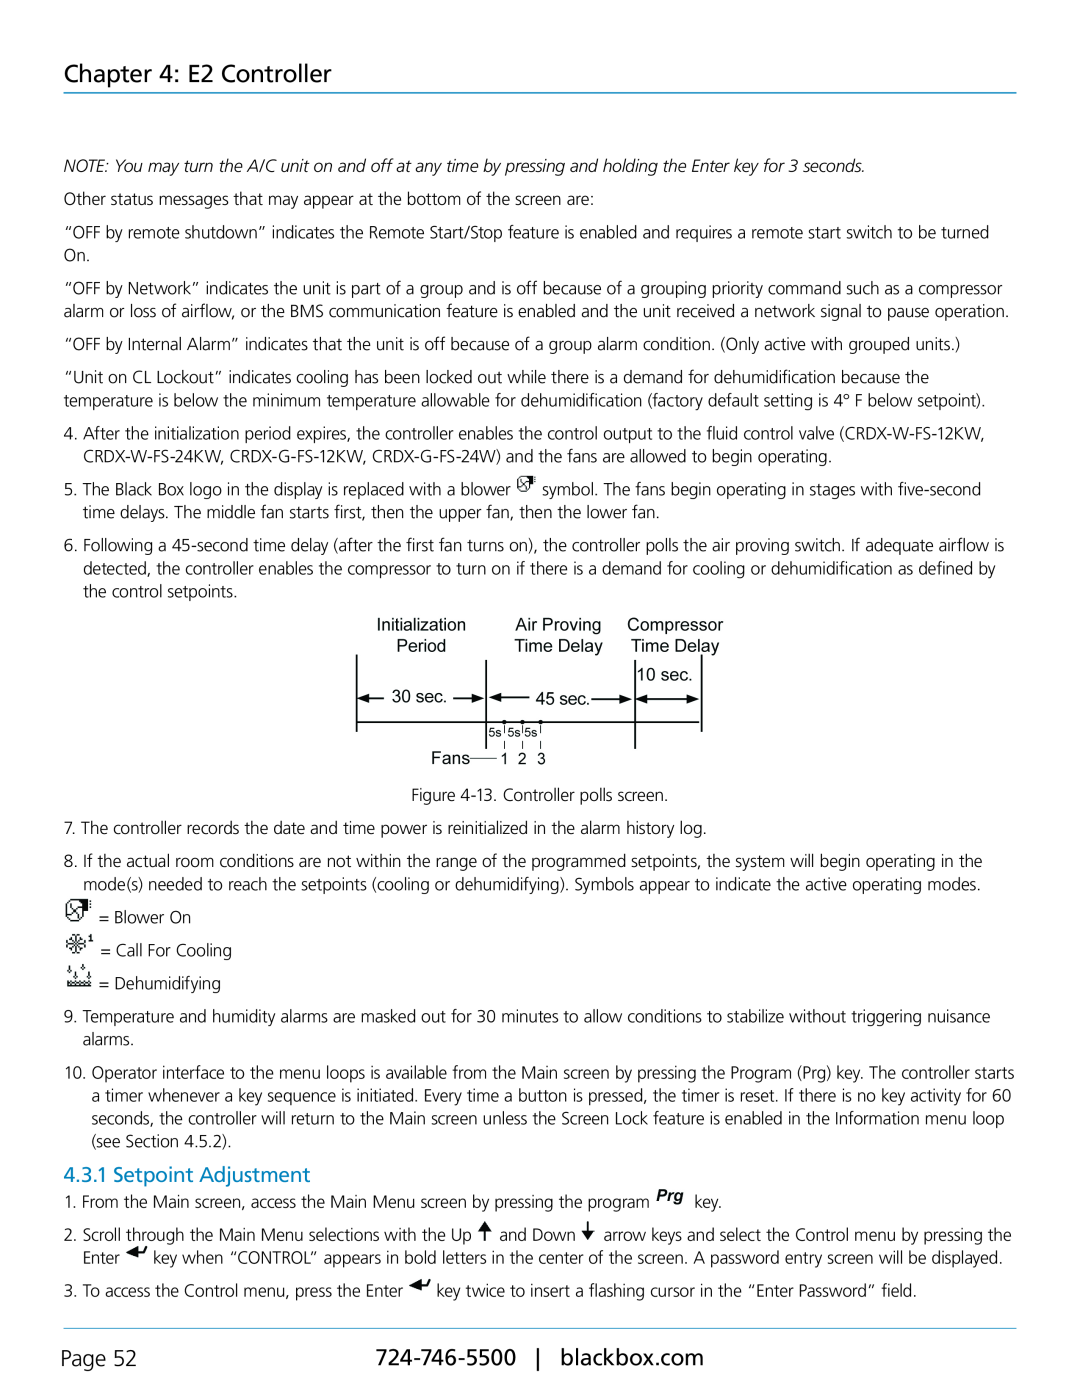
6.Following a
Figure
7.The controller records the date and time power is reinitialized in the alarm history log.
8.If the actual room conditions are not within the range of the programmed setpoints, the system will begin operating in the mode(s) needed to reach the setpoints (cooling or dehumidifying). Symbols appear to indicate the active operating modes.
![]() = Blower On
= Blower On
![]() = Call For Cooling
= Call For Cooling
![]() = Dehumidifying
= Dehumidifying
9.Temperature and humidity alarms are masked out for 30 minutes to allow conditions to stabilize without triggering nuisance alarms.
10.Operator interface to the menu loops is available from the Main screen by pressing the Program (Prg) key. The controller starts a timer whenever a key sequence is initiated. Every time a button is pressed, the timer is reset. If there is no key activity for 60 seconds, the controller will return to the Main screen unless the Screen Lock feature is enabled in the Information menu loop (see Section 4.5.2).
4.3.1 Setpoint Adjustment
1.From the Main screen, access the Main Menu screen by pressing the program ![]() key.
key.
2.Scroll through the Main Menu selections with the Up ![]() and Down
and Down ![]() arrow keys and select the Control menu by pressing the Enter
arrow keys and select the Control menu by pressing the Enter ![]() key when “CONTROL” appears in bold letters in the center of the screen. A password entry screen will be displayed.
key when “CONTROL” appears in bold letters in the center of the screen. A password entry screen will be displayed.
3.To access the Control menu, press the Enter ![]() key twice to insert a flashing cursor in the “Enter Password” field.
key twice to insert a flashing cursor in the “Enter Password” field.
Page 52 |