MFC
Year 2000 Compliant
Brother on the World Wide Web
For Customer Service
Fax-Back System
Brother Bulletin Board
Ordering Accessories and Supplies
Table of Contents
Record FAX/TEL Outgoing Announcement F/T OGM
6Setup Send
Speed Dialing
Vii
Viii
142
164
179
Xii
UsingThis Manual
Finding Information
Fax Tones and Handshake
Test Sheet Procedures For USA Only
About Fax Machines
USA1-908-685-9283 fax
ECM Error Correction Mode
MFC 4350, MFC 4650 and MFC 7750 Control Panel Overview
MFC 435O
MFC 4350, MFC 4650 and MFC 7750 Control Panel Keys
Dial Pad
MFC 6650MC Control Panel Overview
665O MC
MFC 6650MC Control Panel Keys
Hook Stop
A P T E R O N E
MFC Setup Connections
Use caution when installing or modifying telephone lines
Packing List
Make sure you have the following items
No ! no ! no
Choosing a Location
Assembly
Installingl the Drum Unit Assembly With Toner Cartridge
C S E T U P a N D C O N N E C T I O N S
Setting Up the MFC
Sleep
Connect the telephone line
Loading Paper in Multi-Purpose Sheet Feeder
Attaching Dust Cover
Acceptable Paper
MFC can handle paper that has the following specifications
Manual Feed Slot
Loading one sheet of paper
Paper Capacity in Feeder
Connecting an External Telephone Answering Device TAD
Sequence
YES
Connections
Connecting an External Telephone
Recording Outgoing Message OGM
Two-Line Phone System
Special Line Considerations
Roll Over Phone Lines
Converting Telephone Wall Outlets
Installing MFC, External Two-Line TAD Two-Line Telephone
Custom Features on a Single Line
Multi-Line Connections PBX
User-Friendly Programming
Function Mode
If you want to exit the Function Mode, press Stop
Alternating Displays
FAX NO. & Start
Initial Setup
Function Selection Table
Setup Send
Print Reports
Print Options
Getting Started
Setting Dialing Mode Tone/Pulse
DIALINGTONE? DIALINGPULSE?
A P T E R
See Composing Electronic Cover Entering Text
Four times Five times
Entering Text
If you want to enter a blank space, press twice
Press For
Press For = ? @
Setting the Speaker Volume
Setting Beeper Volume
Setting the Handset Volume
You can adjust the speaker volume when your MFC is on Hook
Sleep Mode
Setting the Ring Volume
Memory Storage
Enter & SET
Delayed Timer
Press Set Press Stop to exit
Select Answer Mode
Basic Receiving Operations
Setting Ring Delay
TAD
Setting F/T Ring Time
Ring TIME20 SEC
Reduction
Easy Receive
Printing a Reduced Incoming Document
Pressing
Change Reduction
Setting Paper Size
Paper
Recommended Reductions
Advanced Receiving Operations
Setting the Print Density
Toner Save
FAX RECEIVE*51
For FAX/TEL Mode Only
Remote ACT.ON?
TEL ANSWER#51
Polling RXOFF?
Setting Up Polling Receive
Polling
Enter FAX no Online Press Start KEY
Accepted Dialing #XX
Setting Up Sequential Polling Receive
Polling RXON?
Press or to select Polling on
Canceling a Scheduled Job
Remaining Jobs
Distinctive Ringing
MF Link
Registering your Distinctive Ringing Pattern
Long long Short long short Short short long
Viewing Caller ID List
Caller ID
Press
Clearing a Caller ID Stored in Memory
Printing Caller ID List
Setup Send
BeforeYou Begin
Temperature
Humidity 50% 70% Paper
Automatic Transmission
Manual Transmission
Manual and Automatic Fax Redial
Real Time Transmission
Dual Access
Real Time TX
Checking the Jobs Status
Accepted Other SETTINGS?
Real TIMEON?
#02 Sales Report Clear 2.EXIT
Canceling Jobs in Memory
If you have only one job waiting, go to step
Comment OFF Please Call Urgent Confidential
Basic Sending Operations
Composing Electronic Cover
Cover Page for Next Fax Only
Comment OFF Please Call Urgent Confidential User Defined
Press To select on or OFF
Always Send Cover
COVERPAGEOFF? COVERPAGEON?
Comment OFF
Press Function , 1 , 3 Press or to select
Coverpage MSG
Using a Printed Cover
Cover Page Message
Composing Your Own Comments
Contrast
Overseas Mode
Resolution
Overseas Mode
Advanced Sending Operations
Call BACKOFF? Call BACKON?
Call Reservation
Call Reserveoff Call Reserveon
Enter the fax number you’re calling Press Start
Print Sample Call Back Message
Delayed FAX
DOC 2.MEMORY
Broadcasting
Multiple Resolution Transmission
Press Stop when you’re finished. The screen displays
Setting Up Polling Transmit
Polled TXOFF?
Interrupting Delayed Fax and Polling Transmit Jobs
Canceling a Job While Scanning the Document
Insert Document
Storing One Touch Dial Numbers
Storing Numbers for Easy Dialing
Press Function , 1 , 6
SPEED-DIAL? #
Storing Speed Dial Numbers
Name
Fax number
Setting Up Groups for Broadcasting
Telephone voice number
Select ONE-TOUCH
Setup Groupgo Enter & SET
Name Enter & SET
Manual Dialing
Dialing Options
To hang up, replace the handset
One Touch Dialing
Speed Dialing
Hold
Dialing Access Codes and Credit Card Numbers
Pause
Tone/Pulse
When the call is over, hang up
Searching Telephone Index
FAX FORWARD?
Fax Forwarding/Paging
Programming a Fax Forwarding Number
FWD# Enter & SET
PAGING?
Programming Paging Number
PAG# Enter & SET
FAX STORAGEOFF? Select & SET
Setting Fax Storage
Changing Remote Access Code
Erase ALL FAX?
Using Remote Access Code
Remote Retrieval
Remote Commands
OFF
Retrieving Memory Status List
Retrieving Fax Messages
Changing Fax Forwarding Number
A P T E R N I N E
Xmit Report
MFC Settings and Activity
ACT.REPORT ALL Dial TEL.INDEX User Settings Memory Status
You can print the following lists and reports
Activity Report Interval
To Print a Report
Transmission Verification Xmit Report
INTERVAL?
Using MFC as a Copier
Sort Photo
Stacking Multiple Copies
Making a Single Copy
Making Multiple Copies
Sorting Multiple Copies
Copying a Photograph
If You Get a Memory Full Message
Reducing and Enlarging Copies
Memory Full P.01 Press Stop KEY
A P T E R E L E V E N
Introduction
C12H a P T E R T W E L V E
Message Center Mode
Flexible Memory Settings Message Storage
FAXOFF? Select & SET
Setting Up Message Center
Setting Message Storage
VOICEON? Select & SET
MSG CTR OGM?
Recording Message Center Outgoing Message OGM
MSG CTR OGM? Select & SET
Listening to Outgoing Message OGM
Message Indicators
Activating Message Center Mode
VOICE03 FAX02 Online
Printing a Fax Message
Playing Voice Messages and Memos
Print FAX?
Backup Printing Option
Backup Printon Select & SET
Erase this MSG?
MSG Press Set Press 1 to erase-OR-Press 2 to cancel
Erasing Messages
Erase ALL VOICE?
101
Setting Maximum Time for Incoming Messages
Setting Toll Saver
ICM Recording Monitor
Fax Forwarding/Paging
Recording a Memo
Recording a Conversation
Programming a Fax Forwarding Number
103
Programming a Paging Number
Long beep-Fax messages Long beeps-Voice messages
Changing Remote Access Code
105
Remote Control Commands
Remote Control Commands
107
Changing Fax Forwarding Number
MFC with Your Computer
Computer Requirements
BeforeYou Install Multi-Function Link Pro
If You Don’t Have a CD-ROM Drive
80486/66MHz or higher Windows 3.1, 3.11 or
Connecting the MFC to the Computer
111
Printer Driver for the MFC
Installing MFC 4350 Printer Driver
If you are using Windows NT Workstation Version
Click the Start button in the Taskbar
113
If you are using Windows 3.1 or
If you are using Windows 95
115
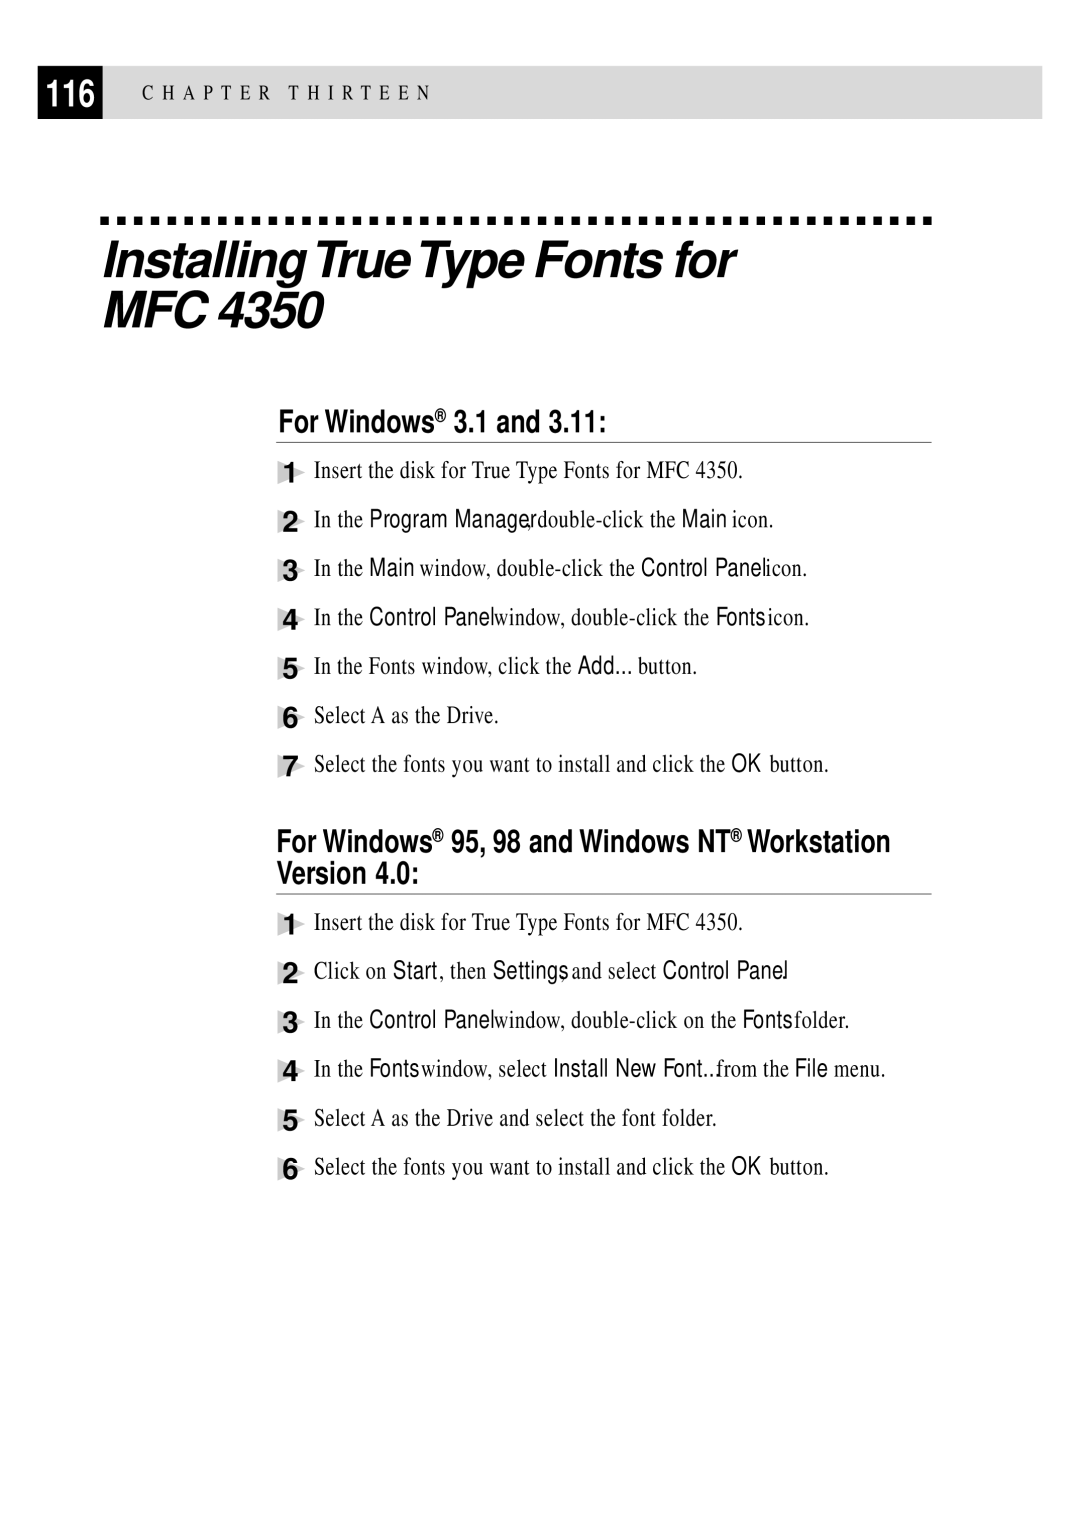
For Windows 3.1
InstallingTrueType Fonts for MFC
For Windows 95, 98 and Windows NT Workstation Version
117
Overview of Basic Steps
Choosing the Software to Install
Installing the Brother Software
119
H a P T E R T H I R T E E N
121
Helpful Hints for Windows 3.1, 3.11 or Windows 95
For DOS Users
How to Use the MFC with Your DOS Application Software
HP LaserJet IIP emulation mode
Auto emulation selection
What Does the Remote Printer Console Do?
Installing the Remote Printer Console
123
Remote Printer Console Main Program
Using the Remote Printer Console Main Program
PCL
125
Remote Printer Console
Printer Setup Category
Print Setup Section
Current Printer Status Information
Font Config
Setup Section
127
Printer Config
Console Config Category
Using the Printer Status Monitor Program
Direct Access Category
129
H a P T E R T H I R T E E N
Multi-Function Link Pro option for MFC
H a P T E R F O U R T E E N
Multi-Function Link Pro Software
Brother Resource Manager
Using the Multi-Function Link Pro Software
Multi-Function Link Pro
135
Visioneer PaperPort LE
Sending a Fax fromYour PC
Sending a Quick Fax
137
Sending a Fax from the Main Menu
Sending a Fax from a Windows Application
Receiving Faxes into your PC
Checklist for the MFC to Make Sure MF Link Mode is Active
Checklist for Your PC
139
Viewing Received Faxes
Manager button-OR-From the Start pull-down menu, select
Scanning a Document
Accessing the Scanner
141
Settings in the Scanner Window
Scanning a Document into your PC
143
Brightness
PreScanning an Image
Business Card Size
145
Exporting an Image File
NetCentric Internet Fax
Compatible Operating Systems
147
Your Fax Service Account
Receiving Faxes
Installing NetCentric FaxStorm
Creating an Inbound Account
149
Overview of Utilities
Accessing NetCentric FaxStorm
Sending Faxes
Addressing a Fax
151
General Tab
Send Fax window appears
Adding Contacts One at a Time
Selecting a Group or a Contact from a Group
Saving a New Contact from the Fax Send Window
153
Specifying a Cover
About Sending a Fax as E-mail
155
Attachments Tab
Sending a Fax from Other Windows Applications
Options/Sender Tab
If You Are Using Windows NT Workstation Version
157
Setting Up Contacts in the Contact Manager
To add a New Contact to the All Group
To add a New Contact to Another Group
159
Changing Contact Detail
Setting Up Multiple Addresses
Moving or Copying a Contact to Another Group
161
Creating a Group for Broadcasting
Accessing the Status Manager
Managing Your Faxes in the Status Manager
Managing Faxes from Your Account
Accessing Your Account
163
Checking the Status of Sent Faxes Outbox
Viewing Received Faxes in Your Account Page Inbox
Checking Sent Faxes in Your Account Page Outbox
Contact NetCentric Corporation at
165
Customer Support
Monsignor O’Brien Highway Cambridge, MA, USA
Main Features
Provides an In Memory printer driver
167
Setting Up Automatic E-Mail Printing
If You are Using Korean Windows 95
You Cannot Use a 16 bit TCP/IP Stack
Setting Up the Server
Setting the Check Time
If the Uninstall Program Displays An Error Message
Using Automatic E-Mail Printing
Uninstalling Automatic E-Mail Printing from Windows 95
169
To Access the Add/Remove Programs Properties Window
Trademarks
Popular Printer Emulation Support
Special Printing Features
Windows Printing
Remote Printer Console Program for DOS
Bi-directional Parallel Interface
Select the print command from your PC
Printing FromYour PC
Enhanced Memory Management
173
Two-Sided Printing Manual Duplexing
Loading Envelopes in Multi-Purpose Sheet Feeder
Loading More Than One Sheet of Paper
Paper Tray
Simultaneous Printing/Faxing
175
Choosing Acceptable Paper
FF/Cont Key
Printer Operation Keys
On/Off Line Key
You can use recycled paper in this MFC
177
Test/Reset Key
Printing the Print Configuration List
Print Priority Key
Printing PC Data in Hexadecimal
Restoring Factory Default Settings
Reset 2.EXIT
SET 2.EXIT
Accessories
Memory Board
For the Printer
Optional Memory for the Printer & Fax Operations
For the Fax
Installing the Optional Memory Board
181
MemoryConnector Board Spacer Main Controller
Information
Standard Telephone FCC Notices For 120V Models Only
H a P T E R E I G H T E E N
Laser Safety For 110-120V Models Only
185
Manufactured
FDA Regulations
United States
Industry Canada Compliance Statement For Canada Only
187
International Energy Star Compliance Statement
Important Safety Instructions
Do not use this product near water
189
Voice
H a P T E R E I G H T E E N
191
Compilation and Publication Notice
H a P T E R E I G H T E E N
Troubleshooting
Brother Home
Error Messages
Error Messages
195
Please Wait
Error Message
Document Jam
197
Printer Jam
Paper is Jammed in the Multi-purpose Sheet Feeder
Paper is Jammed near the Drum Unit or in the Fuser Unit
199
If You Are Having Difficulty with Your MFC
Sending Faxes
201
MFC
General Printing Difficulties Windows Setup Printing
203
Remained Data
Copy Quality Difficulties
205
Problem Using the HP Pavilion PC HP Demo Screen Saver
Difficulties Setting up the Software
Bi-Directional Parallel Ports nibble and byte modes
MFC Connect Failure or Bi-Directional Communication Error
207
HP LaserJet 4 Plus
HP LaserJet series II, IID, IIP, IIP+, III, Iiid or Iiip
NEC SuperScript 610/660
Epson ActionLaser 1100
209
Lexmark WinWriter
Graphics or Text Is Missing When the Document Is Printed
Packing and Shipping the MFC
211
Close the carton and tape it shut
Cleaning the Document Scanner
Regular Maintenance
213
Open the top cover Remove the drum unit assembly
Cleaning the Printer
Toner sensor
Cleaning the Drum Unit
215
Toner Empty Indicator
Replacing the Toner Cartridge
How to Replace the Toner Cartridge
217
Toner Cartridge Drum Unit
219
Reinstall the drum unit into the MFC and close the top cover
221
Replacing the Drum Unit
Follow these steps to replace the drum unit
223
Do not remove the clear plastic starter sheet
225
MFC will eject the clear plastic starter sheet automatically
For Customer Service
Fax Specifications
Product Description
Printer Specifications
Electrical and Environment
229
Parallel Interface Specifications
Resident Fonts
Symbol Sets/Character Sets
231
H a P T E R T W E N T Y
Glossary
233
L O S S a R Y
235
L O S S a R Y
237
L O S S a R Y
134
167
111
194
173
FAQ’s Frequently Asked Questions
220, 221, 222, 223, 224
166
241
135
19, 20
193
190
Visit us on the World Wide Web