VIEWING THE SEWING SCREEN
Example : One point pattern
CONTENTS
1 — |
1
2
3
4
5
6
7
8
9CAUTION
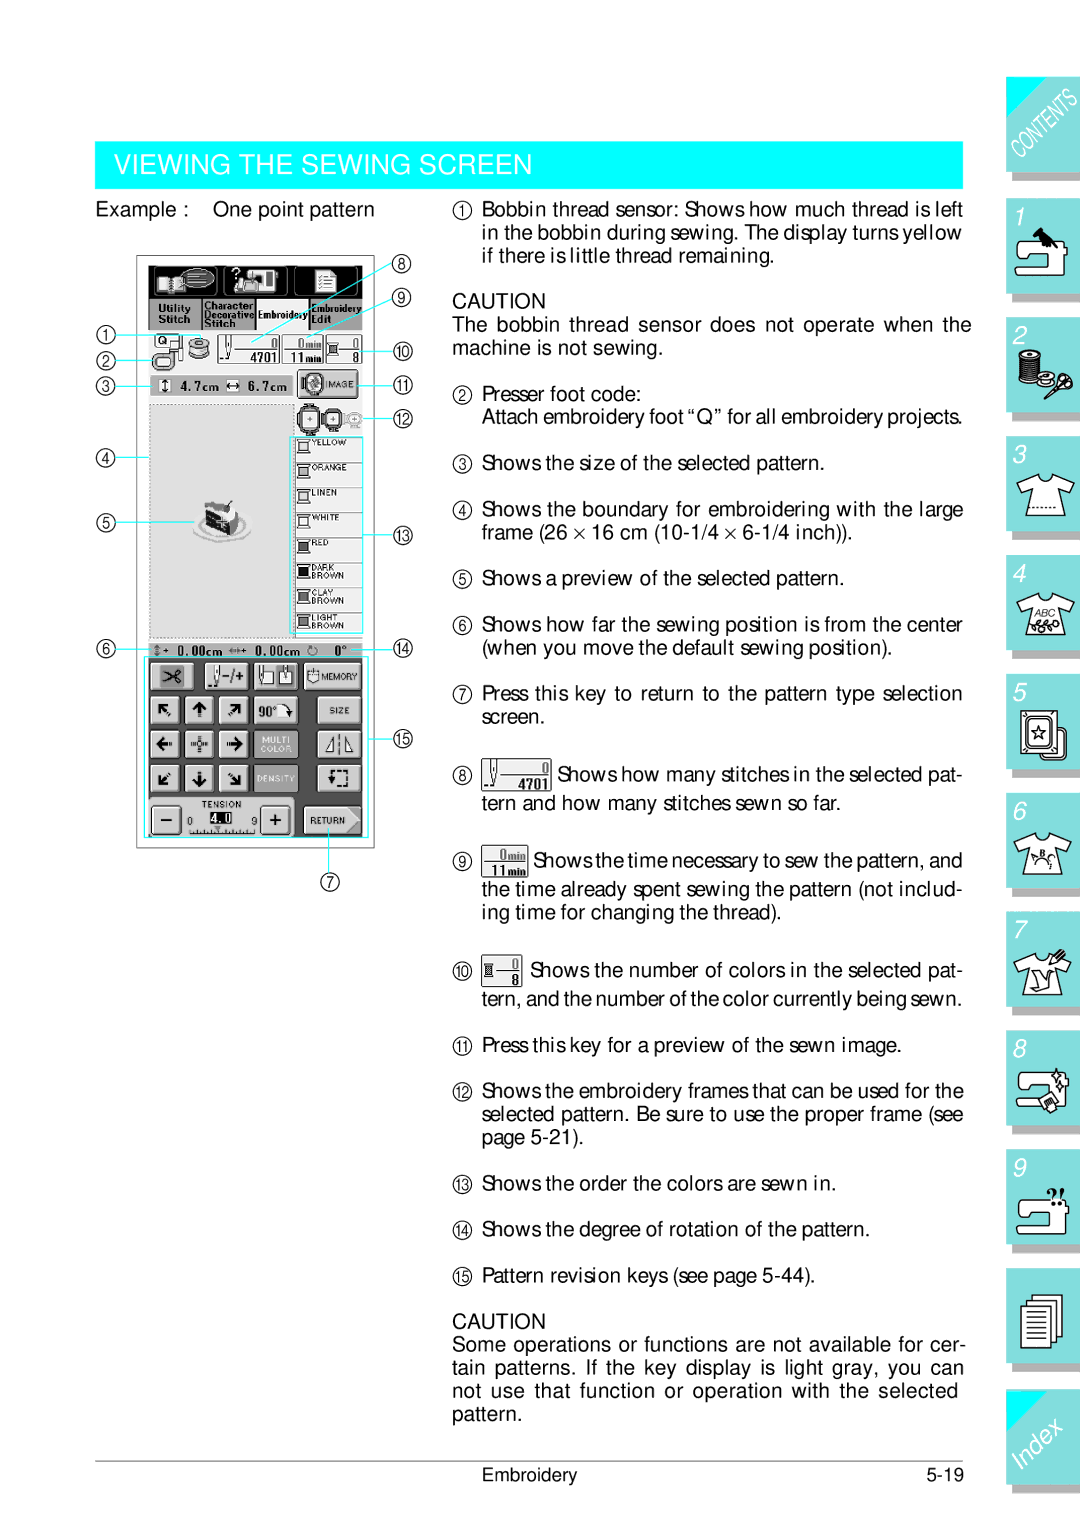
The bobbin thread sensor does not operate when the
@machine is not sewing.
A2 Presser foot code:
BAttach embroidery foot “Q” for all embroidery projects.
3Shows the size of the selected pattern.
4Shows the boundary for embroidering with the large
Cframe (26 × 16 cm
5Shows a preview of the selected pattern.
6Shows how far the sewing position is from the center D (when you move the default sewing position).
7Press this key to return to the pattern type selection screen.
E
8![]() Shows how many stitches in the selected pat- tern and how many stitches sewn so far.
Shows how many stitches in the selected pat- tern and how many stitches sewn so far.
9![]() Shows the time necessary to sew the pattern, and the time already spent sewing the pattern (not includ- ing time for changing the thread).
Shows the time necessary to sew the pattern, and the time already spent sewing the pattern (not includ- ing time for changing the thread).
0![]() Shows the number of colors in the selected pat- tern, and the number of the color currently being sewn.
Shows the number of colors in the selected pat- tern, and the number of the color currently being sewn.
APress this key for a preview of the sewn image.
BShows the embroidery frames that can be used for the selected pattern. Be sure to use the proper frame (see page
CShows the order the colors are sewn in.
DShows the degree of rotation of the pattern.
EPattern revision keys (see page
CAUTION
Some operations or functions are not available for cer- tain patterns. If the key display is light gray, you can not use that function or operation with the selected pattern.
2 — |
3 — |
4 — |
5 — |
6 — |
7 — |
8 — |
9 — |
?!
Embroidery |