1 | 4 | 2 | 3 |
| |||
|
| 3 |
|
|
| 1 |
|
| 2 |
|
|
| 1 |
|
|
| 6 |
|
|
| 2 |
|
|
3 |
|
|
|
| 4 |
|
|
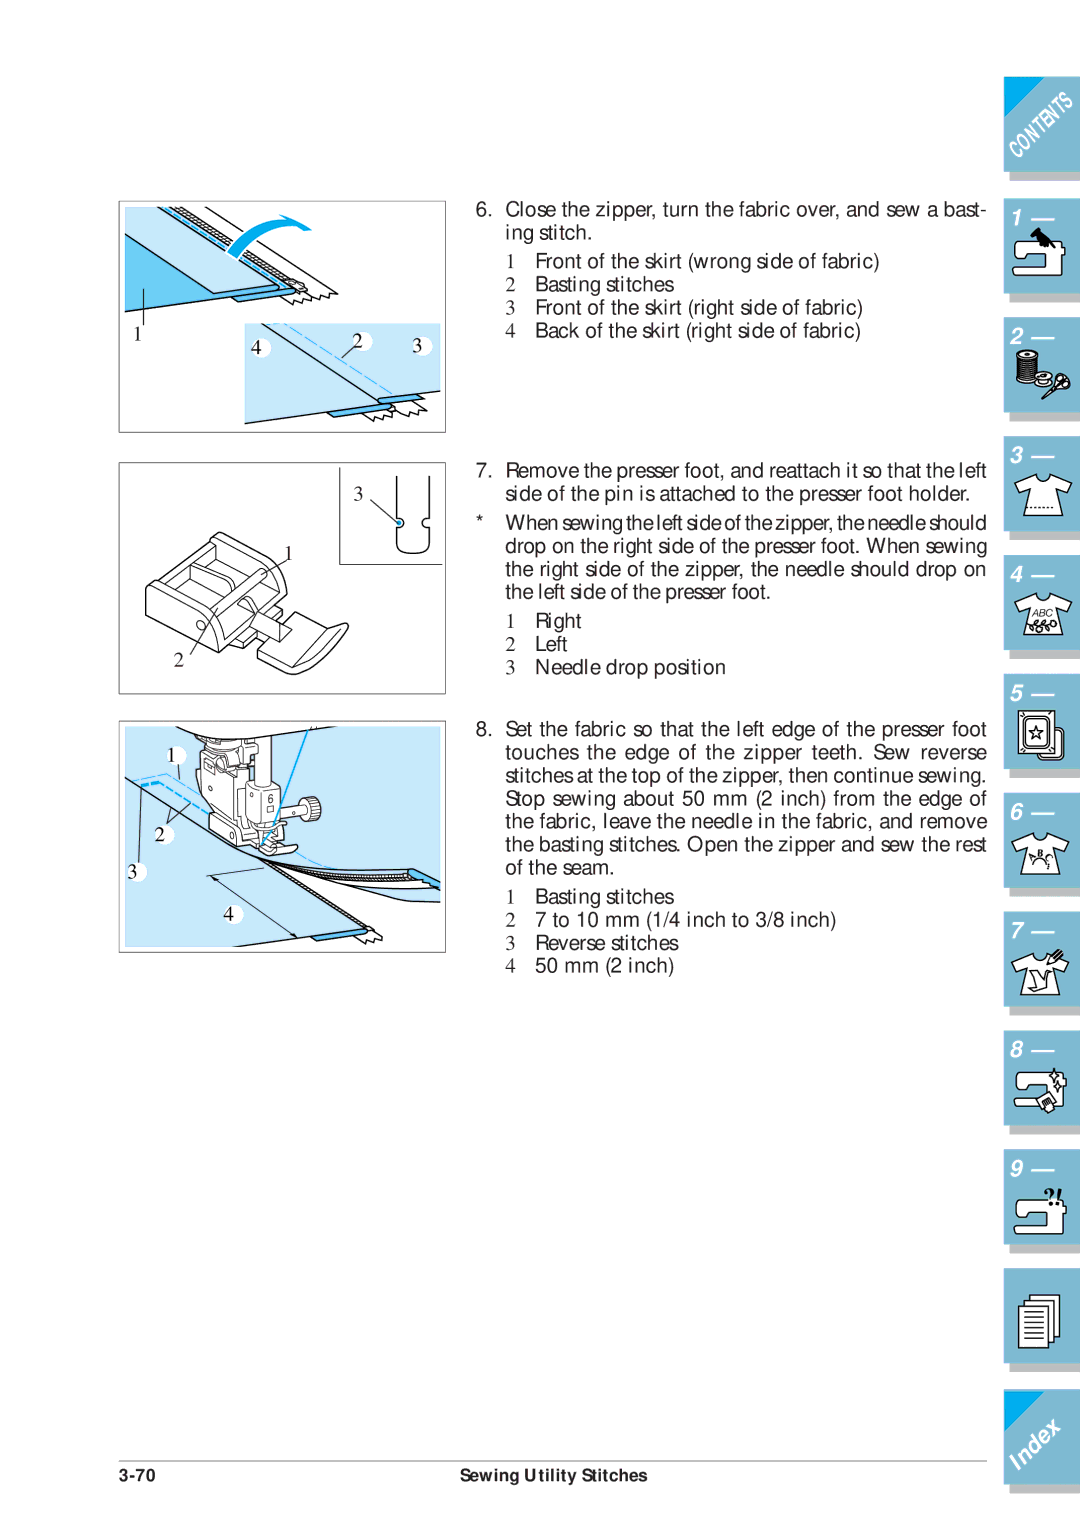
6.Close the zipper, turn the fabric over, and sew a bast- ing stitch.
1 Front of the skirt (wrong side of fabric)
2 Basting stitches
3 Front of the skirt (right side of fabric)
4 Back of the skirt (right side of fabric)
7.Remove the presser foot, and reattach it so that the left side of the pin is attached to the presser foot holder.
*When sewing the left side of the zipper, the needle should drop on the right side of the presser foot. When sewing the right side of the zipper, the needle should drop on the left side of the presser foot.
1 Right
2 Left
3 Needle drop position
8.Set the fabric so that the left edge of the presser foot touches the edge of the zipper teeth. Sew reverse stitches at the top of the zipper, then continue sewing. Stop sewing about 50 mm (2 inch) from the edge of the fabric, leave the needle in the fabric, and remove the basting stitches. Open the zipper and sew the rest of the seam.
1 Basting stitches
2 7 to 10 mm (1/4 inch to 3/8 inch) 3 Reverse stitches
4 50 mm (2 inch)
CONTENTS
1—
2—
3—
4—
5—
6—
7—
8—
9—
?!
Sewing Utility Stitches |
