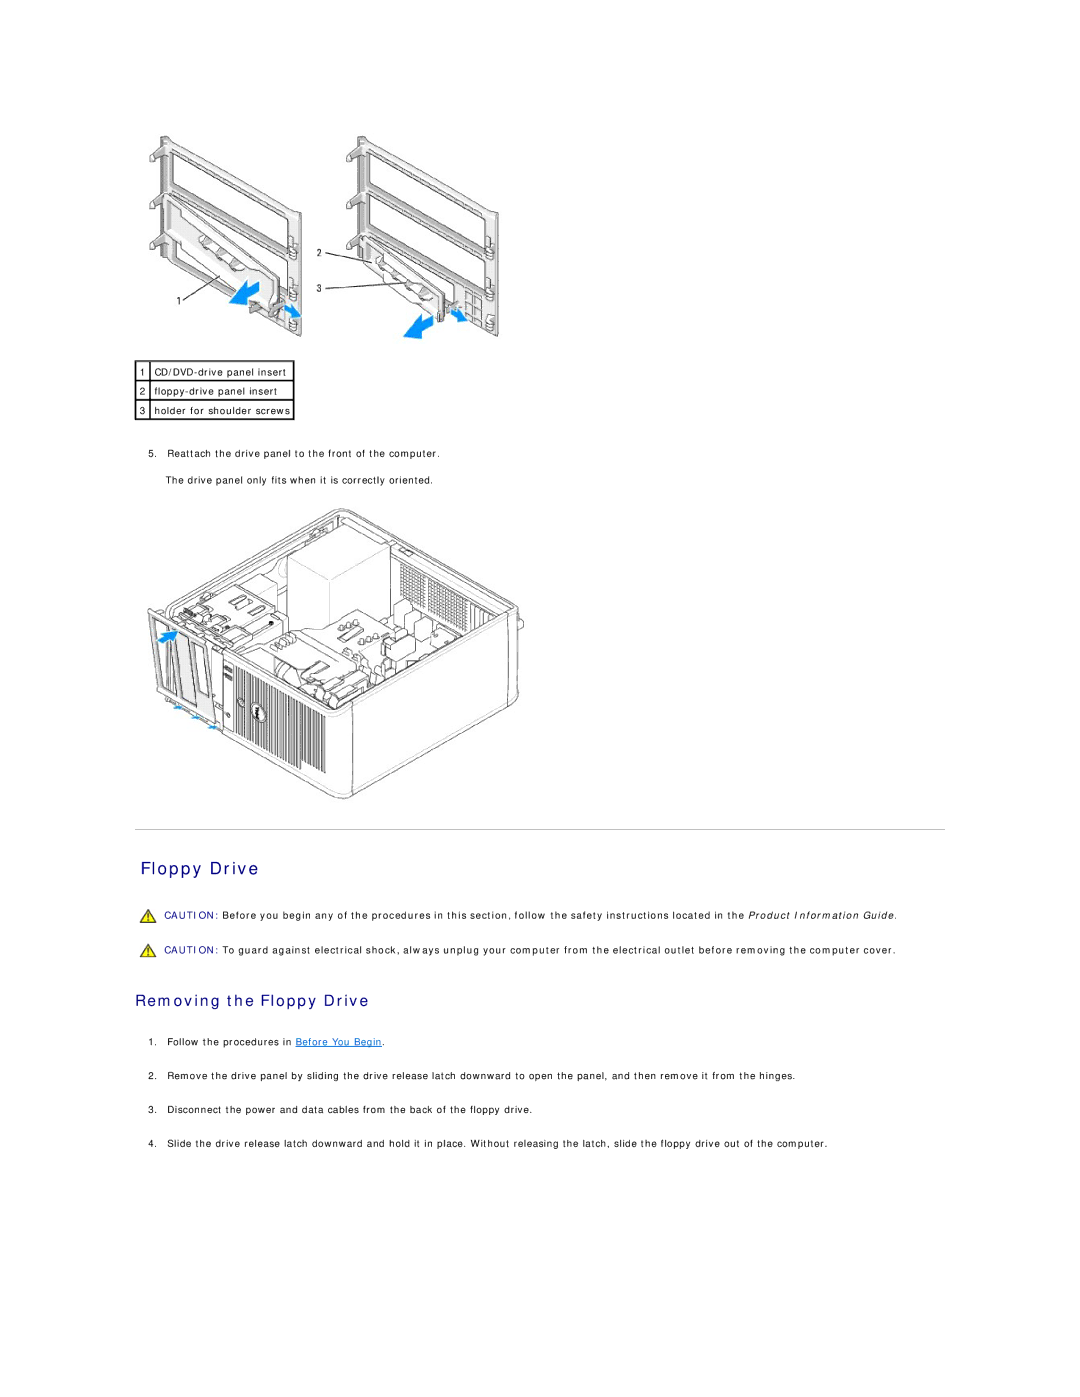
1
2
3holder for shoulder screws
5.Reattach the drive panel to the front of the computer.
The drive panel only fits when it is correctly oriented.
Floppy Drive
CAUTION: Before you begin any of the procedures in this section, follow the safety instructions located in the Product Information Guide.
CAUTION: To guard against electrical shock, always unplug your computer from the electrical outlet before removing the computer cover.
Removing the Floppy Drive
1.Follow the procedures in Before You Begin.
2.Remove the drive panel by sliding the drive release latch downward to open the panel, and then remove it from the hinges.
3.Disconnect the power and data cables from the back of the floppy drive.
4.Slide the drive release latch downward and hold it in place. Without releasing the latch, slide the floppy drive out of the computer.