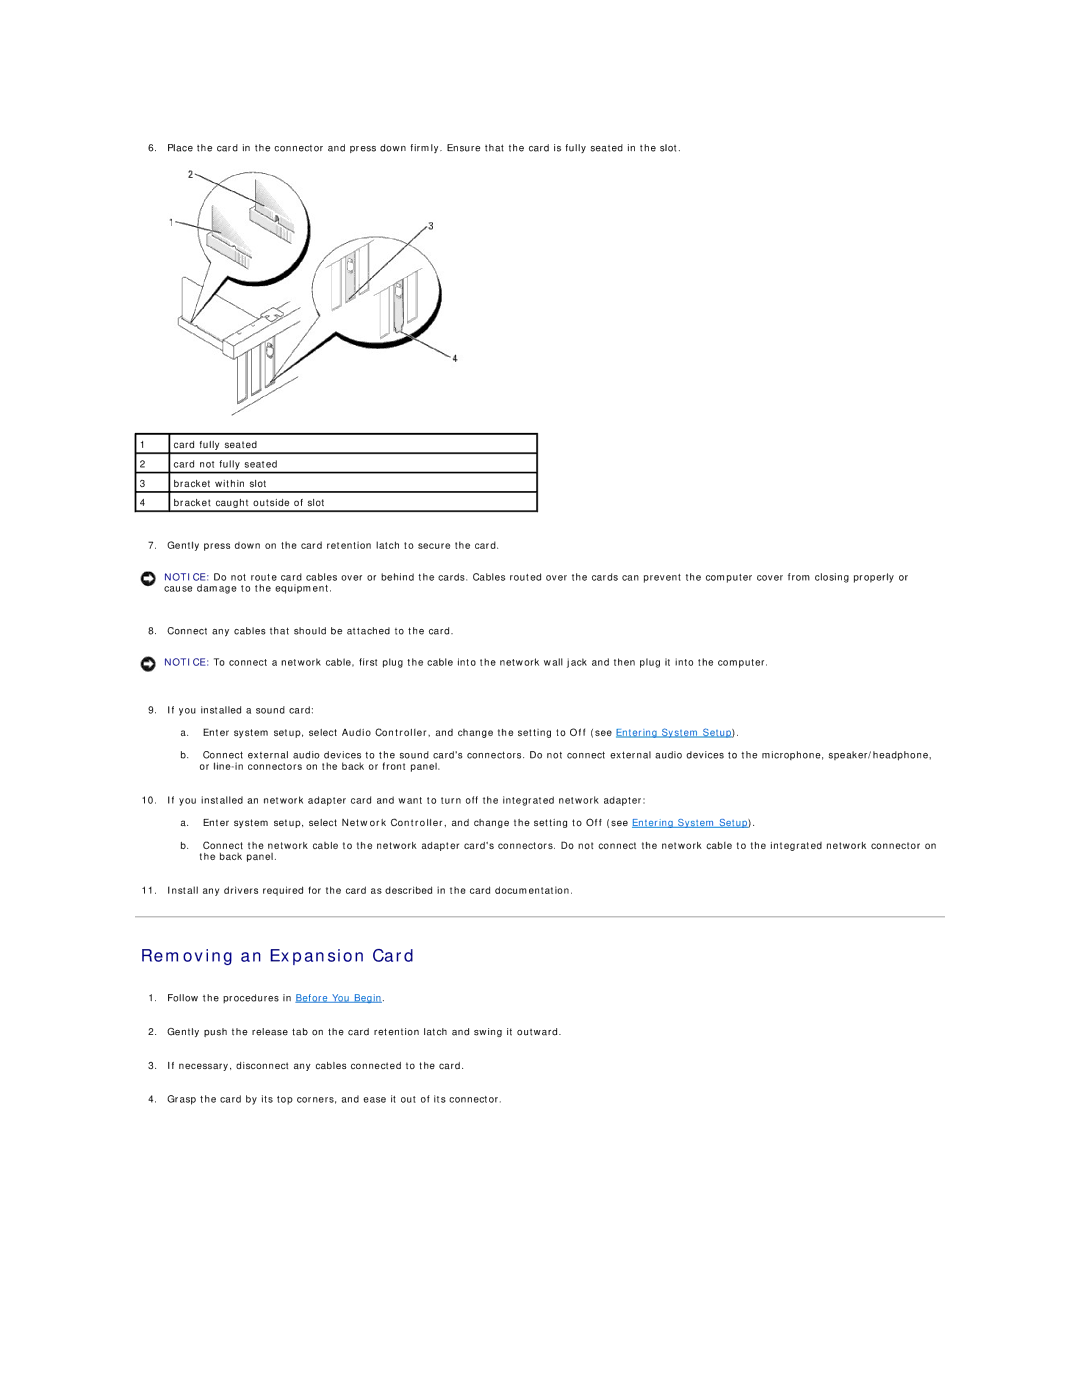
6. Place the card in the connector and press down firmly. Ensure that the card is fully seated in the slot.
1card fully seated
2card not fully seated
3bracket within slot
4bracket caught outside of slot
7. Gently press down on the card retention latch to secure the card.
NOTICE: Do not route card cables over or behind the cards. Cables routed over the cards can prevent the computer cover from closing properly or cause damage to the equipment.
8. Connect any cables that should be attached to the card.
NOTICE: To connect a network cable, first plug the cable into the network wall jack and then plug it into the computer.
9.If you installed a sound card:
a.Enter system setup, select Audio Controller, and change the setting to Off (see Entering System Setup).
b.Connect external audio devices to the sound card's connectors. Do not connect external audio devices to the microphone, speaker/headphone, or
10.If you installed an network adapter card and want to turn off the integrated network adapter:
a.Enter system setup, select Network Controller, and change the setting to Off (see Entering System Setup).
b.Connect the network cable to the network adapter card's connectors. Do not connect the network cable to the integrated network connector on the back panel.
11.Install any drivers required for the card as described in the card documentation.
Removing an Expansion Card
1.Follow the procedures in Before You Begin.
2.Gently push the release tab on the card retention latch and swing it outward.
3.If necessary, disconnect any cables connected to the card.
4.Grasp the card by its top corners, and ease it out of its connector.