Back to Contents Page
System Board
Dell™ OptiPlex™ 320 User's Guide
Replacing the System Board
Removing the System Board
1. Follow the procedures in Before You Begin.
CAUTION: To guard against the electrical shock, always unplug your computer from the electrical outlet before removing the cover.
NOTICE: Before touching anything inside your computer, ground yourself by touching an unpainted metal surface, such as the metal at the back of the computer. While you work, periodically touch an unpainted metal surface to dissipate any static electricity that could harm internal components.
2.Remove any components that restrict access to the system board (CD/DVD drive(s), floppy drive, hard drive, and I/O panel).
3.Remove the processor:
•For your mini tower computer, see Processor.
•For your desktop computer, see Processor.
4.Disconnect all cables from the system board.
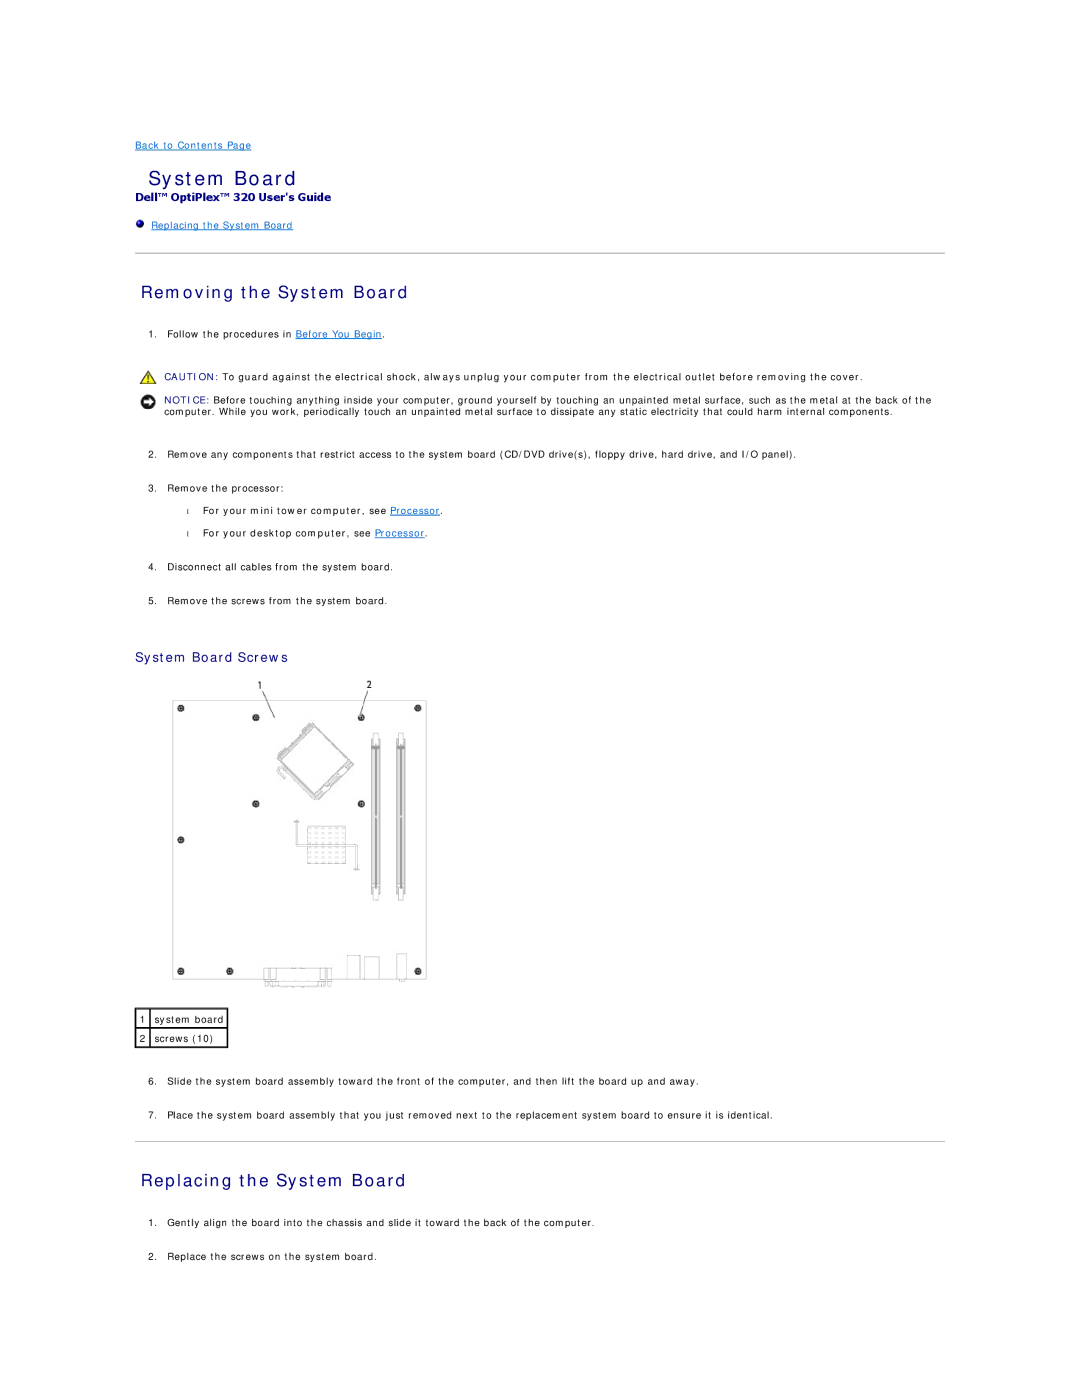
5.Remove the screws from the system board.
System Board Screws
1system board
2screws (10)
6.Slide the system board assembly toward the front of the computer, and then lift the board up and away.
7.Place the system board assembly that you just removed next to the replacement system board to ensure it is identical.
Replacing the System Board
1.Gently align the board into the chassis and slide it toward the back of the computer.
2.Replace the screws on the system board.