Manuals
/
Dell
/
Computer Equipment
/
Printer
Dell
7330
manual
Adjust the paper guides to the size of the paper
Models:
7330
1
80
229
229
Download
229 pages
10.01 Kb
77
78
79
80
81
82
83
84
Page 80
Image 80
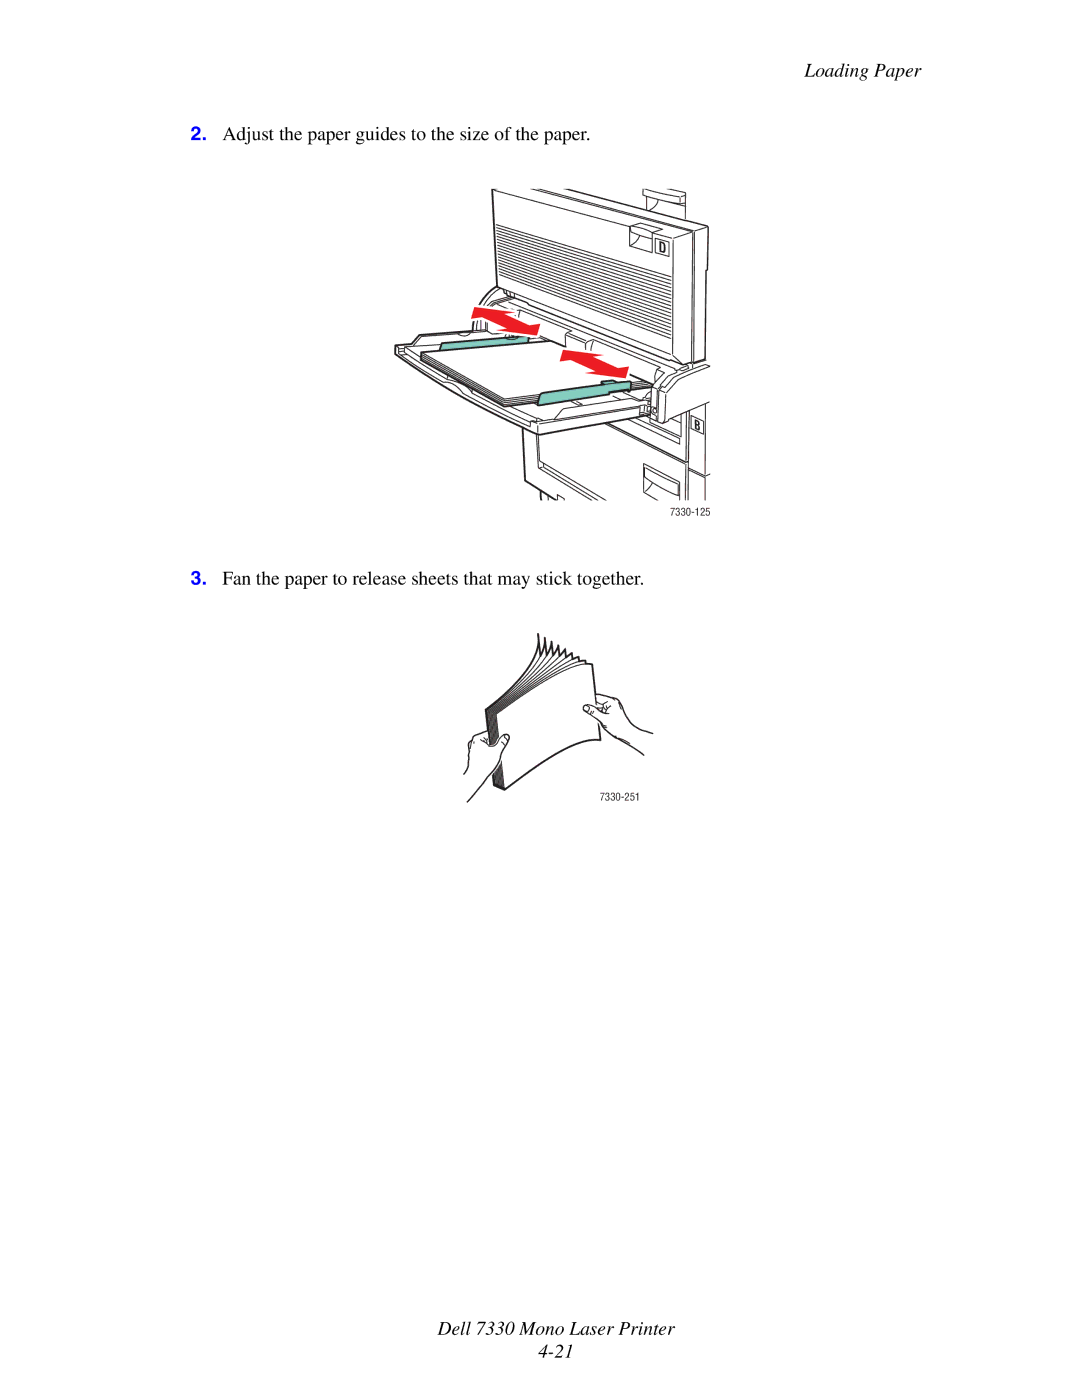
Loading Paper
2.
Adjust the paper guides to the size of the paper.
D
B
7330-125
3.
Fan the paper to release sheets that may stick together.
7330-251
Dell 7330 Mono Laser Printer
4-21
Page 79
Page 81
Page 80
Image 80
Page 79
Page 81
Contents
User Guide
Page
Contents
Network Basics
Printing Basics
Managing Your Printer
Dell 7330 Mono Laser Printer
Printer Specifications Index
User Safety
Electrical Safety
Electrical Safety
Laser Safety
Maintenance Safety
Printer Clearance
Operational Safety
Printer Location
Printer Supplies
Printing Safety Guidelines
Operational Guidelines
Moving the Printer
Symbols Marked on Product
Printer Features
Parts of the Printer
Front View
Internal Components
Printer Configurations
Standard Features
Available Configurations
Features Printer Configuration
Options and Upgrades
Options
Control Panel Features
Control Panel
Control Panel Layout
Print Icon
Sample Pages
Menu Map
Information Pages
Downloading Fonts
Fonts
Types of Fonts
Using the Control Panel
Using the Embedded Web Server
Printing Font Samples
Click Properties
More Information
Resources
Network Basics
Overview of Network Setup and Configuration
Network Connection
Connecting via Ethernet Recommended
Choosing a Connection Method
USB Connection
Connecting via USB
Connecting via Parallel
TCP/IP and IP Addresses
Configuring the Network Address
Automatically Setting the Printer’s IP Address
Dynamic Methods of Setting the Printer’s IP Address
Select Properties
Primary Wins Server optional Secondary Wins Server optional
Using Host Names with the Domain Name Service DNS
Dynamic DNS Registration Set to Enabled
Manually Setting the Printer’s IP Address
Information Required for Manual IP Addressing
See also Dell 7330 Mono Laser Printer
Printer Management Software
Embedded Web Server
Available Printer Drivers
Printer Driver Source Description Windows PostScript Driver
Quick CD Install Steps
Other Methods of Installation
Windows 2000 or Later
Preliminary Steps
Click the Create a New Port button
Microsoft TCP/IP Protocol
Right-clickLocal Area Connection, and then click Properties
Configuring the Printer
Microsoft IPP Port
Http//printer-ip-address/ipp
Select Intel Box for Windows XP, and then click Next
Windows 64-Bit Server to 32-Bit Client Installation
Double-click on Printers and Faxes
Verifying Driver Installation
Windows 2000 or Later Troubleshooting
Verifying Settings
Printing a Test
Bonjour Rendezvous Connection
Macintosh OS X, Version 10.3 and Higher
Macintosh OS X, Version
Open the Printer Setup Utility
Select the Default Browser in the Printer Browser
LPD/LPR Connection
Bonjour Connection
LPD Connection
Macintosh Troubleshooting Mac OS X, Version 10.3 and Higher
Mac OS X, Version 10.3 and Higher Troubleshooting
From the Printer
Quick Install Steps
Unix Linux
From Your Computer
Installing the Printer When Using Cups as the Print Spooler
Click the PPD Files using Cups Printing Services link
IPv6
Enabling IPv6
Setting the Interface ID
Resetting the TCP/IP Configuration
Automatic Address Assignment
Select/deselect Use router supplied prefixes
DHCPv6
Setting DHCPv6 Options with the Control Panel
Setting DHCPv6 Options Using the Embedded Web Server
Manual Address Assignment
Setting the IPv6 Address with the Control Panel
Setting the IPv6 Address Using the Embedded Web Server
Address Precedence
Printing Basics
Supported Paper and Media
Paper Usage Guidelines
Paper that May Damage Your Printer
Paper Storage Guidelines
Supported Paper Sizes and Weights
Paper Sizes and Weights for Tray 1 MPT
Paper Sizes and Weights for Trays
Paper Sizes and Weights for Tray
Paper Sizes and Weights for Envelope Tray
Tray Setup
Tray 1 MPT
Tray 6 and Envelope Tray
Loading Paper
Loading Paper in Tray 1 MPT for Single-Sided Printing
Lower Tray 1 MPT
Long-Edge Feed
Short-Edge Feed
Loading Paper in Trays 2-5 for Single-Sided Printing
Pull out the tray
7330-129
7330-254
Loading Paper in Tray 6 for Single-Sided Printing
7330-241
7330-255
Loading Paper in Tray 1 MPT for 2-Sided Printing
Adjust the paper guides to the size of the paper
7330-139
7330-140
Loading Paper in Trays 2-5 for 2-Sided Printing
7330-134
7330-135
Loading Paper in Tray 6 for 2-Sided Printing
7330-241
Fan the paper to release sheets that may stick together
Loading Paper
Selecting Printing Preferences Windows
Selecting Printing Options
Factors Affecting Print Performance
Selecting Options for an Individual Job Windows
Selecting Options for an Individual Job Macintosh
Printing on Both Sides of the Paper
Automatic 2-Sided Printing
Binding Preferences
Guidelines
Selecting 2-Sided Printing
Printing on Specialty Media
Printing Transparencies
Guidelines for Transparencies
Printing Transparencies from Tray 1 MPT or Tray
Printing Transparencies from Trays
7330-143
Printing Envelopes
Guidelines for Envelopes
Printing Envelopes from Tray 1 MPT
Printing Envelopes from the Optional Envelope Tray
Printing Postcards
Guidelines for Postcards
Printing Postcards
Tray 1 MPT
Envelope Tray
Printing Labels
Printing Labels
Guidelines for Labels
Trays
Tray
Printing on Custom Size Paper
Guidelines
Printing Custom Size Paper
Loading the Paper Trays
Tray 1 MPT Trays
Printing on Custom Size Paper
Creating Custom Paper Types
Select Custom Paper Types
Low Staples Behavior
Using the Stapler
Stapling Options
Adding Staples
Remove the staple unit by lifting it up and out
Close Door G
Using the Hole Puncher
Setting the Default Hole Punching Option
Control Panel
Embedded Web Server
Emptying the Punch Waste Box
Advanced Options
Printing Separator Pages
Printing Multiple Pages to a Single Sheet N-Up
Printing Booklets
Printing Negative and Mirror Images
Scaling
Other Size or Advanced Paper Selection
Printing Edge-To-Edge
Printing Watermarks
Printing Cover Pages
Print Option Last Page of Text Blank Pages
Job Completion Notification
To select cover pages in a supported driver
This section includes
Select the job type under Job Type
Sending Print With Jobs
Select Print With under Job Type
Printing or Deleting Proof and Saved Print Jobs
Printing or Deleting Secure Print Jobs
Printing or Deleting Personal Print Jobs
Printing or Deleting Personal Saved Jobs
Managing Your Printer
Printer Settings
Accessing Power Saver
Selecting Output Options
Selecting Job Offset
Select Printer Defaults
Accessing the Startup
Printing the Startup Page Using the Control Panel
Accessing Load Paper Timeout
Tray Sequence
Selecting Tray Settings
Tray Switching
Selecting the Default Tray
Changing Printer Language
Selecting Administrative Settings
Printer Security
Managing Certificates
Selecting Printing Security Settings
Configuring Https
Configuring
Locking the Control Panel Menus
Analyzing Printer Usage
Job Accounting
Usage Profile Reports
Click the Send Usage Profile Report button
Setting Up Embedded Web Server Status Notification
MaiLinX Alerts
Troubleshooting
Status Monitor Alerts
Automatic Diagnostic Tools
Online Diagnostics Technical Support
Clearing Paper Jams
Jam at a
Close Door a
Jam at B
Close Door B
Jam at B and C
Open Door B
Open Door C
Close Door C
Jam at C
Open Door C
Close Door C
Jam at D
Jam at D and a
Clearing Paper Jams
Open Door a
Jam at E
Open Door E
Close Door E
Jam at F
Jam at G
Open Door G
Jam at H
Jam at the Stacker Upper Tray
Paper Size Jam in Tray 1 MPT
7330-001
Close Door a
Paper Size Jam in Trays
Push the tray completely into the printer
Close Door a
Paper Size Jam in Tray
Push the tray completely into the printer
Close Door a
Jam at Tray 2, 3, 4, or
Remove crumpled paper from the tray
Jam at Tray 1 MPT
7330-048
Close Door a
Jam at Tray 2 and Door a
Pull Tray 2 completely out of the printer
Remove crumpled paper from the tray
7330-216
Jam at Tray 3 and Door B
Close Door B
Pull Tray 3 completely out of the printer
7330-215
7330-217
Jam at Tray 4 or 5 and Door C
Close Door C
7330-212
7330-051
Insert the tray and push it completely into the printer
Jam at Tray
Open Door J and lift the access handle
Close the jam access handle and close Door J
Print-Quality Problems
Light Prints
Blank Prints
Entire printed page is blank with no visible print
Black Prints
Entire printed page is black
Horizontal Line Deletions
Vertical Line Deletions
There are areas of print deletions that form narrow lines
Horizontal Dark Streaks
Vertical Dark Streaks
Dark Spots or Marks
Configuration
Unfused or Partially Fused Image
Wrinkled Prints
Blurred Prints
Random or Spot Deletions
Areas of the print are extremely light or missing
Repeating Defects
Control Panel Messages
Status Messages
Errors and Warnings
Additional Resources
Resource Link
Maintenance
Cleaning the Interior
Cleaning the Printer
Cleaning the Exterior
Routine Maintenance Items
Supplies
Consumables
Customer Usage Patterns
Precautions for Moving the Printer
Moving and Repacking the Printer
Moving the Printer Within the Office
Preparing the Printer for Shipment
Printer Specifications
Physical Specifications
Performance Specifications
Environmental Specifications
Electrical Specifications
PCL Pclxl
Index
Index
Dell 7330 Mono Laser Printer Index-3
Dell 7330 Mono Laser Printer Index-4
Dell 7330 Mono Laser Printer Index-5
Dell 7330 Mono Laser Printer Index-6
Dell 7330 Mono Laser Printer Index-7
Dell 7330 Mono Laser Printer Index-8
Dell 7330 Mono Laser Printer Index-9
Top
Page
Image
Contents