4.2.1 DEMOJR1.C
This sample program can be used to illustrate some of the functions of Dynamic C.
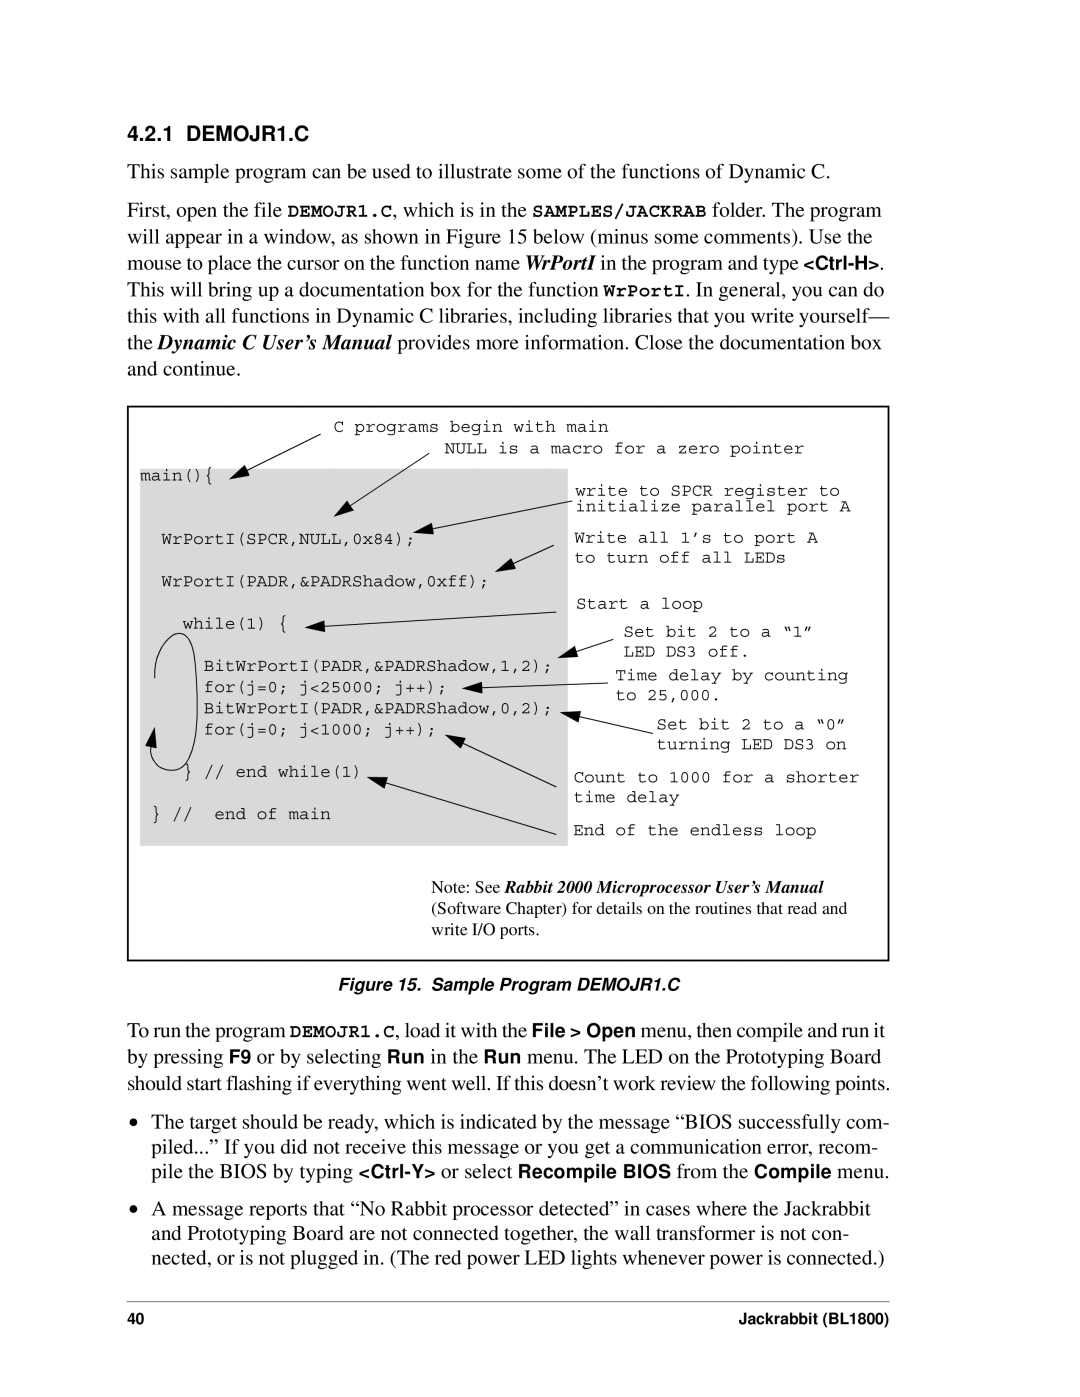
First, open the file DEMOJR1.C, which is in the SAMPLES/JACKRAB folder. The program will appear in a window, as shown in Figure 15 below (minus some comments). Use the mouse to place the cursor on the function name WrPortI in the program and type
C programs begin with main
| NULL is a macro for a zero pointer |
main(){ | write to SPCR register to |
| |
| initialize parallel port A |
WrPortI(SPCR,NULL,0x84); | Write all 1’s to port A |
| to turn off all LEDs |
WrPortI(PADR,&PADRShadow,0xff); |
| |
| Start a loop | |
while(1) { | Set bit 2 to a “1” | |
| ||
BitWrPortI(PADR,&PADRShadow,1,2); | LED DS3 off. | |
Time delay by counting | ||
for(j=0; j<25000; j++); | ||
to 25,000. | ||
BitWrPortI(PADR,&PADRShadow,0,2); | ||
Set bit 2 to a “0” | ||
for(j=0; j<1000; j++); | ||
turning LED DS3 on | ||
| ||
} // end while(1) | Count to 1000 for a shorter | |
| ||
} // end of main | time delay | |
End of the endless loop | ||
|
Note: See Rabbit 2000 Microprocessor User’s Manual (Software Chapter) for details on the routines that read and write I/O ports.
Figure 15. Sample Program DEMOJR1.C
To run the program DEMOJR1.C, load it with the File > Open menu, then compile and run it by pressing F9 or by selecting Run in the Run menu. The LED on the Prototyping Board should start flashing if everything went well. If this doesn’t work review the following points.
•The target should be ready, which is indicated by the message “BIOS successfully com- piled...” If you did not receive this message or you get a communication error, recom- pile the BIOS by typing
•A message reports that “No Rabbit processor detected” in cases where the Jackrabbit and Prototyping Board are not connected together, the wall transformer is not con- nected, or is not plugged in. (The red power LED lights whenever power is connected.)
40 | Jackrabbit (BL1800) |
