26 | 7 | 9112 | 2 |
Type | Edition | Page |
| Service |
26. Level Control | Manual |
2
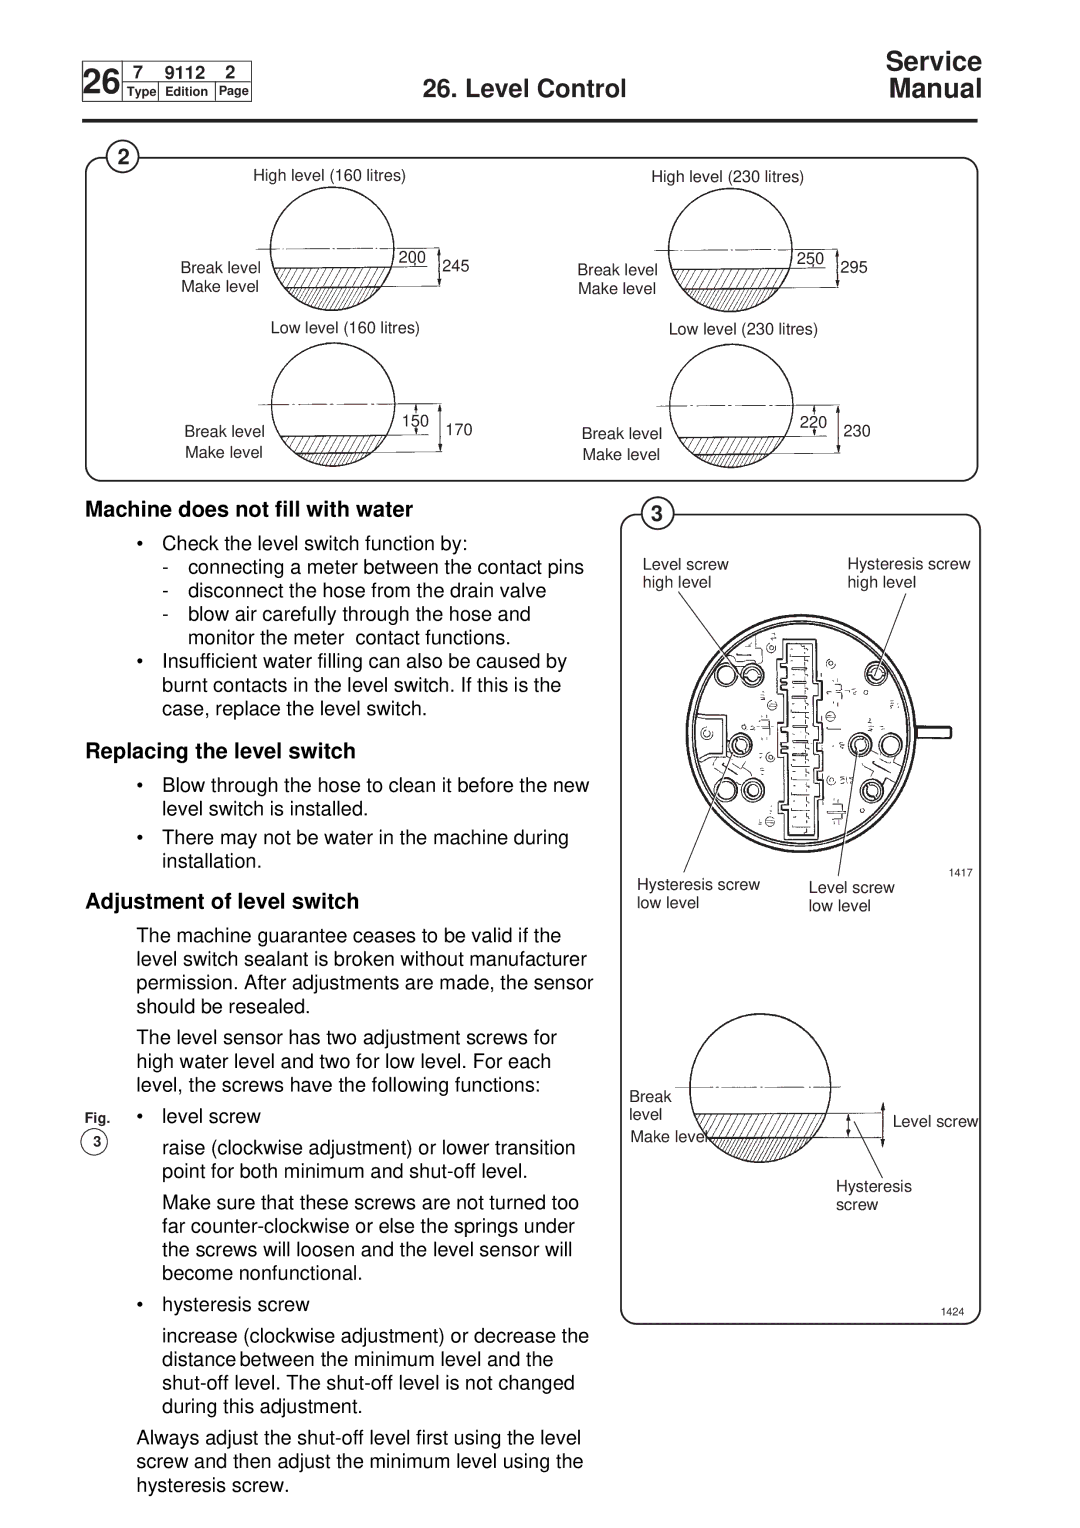
High level (160 litres) |
| High level (230 litres) |
| |
Break level | 200 | 245 | 250 | 295 |
| Break level | |||
Make level |
|
| Make level |
|
| Low level (160 litres) |
| Low level (230 litres) |
|
150 | 170 |
| 220 | 230 |
Break level | Break level |
| ||
Make level |
| Make level |
|
|
Machine does not fill with water
•Check the level switch function by:
-connecting a meter between the contact pins
-disconnect the hose from the drain valve
-blow air carefully through the hose and monitor the meter contact functions.
•Insufficient water filling can also be caused by burnt contacts in the level switch. If this is the case, replace the level switch.
Replacing the level switch
•Blow through the hose to clean it before the new level switch is installed.
•There may not be water in the machine during installation.
Adjustment of level switch
3
Level screw | Hysteresis screw |
high level | high level |
1417
Hysteresis screw | Level screw |
low level | low level |
Fig.
3
The machine guarantee ceases to be valid if the level switch sealant is broken without manufacturer permission. After adjustments are made, the sensor should be resealed.
The level sensor has two adjustment screws for high water level and two for low level. For each level, the screws have the following functions:
•level screw
raise (clockwise adjustment) or lower transition point for both minimum and
Make sure that these screws are not turned too far
•hysteresis screw
increase (clockwise adjustment) or decrease the distance between the minimum level and the
Always adjust the
Break
levelLevel screw Make level
Hysteresis screw