EPSON
4.2.3Removing the Print Head
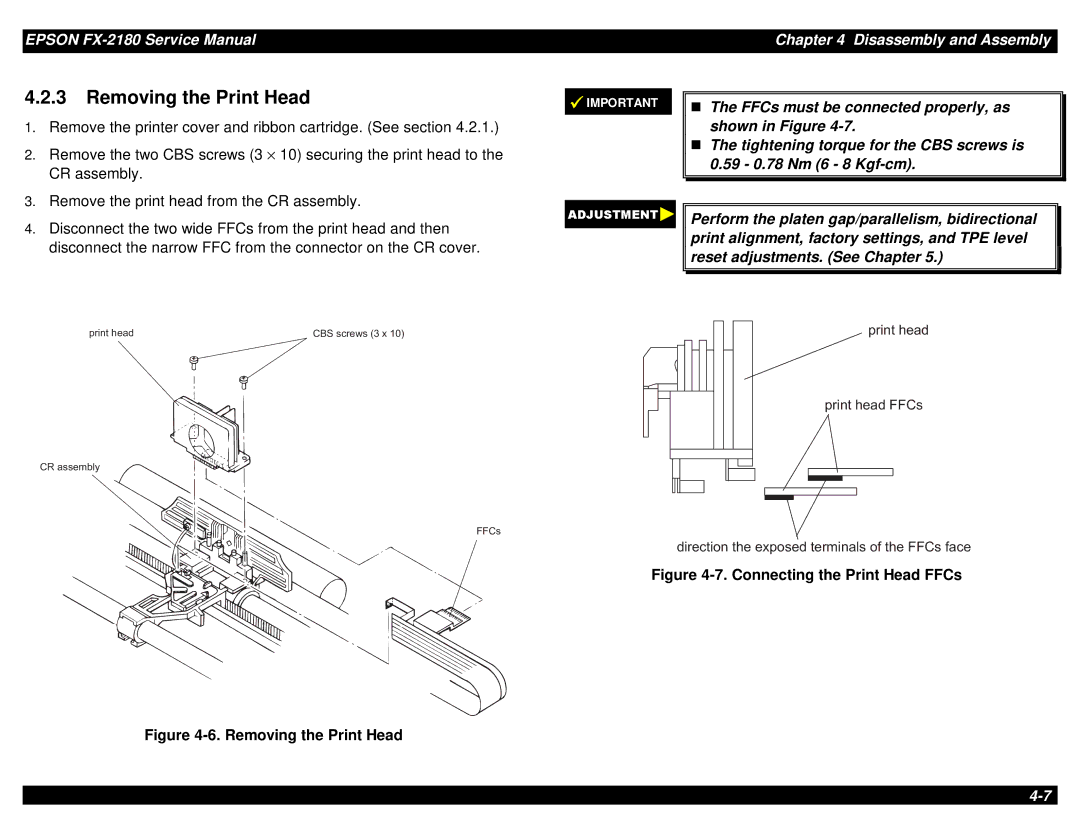
1.Remove the printer cover and ribbon cartridge. (See section 4.2.1.)
2.Remove the two CBS screws (3 × 10) securing the print head to the CR assembly.
3.Remove the print head from the CR assembly.
4.Disconnect the two wide FFCs from the print head and then disconnect the narrow FFC from the connector on the CR cover.
IMPORTANT
Chapter 4 Disassembly and Assembly
The FFCs must be connected properly, as
Tshown in Figure
The tightening torque for the CBS screws is 0.59 - 0.78 Nm (6 - 8
Perform the platen gap/parallelism, bidirectional print alignment, factory settings, and TPE level reset adjustments. (See Chapter 5.)
p r in t h e a d | C B S s c r e w s ( 3 x 1 0 ) |
p r in t h e a d
p r in t h e a d F F
C R a s s e m b ly![]()
![]()
![]()
![]()
![]()
![]()
![]()
F F C s
d ir e c t io n t h e e x p o s e d