EPSON
4.2.11.3 Removing the PG Sensor Assembly
1. | Remove the printer cover, front and rear edge guide assemblies, front |
| cover, paper eject assembly, and front and rear tractor units. (See |
| section 4.2.1.) |
2. | Remove the panel board assembly. (See section 4.2.2.) |
3. | Remove the upper housing assembly. (See section 4.2.7.) |
4. | Remove the printer mechanism. (See section 4.2.11.) |
IMPORTANT
Chapter 4 Disassembly and Assembly
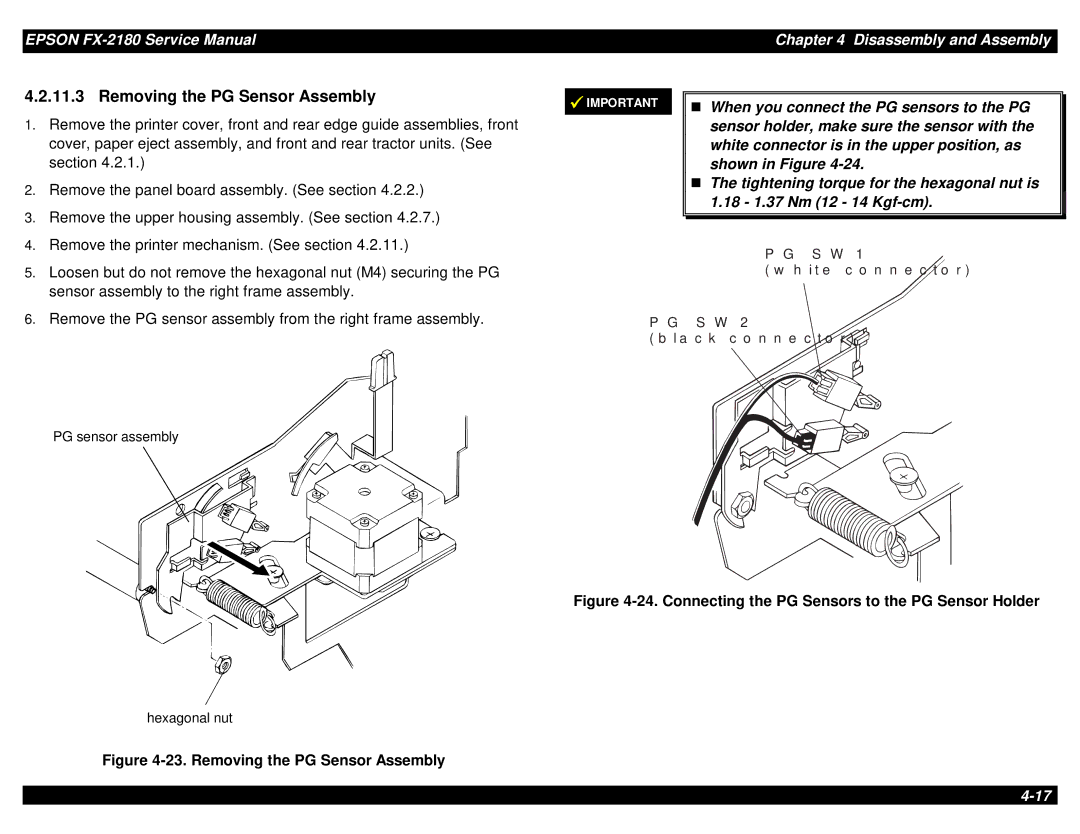
When you connect the PG sensors to the PG sensor holder, make sure the sensor with the white connector is in the upper position, as
Tshown in Figure
The tightening torque for the hexagonal nut is 1.18 - 1.37 Nm (12 - 14
5. | Loosen but do not remove the hexagonal nut (M4) securing the PG |
| sensor assembly to the right frame assembly. |
6. | Remove the PG sensor assembly from the right frame assembly. |
PG sensor assembly
hexagonal nut
Figure 4-23. Removing the PG Sensor Assembly
P G S W 1
( w h it e c o n n e c t o r
P G S W 2
( b la c k c o n n![]() e c t o r )
e c t o r )