EPSON | Chapter 4 Disassembly and Assembly |
|
| C R m o u n t in g s c r | |
4.2.11.1 Removing the CR Motor Assembly
1.Remove the printer cover, rear edge guide assembly, paper eject
assembly, and rear tractor unit. (See section 4.2.1.)
2. Remove the panel board assembly. (See section 4.2.2.)
3. Remove the upper housing assembly. (See section 4.2.7.)
4. Remove the printer mechanism. (See section 4.2.11.)
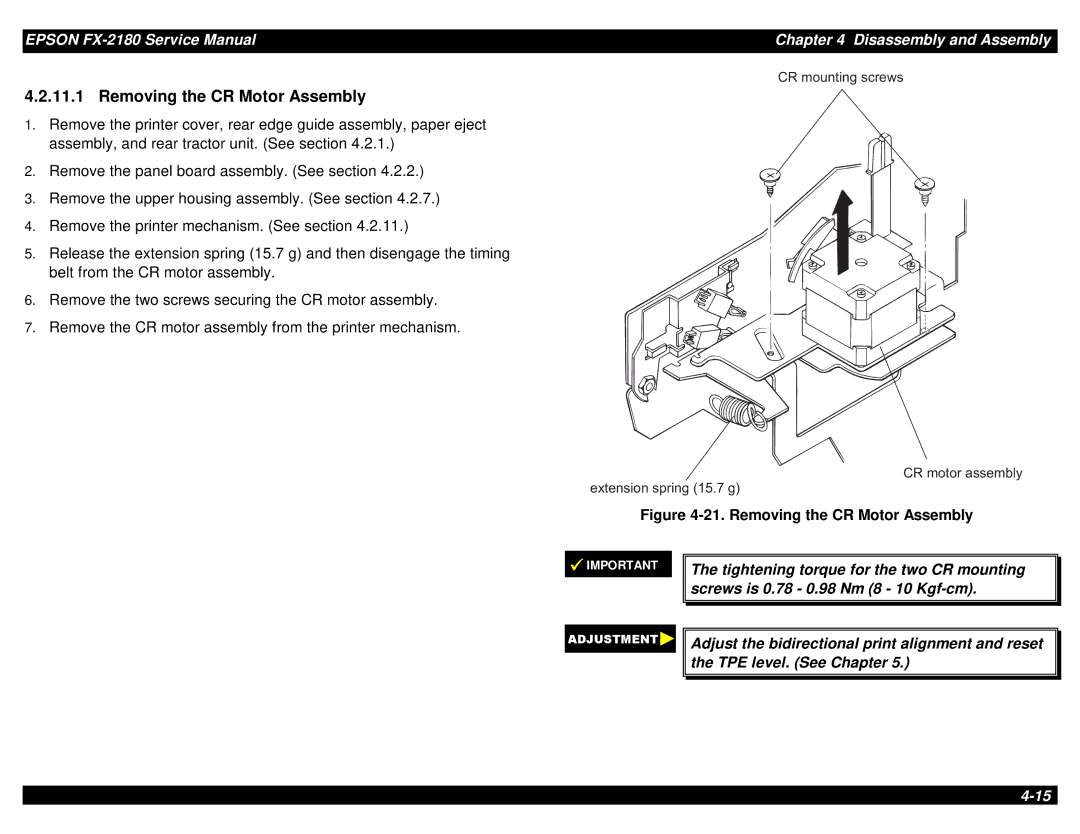
5. Release the extension spring (15.7 g) and then disengage the timing belt from the CR motor assembly.
6. Remove the two screws securing the CR motor assembly.
7. Remove the CR motor assembly from the printer mechanism.
C R m o t o r e x t e n s io n s p r in g ( 1 5 . 7 g )
Figure 4-21. Removing the CR Motor Assembly
IMPORTANT
The tightening torque for the two CR mounting screws is 0.78 - 0.98 Nm (8 - 10
Adjust the bidirectional print alignment and reset the TPE level. (See Chapter 5.)