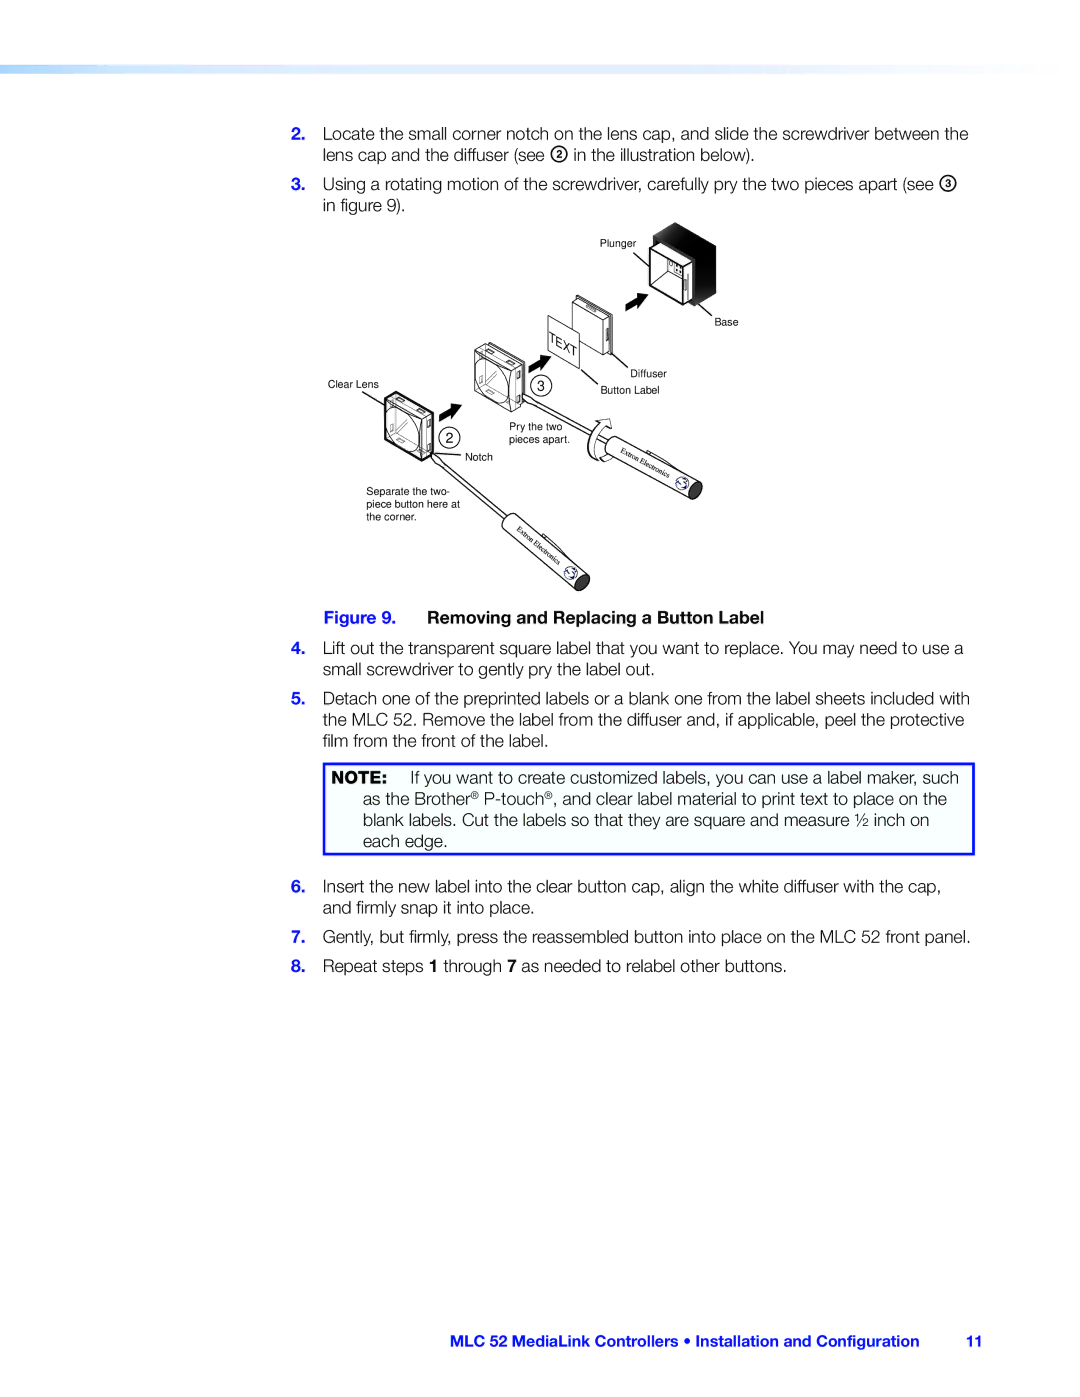
2.Locate the small corner notch on the lens cap, and slide the screwdriver between the lens cap and the diffuser (see B in the illustration below).
3.Using a rotating motion of the screwdriver, carefully pry the two pieces apart (see C in figure 9).
Plunger
Base
Clear Lens | 3 | Diffuser | |
Button Label | |||
| |||
2 | Pry the two |
| |
pieces apart. |
| ||
| Notch |
|
Separate the two- piece button here at the corner.
Figure 9. Removing and Replacing a Button Label
4.Lift out the transparent square label that you want to replace. You may need to use a small screwdriver to gently pry the label out.
5.Detach one of the preprinted labels or a blank one from the label sheets included with the MLC 52. Remove the label from the diffuser and, if applicable, peel the protective film from the front of the label.
NOTE: If you want to create customized labels, you can use a label maker, such as the Brother®
6.Insert the new label into the clear button cap, align the white diffuser with the cap, and firmly snap it into place.
7.Gently, but firmly, press the reassembled button into place on the MLC 52 front panel.
8.Repeat steps 1 through 7 as needed to relabel other buttons.
MLC 52 MediaLink Controllers • Installation and Configuration | 11 |